


What you’ll need:

For each card:
4” x 6” photo insert card with a holiday theme
Embroidery thread as stated in the color sequence, and to coordinate with the colors on the card
Poly mesh stabilizer to fit hoop
White poly-fleece to fit hoop
Paper glue
Featured Designs:
https://www.grandslamdesigns.com/merry-christmas-340-embroidery-design?variant=1
https://www.grandslamdesigns.com/christmas-stocking-joy-embroidery-design
Notes:
- Polyester fleece works well for this project, but cotton or fine linen may also be used
- Cards may be found at the craft store or ordered on Amazon by searching "Photo Frame Greetings Cards".
Preparation:
- Read through all the instructions and assemble all the materials before beginning.
Machine prep and hooping:

- Load the “Merry Christmas” design on the machine.
- Add a basting stitch to sew first; this will help align the ruler when it comes time to trim the design for the card.
- Set the thread colors.
- Hoop a piece fleece with a layer of poly mesh stabilizer.
- Place the hoop on the machine and stitch Color 1, the basting stitch.
Stitching:

- Continue stitching the design with the chosen thread colors.
- Remove the embroidery from the hoop.
- Next will be to trim the embroidered fleece to fit inside the window of the card.
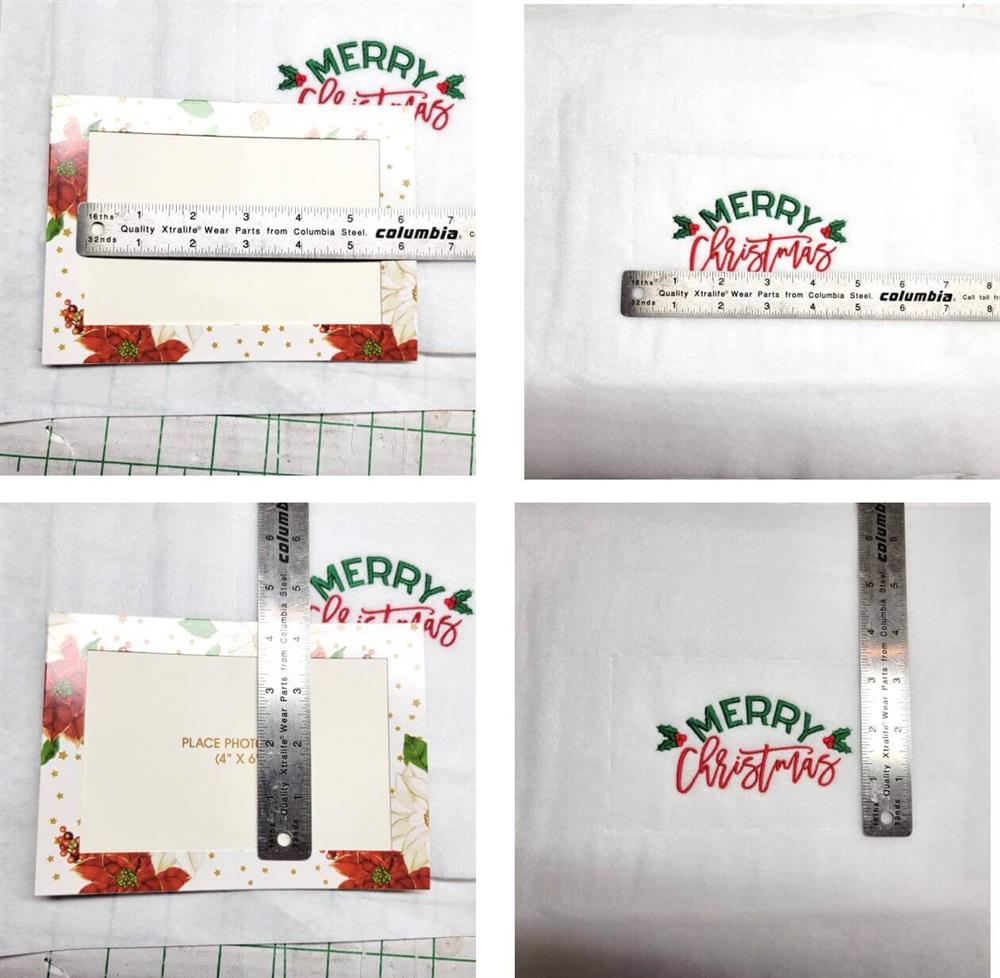
- Measure the width and height of the card opening, and also the total width and height of the card.
- Measure the width and height of the basting line.
- Determine how much of the fleece needs to be trimmed away.
- Make note of how wide the border around the opening is and cut the fleece to about 1/8” smaller all around.

- While you are working on one card, load the “Joy Stocking” design on the machine.
- Add the basting stitch to sew first.
- Hoop a piece of fleece with a layer of poly mesh stabilizer.
- Stitch the design with the chosen thread colors.

- If it is easier, align the top edge of the card along the bottom edge of the basting line and note the difference—here it is 2”.
- Do the same for the right side of the card against the left side of the basting line and note the difference.
- Divide each measurement in half and trim the card around all sides using those measurements.
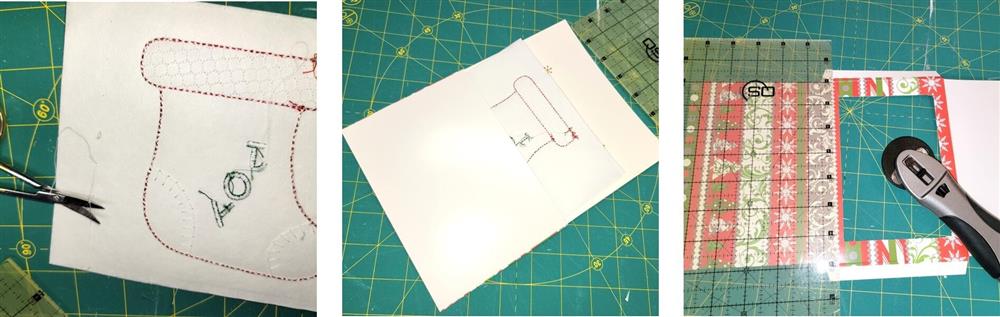
- If the basting lines are visible after trimming, simply clip them on the back side of the embroidery and remove them.
- Insert the embroidery into the card opening.
- If the design comes too close to the border around the opening, simply do a little trimming with a ruler and cutter. This design should have been resized down about 3/8” or so before stitching to actually fit inside the card.

- If trimming is needed, simply open up the card, trim to size, and then glue the card back together.
- Be sure to firmly secure the glued pieces together so they hold securely.
- Insert the “Merry Christmas” design into its frame.
- Address and stamp the envelopes, insert the cards and they are ready for mailing.
- Do several of these when you have a couple of hours of time so that all the cards will be ready for mailing when the holiday season is near. Use several Grand Slam designs to personalize the cards for family and friends.
Conclusion:
Congratulations! Whether for yourself or a gift, learning new ways to use designs increases your enjoyment of stitching. There is no doubt your project will be a “Grand Slam!”
By the “Grand Slam Designs” Team
By the "1Z Embroidery" Team

