


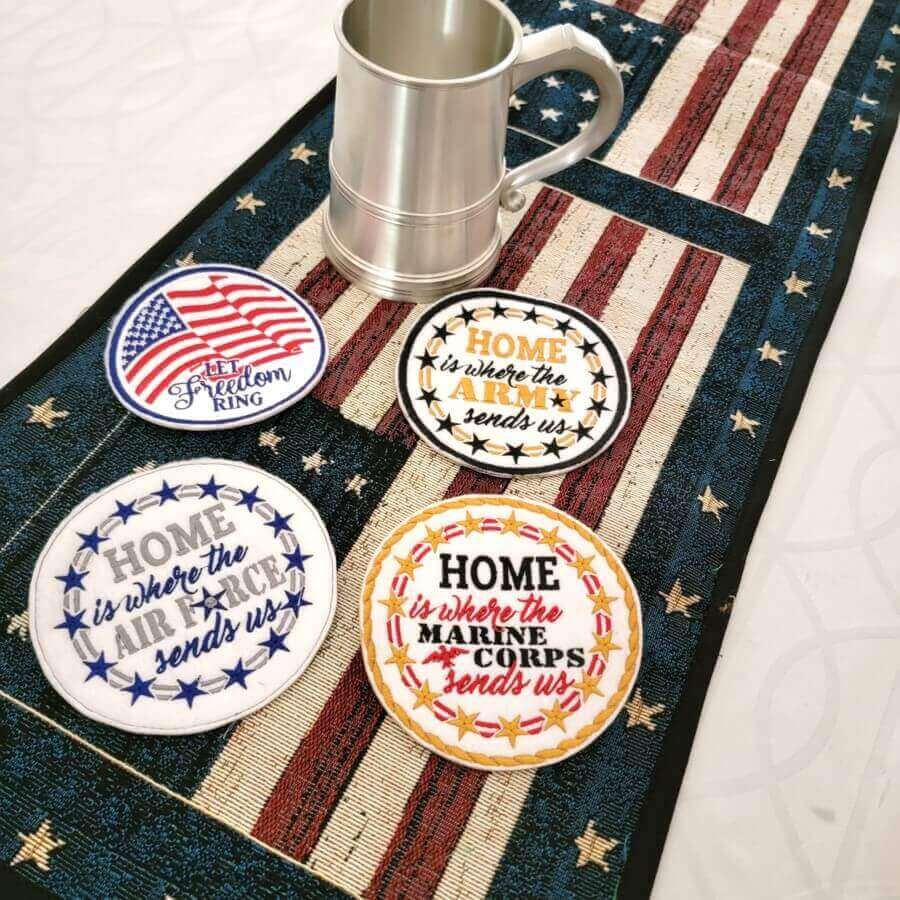
 Military members are the backbone of our country. When they are off duty, they enjoy spending time with their family and friends. In that spirit, why not stitch up some coasters! When inserted into a gift basket, they can be used to welcome new members to the neighborhood. Do you have family members who once served or are retired? Stitch up some coasters for them, too! They are sure to be an appreciated gift.
What you’ll need
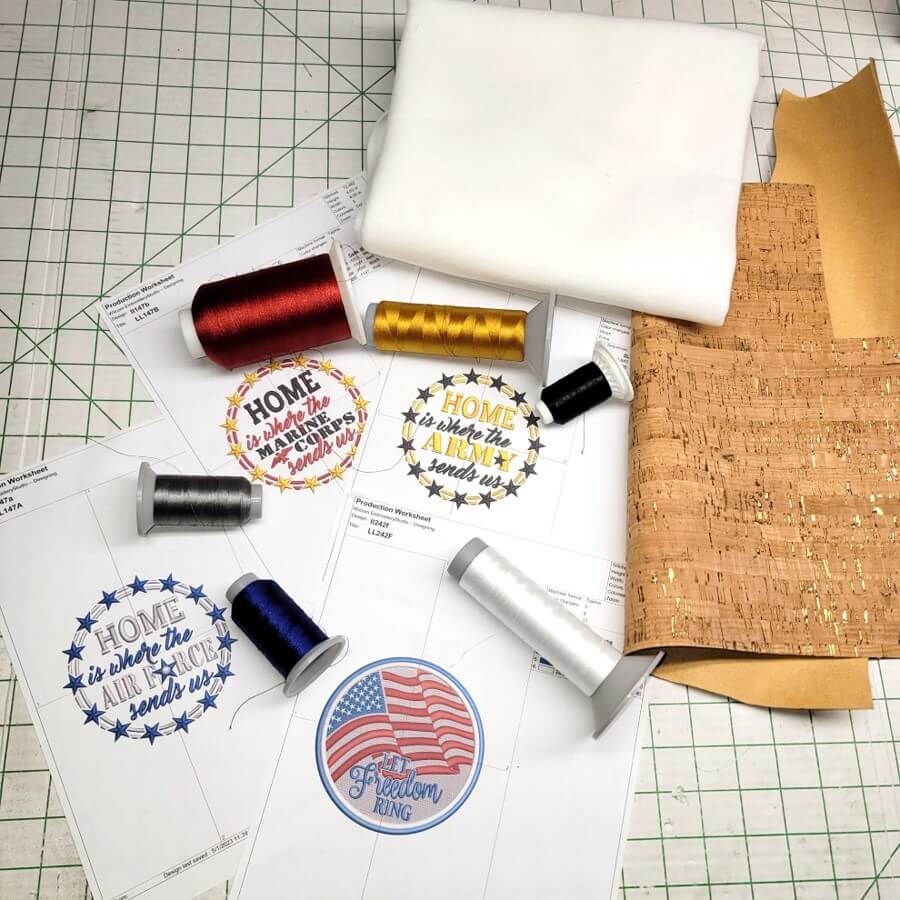
For each coaster:
1- Poly mesh stabilizer to fit hoop
1- washable white polyester felt to fit hoop
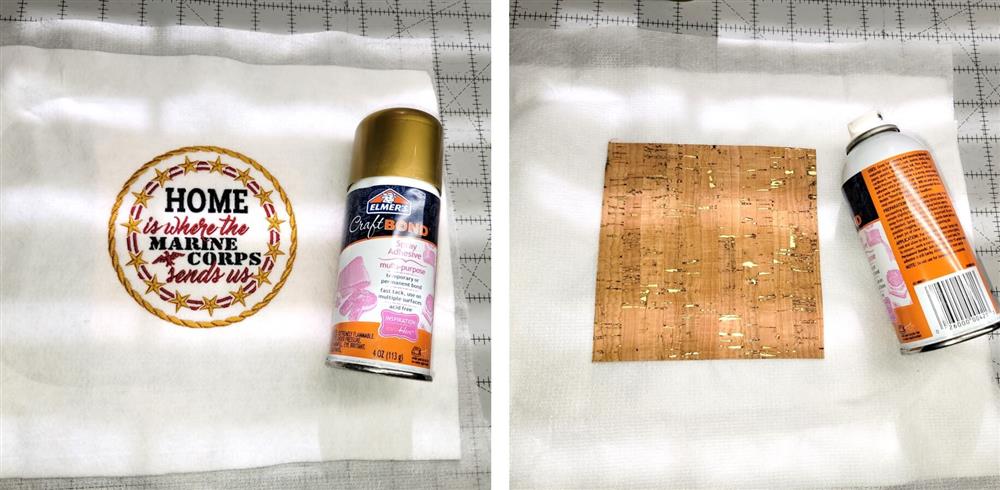
1- 5” x 5” piece of cork for the backing
Embroidery thread as stated in the color sequence
Sharp scissors for trimming
Optional: permanent spray adhesive
Featured Designs:
https://www.grandslamdesigns.com/let-freedom-ring-embroidery-design?variant=2
https://www.grandslamdesigns.com/in-the-air-force-embroidery-design?variant=1
https://www.grandslamdesigns.com/in-the-marines-embroidery-design?variant=1
https://www.grandslamdesigns.com/in-the-army-embroidery-design?variant=1
Notes
- Coasters like these may have many design themes; consider holidays, sports, or kitchen. Just choose a design that fits the theme and follow the directions, altering any fabric sizes as needed.
Preparation
- Gather the materials needed for the project.
- Read through all the instructions before beginning.
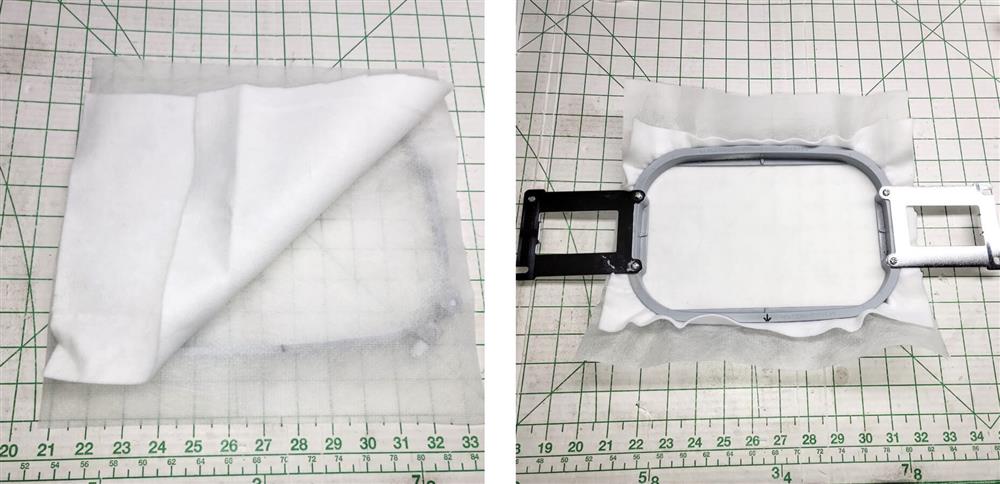
- Hoop a layer of washable polyester felt with a layer of poly mesh stabilizer.
Machine prep and hooping
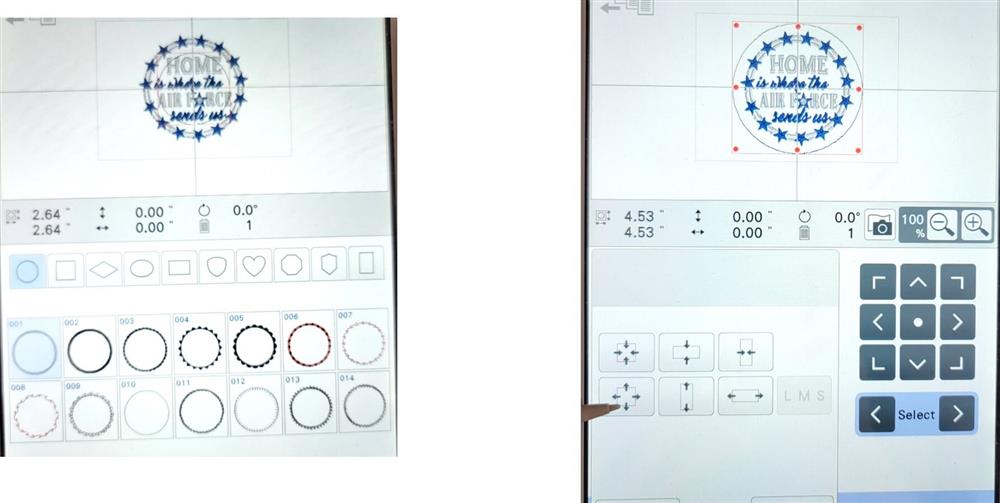
- Load the design on the machine.
- Machines come with several types of outline designs; choose one appropriate for the design and add it to be stitched last.
- Resize the outline design so it is about ¼” outside of the embroidery design.
Stitching
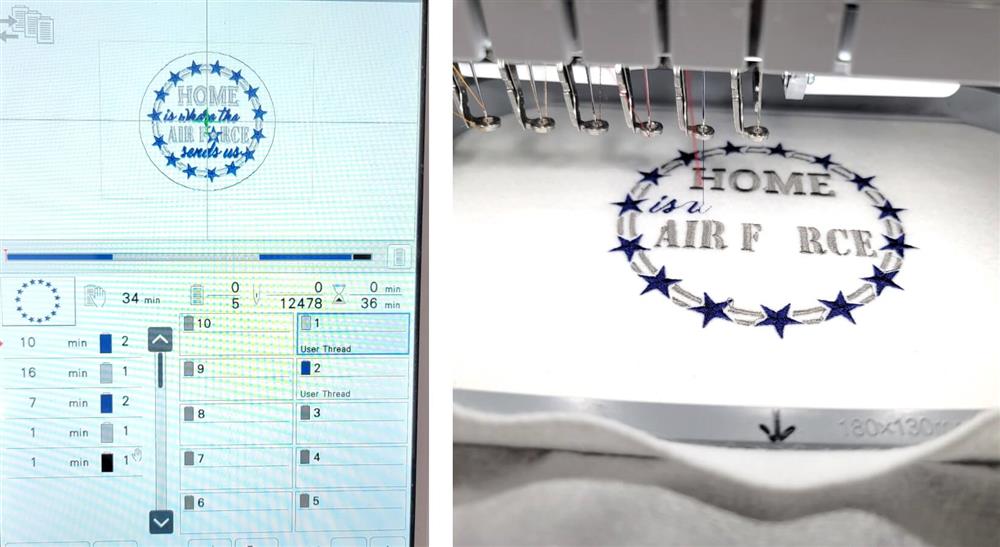
- Load the thread colors on the machine and select the order for stitching the colors.
- Be sure to set a STOP so that the machine stops before the last color, which is the outline, stitches.
- Stitch the design.
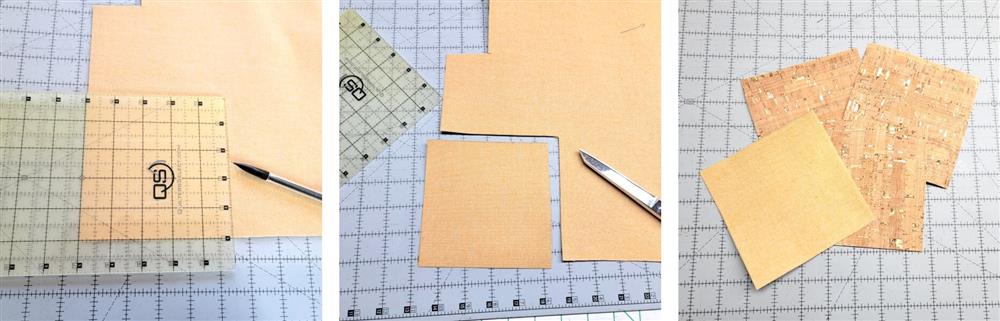
- While the design stitches, mark and trim the cork backing fabric for the coasters.
Border

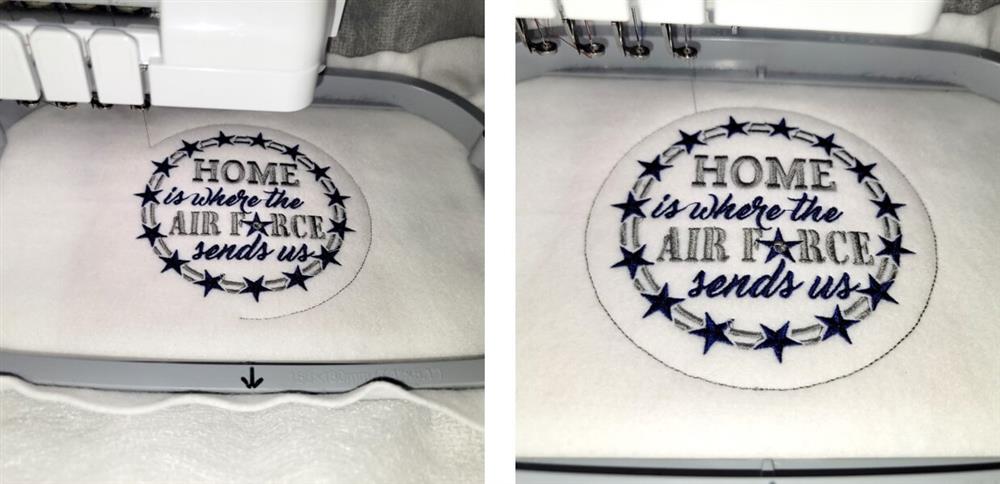
- When the designs stops before stitching the last color, remove the hoop from the machine but leave the fabric in the hoop.
- Flip the hoop over and apply either spray adhesive or glue stick to the back of one cork piece.
- Center the cork piece over the back side of the embroidery.
- Place the hoop back on the machine and stitch the last color, which is the outline.
Final Steps
- Remove the fabric from the hoop

- Using sharp scissors, trim about 1/8-1/4” away from the outline.
Options
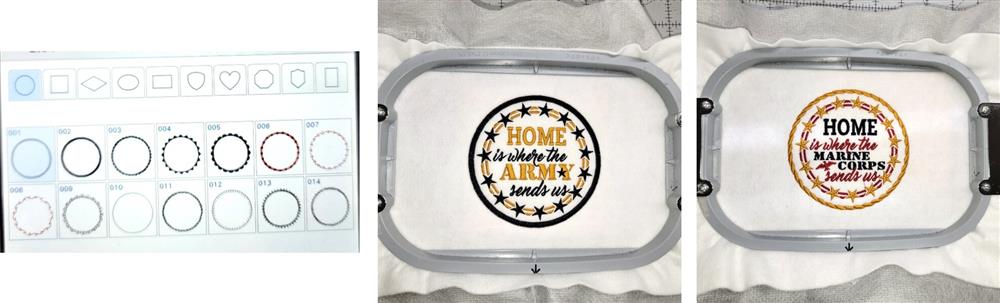
- Choose from any of the border/outline options on the machine which would be appropriate for the design/theme.
- Instead of stopping and applying the cork to the back of the embroidery before the border stitches, just let the design stitch entirely.
- Remove the fabric from the hoop and use a permanent spray adhesive to apply the cork to the back of the design. Be sure to follow the manufacturers directions for the product being used.
Conclusion
Congratulations! Whether for yourself or a gift, learning new ways to use designs increases your enjoyment of stitching. There is no doubt your project will be a “Grand Slam!”
By "The Grand Slam Designs" Team
By the "1Z Embroidery" Team


