


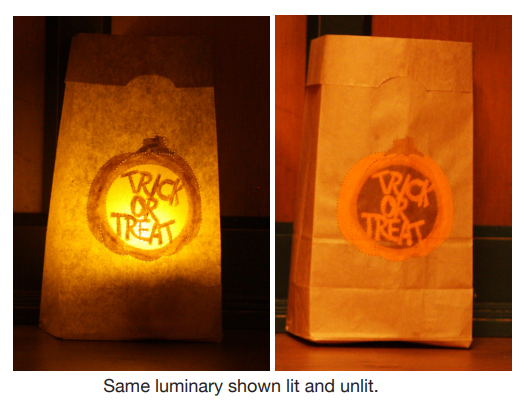
Crafting with Your Embroidery Machine Use your embroidery machine to punch out a design on paper or metal! While paint adds color to the design, vegetable oil renders parts of the design translucent allowing an eerie glow from the battery operated tea-light within. Fun project for kids of any age! I used ordinary brown paper lunch bags for this project. After experimenting with brown craft paper (also known as postal wrap), I found the bags “glow” better than the heavier craft paper. You can get prettier bags at the craft store but if you want to use them as luminaries, do test one first to see how you like the effect.
![]() Note: These designs are specifically digitized for punch work and are not intended to be sewn with thread.
Note: These designs are specifically digitized for punch work and are not intended to be sewn with thread.
Supplies
- Brown paper lunch bags
- Acrylic paint: brown and orange
- Small paint brush(es) as desired (small flat acrylic brushes work well)
- Liquid vegetable oil
- Size 100 jeans needle (can be an old needle)
- Painter’s tape
- Cellophane tape or white school glue to reattach bag
- Tea lights (battery operated or candles)
- Paper scissors
![]() Please read all instructions before beginning
Please read all instructions before beginning
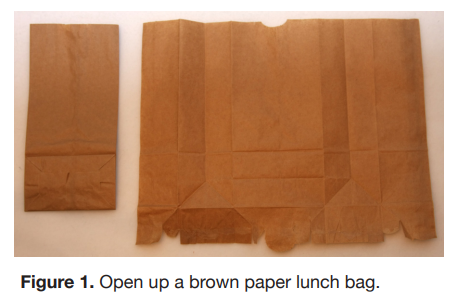
Open up the paper lunch bag by cutting down next to the seam and carefully peeling apart the bottom. (A smooth edge steak knife is helpful.) Press with medium hot dry iron to flatten out. Fold down a 1 1/2” cuff on the top edge of the paper bag.
While these designs are sized for 100mm x 100mm hoops, it’s easier to work with the paper bags in larger hoop. Depending on how your hoop attaches to your machine, you may have to get creative with hooping to prevent the paper from getting mangled during the sewing process.
The paper needs to be taped to the hoop with painter’s tape. Secure the inner ring of the hoop inside the outer, position the hoop and tape the paper to the hoop using. One strip at the top and another at the bottom should be sufficient. Since you aren’t using thread, there is no pull so you just need to a small amount of tape to keep paper attached to the hoop. Gently press the painter’s tape to the paper so that it can be easily removed without damaging the paper.
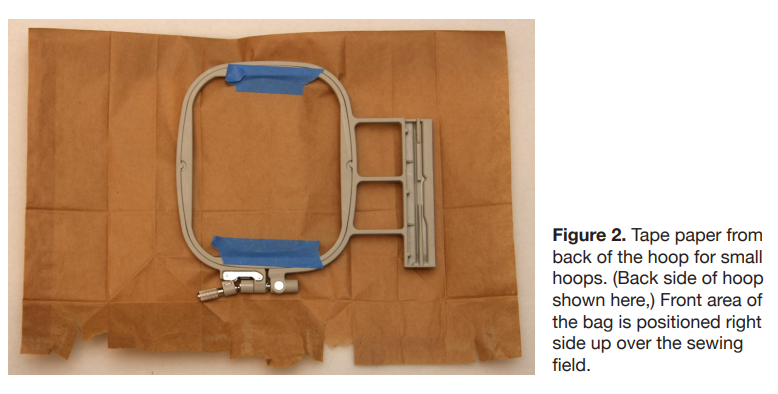
If you only have a small hoop, the paper will need to laid on top of the hoop and taped from the bottom. Take care not to crease the paper. The following photo shows the paper hooped upright.
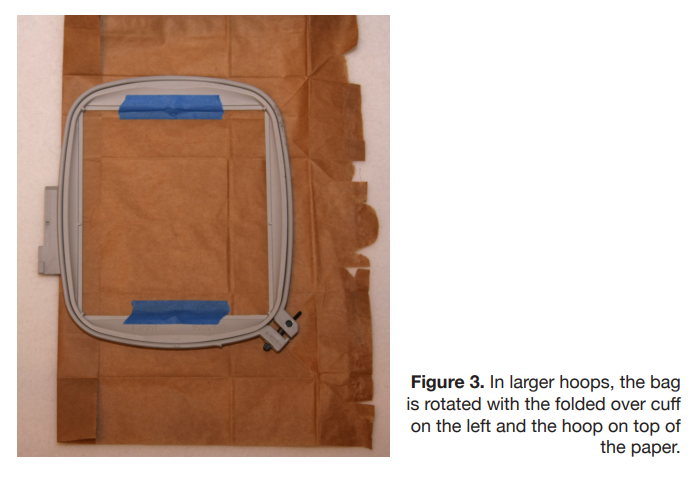
With a larger hoop, the paper can be placed underneath the hoop. I found that a minimum 150x150mm hoop allowed me to hoop the paper sideways with the cuff folded down and on the left without having the paper under the pantograph of the machine. I could then move the design at the machine to the right to get the design positioned where I wanted it. With this placement, the design is rotated 90° counter clockwise.
Insert a large needle. This can be any kind of needle and it doesn’t have to be new. The larger the needle, the more prominent the holes (and the less likely they are to fill in with paint).
Load the design into the machine and rotate or move the design as necessary.
Adjust any settings to permit your machine to sew without thread (turn off the needle thread sensor). You will probably still need to have a bobbin inserted in your machine.
Advance to the first stitch in the design. Many machines will sink the needle in the center of the hoop before moving to the first actual stitch. You don’t want a needle hole in the middle of the design! You may want to test your machine first by stitching on small square of paper to see if there is a beginning and/or ending stitch in the center of the design.
Sew the design.
4. Paint the design.
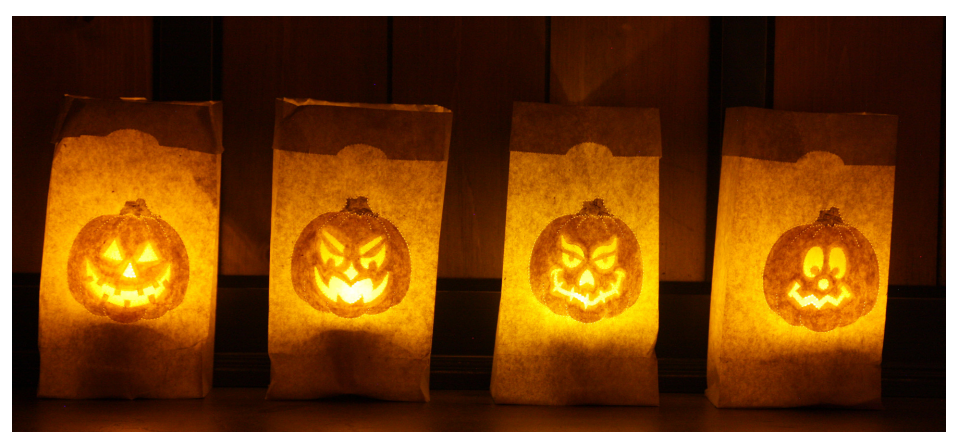
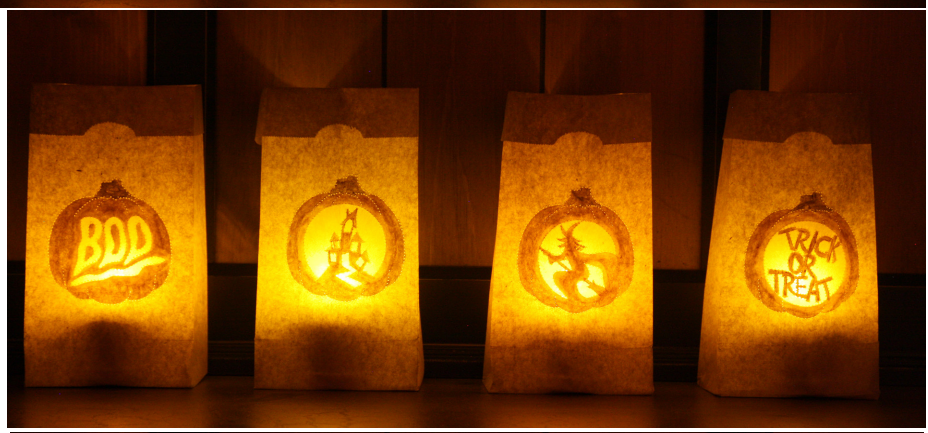
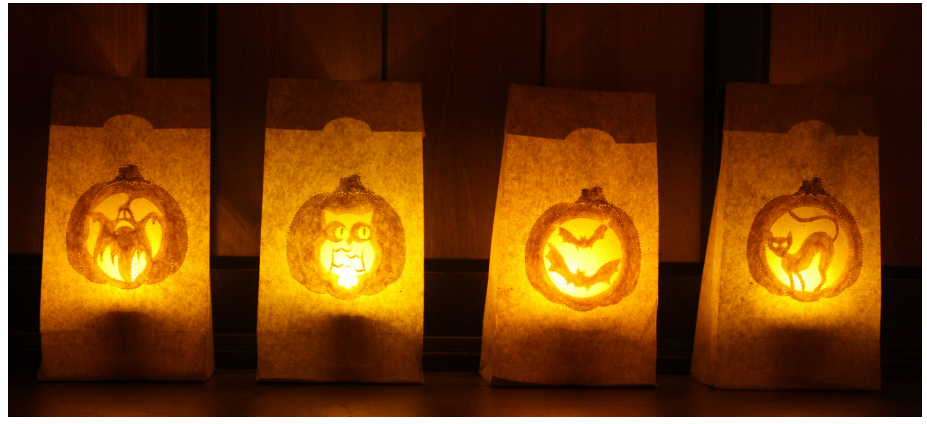
All the luminaries are shown on the last page of these instructions. Refer to the color sequence PDF if you are unsure which areas are painted. If you plan to skip the oiling step to create the translucency, you can skip the painting step if desired.
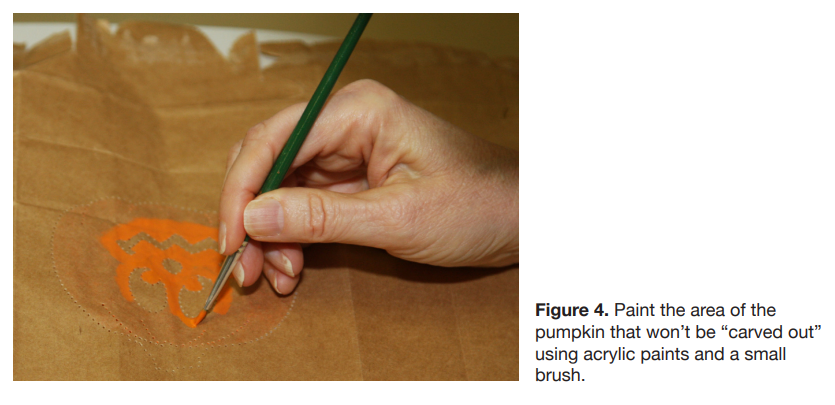
![]() Tip: You may wish to connect the dots lightly with a pencil to make it easier to see where to paint!
Tip: You may wish to connect the dots lightly with a pencil to make it easier to see where to paint!
The paint serves several functions. In addition to adding color when the luminary is not lit, the paint serves as a resist to keep the vegetable oil from seeping into undesirable areas. The untreated paper will wick up the oil very quickly. The paint also adds a little contrast and some color when the luminary is lit. You can get fancy with your painting or just fill it in solidly as I’ve done here.
When painting, avoid getting the paper too wet because it will wrinkle. It is better to paint in two or more more lighter coats than one heavy one. Avoid filling in the holes with paint. Apply paint to both sides of the paper. Allow to dry between layers and sides.
![]() Use a pin to clear any holes that get filled in with paint before the paint dries.
Use a pin to clear any holes that get filled in with paint before the paint dries.
![]() Since the acrylics double as a resist, you need to coat the paper well enough; however, it doesn’t have to be heavy. Markers or other products may provide color but are unlikely to protect the paper from the oil seepage.
Since the acrylics double as a resist, you need to coat the paper well enough; however, it doesn’t have to be heavy. Markers or other products may provide color but are unlikely to protect the paper from the oil seepage.
When the paint is dry, sparingly and carefully paint in a small amount vegetable into the areas you want to be translucent. Blot up any excess oil with a paper towel. The paint should protect the areas around the illuminated details. Avoid getting any oil outside of the design area.
Hold the finished piece in front of bright light to make sure the oil is evenly distributed. The oil will sink through the paper quite easily so it’s not necessary to paint both sides unless you are really stingy with the oil. The oiled areas will appear darker when unlit and will glow when lit from behind.
Using cellophane tape, reattach the back side of the bag. Glue or tape can be used to hold the refolded bottom together. The bags I used measured 3” x 5” across the bottom and I found it easiest to insert an index card and just glue the refold botttom sections to that.
Other Ideas
- Instead of applying the vegetable oil in step 5, use a craft knife to cut out various areas.
- Instead of applying the vegetable oil in step 5, use paint or markers to color in details.
- Skip all the painting and just use the punched paper as a luminary.
- Use the designs to create holiday cards and embellish with inks, pens, glitter, etc.
- Stitch on colored paper and cut design areas and layer over another colored paper or card stock.
- Instead of using craft paper, stitch on craft metal used for punched tin work. Shape into a cylinder or other shape and use with real candles
By the "Lindee G Embroidery" Team
