


What you’ll need
- Cork fabric for stitching
- Adhesive cork for back
- Poly mesh stabilizer
- Fabric type water-soluble stabilizer
- 505 Temporary spray adhesive
- Green embroidery thread
In addition:
- Old scissors for cutting adhesive backed cork
- Applique scissors
- Brayer
- Green wire-edged ribbon and a piece of green organza ribbon to tie stack of coasters together
- ecipe for Irish Coffee
Featured Design
https://www.grandslamdesigns.com/st-patricks-day-2-embroidery-design-pack?variant=1
https://www.grandslamdesigns.com/clover-ornament-2-embroidery-design
Notes
- Look on the Internet for a free printable recipe for Irish coffee if you don’t already have one.
- The pack of designs stitches fast and beautifully!
Preparation
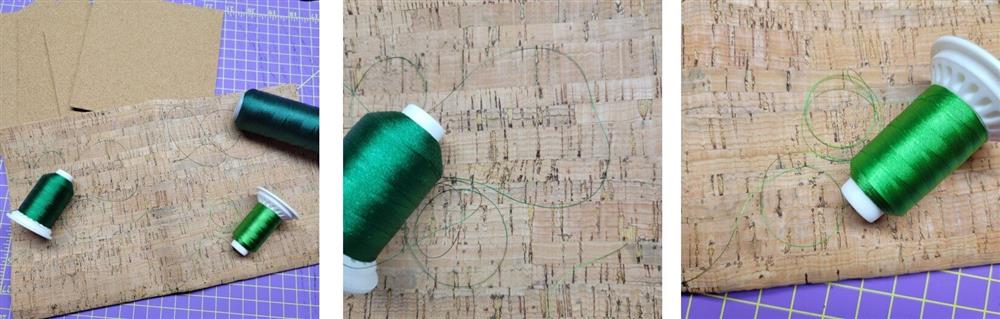
- Use a green thread that will show up well on the cork.
- For the project, the bright Kelly green was used for stitching.
Machine prep and hooping
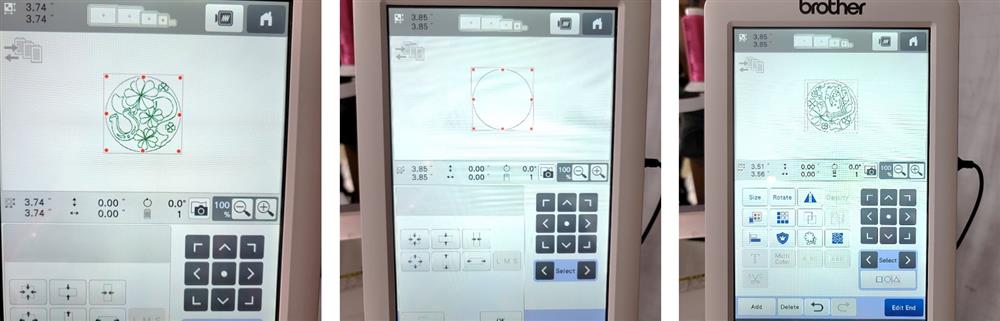
- Make note of the design measurement
- At the machine, import a circle that is about 3.85”—it must fit within the hoop and be slightly larger than the stitched design.
- Next import the coaster design to be stitched.
- If using a multi-needle machine, program a color stop between the circle and the design.
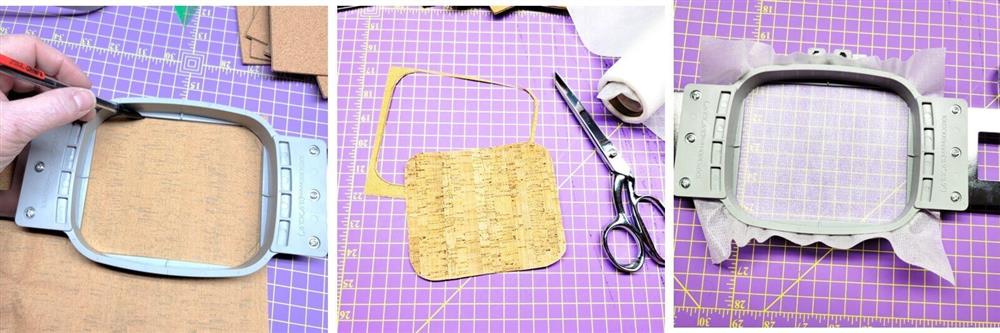
- On the back side of the cork to be stitched, place the inner hoop down and trace around the hoop.
- Cut out the cork using the old scissors.
- Hoop a layer of poly mesh stabilizer.
Stitching
- Place the hoop on the machine and stitch color 1, the circle.
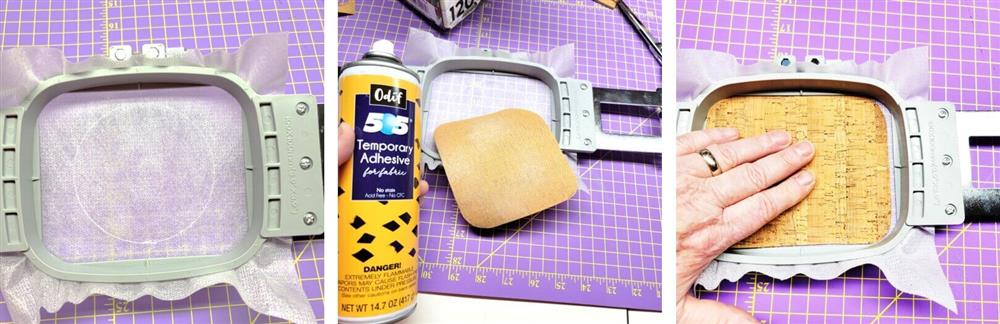
- Remove the hoop from the machine, but do not unhoop the stabilizer.
- Spray the back of the cut out piece of cork with temporary spray adhesive.
- Place the cork, right side up, inside the hoop and press into place.
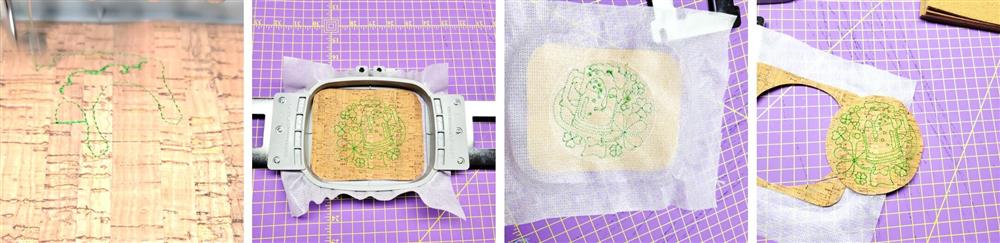
- Place the hoop on the machine and stitch the design.
- When the stitching is finished, remove the piece from the hoop.
- Using the circle outline as a guide, trim the stabilizer and cork cutting along the circle.
Final Steps
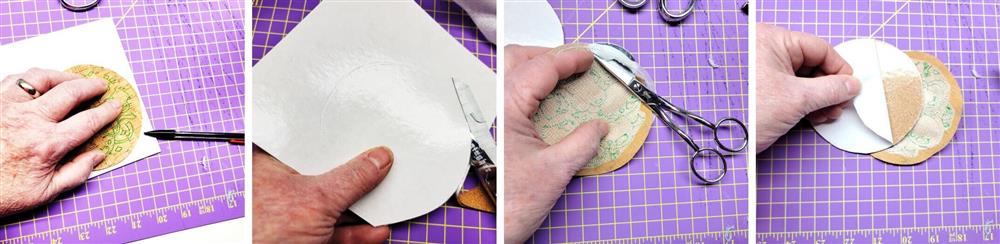
- Using the cork design as a guide, on the paper side of the adhesive backed cork, grace the circle.
- Cut out the circle from the adhesive cork using old scissors.
- Using the applique scissors, trim away the extra stabilizer from around the design. This will give more surface area for the adhesive cork to stick to the stitched cork.
- Remove the paper backing from the adhesive cork circle.
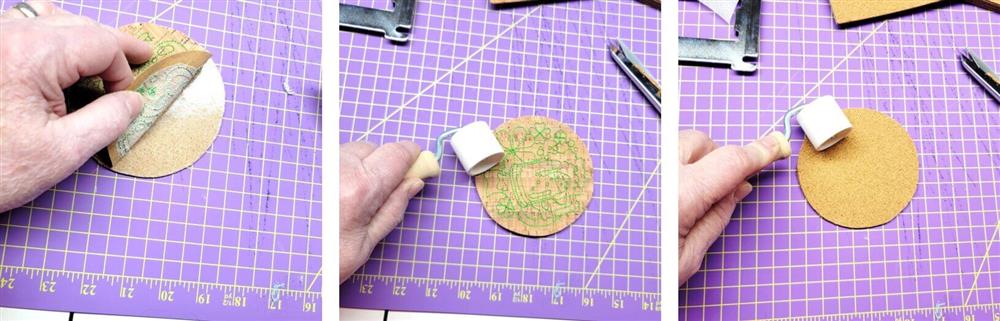
- Carefully center the stitched cork over the adhesive side of the back cork piece.
- Use the brayer on both the front and back of the coaster to adhere the cork pieces together.
Decorating
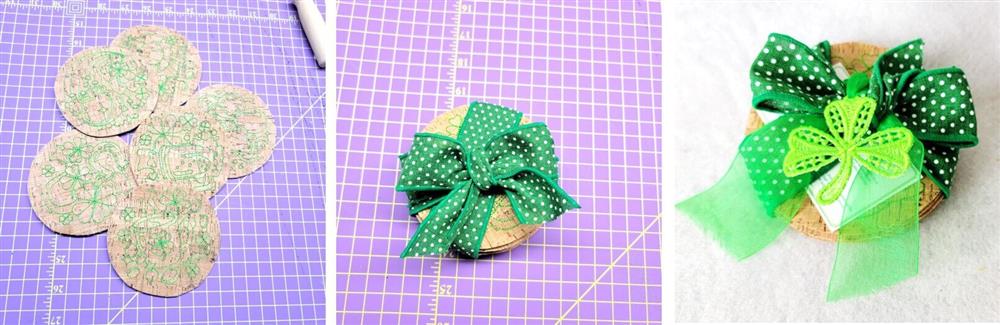
- Stitch the remaining cork coaster and back them following all the steps.
- Stack the cork coasters and tie them with the green wire edged ribbon.
- Stitch the FSL shamrock, using two layers of the fibrous water-soluble stabilizer.
- Rinse out the excess stabilizer and let the shamrock dry.
- Print out the Irish Coffee recipe and slip it under the ribbons on top of the stack.
- Slip the green organza ribbon through the top loop of the and fasten it to the green wire edged ribbon.
- Trim the tails of the ribbons.
Conclusion:
Congratulations! Whether for yourself or a gift, learning new ways to use embroidery designs increases your enjoyment of stitching. There is no doubt your project will be a “Grand Slam!”
By the "Grand Slam Designs" Team

