


What you’ll need:
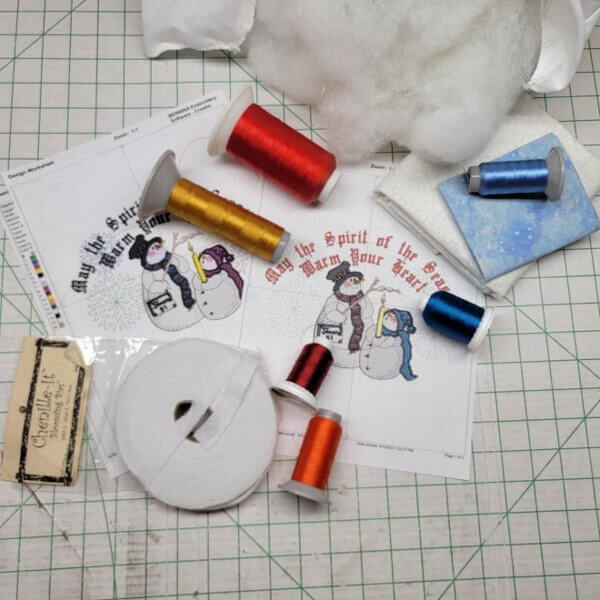
1- 13” x 13” white cotton fabric with snowflakes for embroidery (will be cut down during assembly), backed with lightweight interfacing such as Easy Knit
1- 22” x 12” white cotton fabric with snowflakes for pillow back (will be cut down during assembly)
2- 1-.5” x 12” blue cotton fabric with snowflakes
Embroidery thread as stated in color sequence
White 5/8” Chenille It®
Sewing thread to coordinate with fabric and Chenille It®
2- pieces red jumbo ric rac 11” in length
Poly-fil to softly stuff pillow
Soft nail brush and/or chenille fringing brush
Featured Design:
https://www.grandslamdesigns.com/spirit-of-the-season-embroidery-design
Another Design which could be used:
https://www.grandslamdesigns.com/snowmen-caroling-embroidery-design
Notes:
- Chenille It® is available at your local fabric and quilt store and also available online.
- The original design colors were changed in embroidery software and the sheets printed to see which one might look best.
Machine prep and hooping:

- Load the design on the machine.
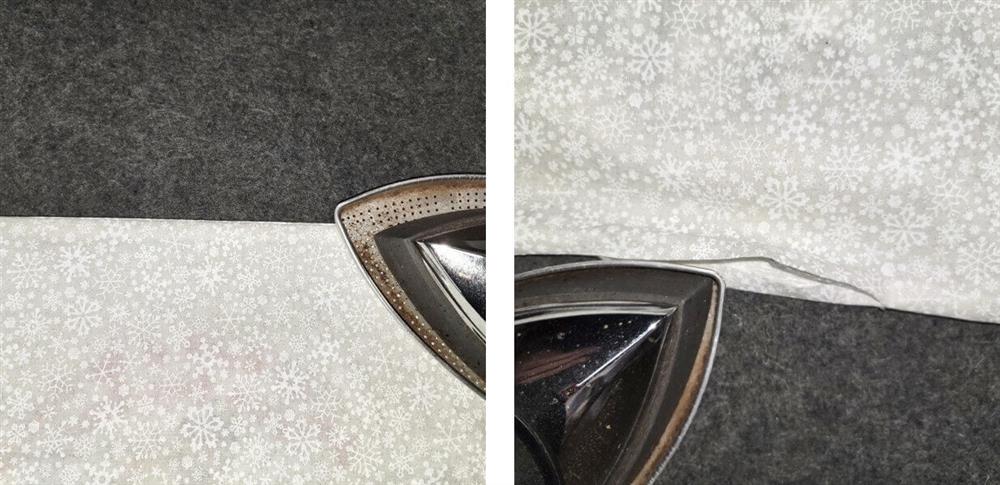
- Press the interfacing to the back side of the front fabric to be embroidered.
- Fold the fabric to find the center. Center and hoop the fabric with a piece of tearaway stabilizer.
Stitching:

- Put the hoop on the machine and stitch the color sequence.
- Stitch the design following the color sequence.
- After the design has finished stitching, carefully tear away the excess stabilizer.

- Remove the fabric from the hoop and press. Make pencil tick marks on the fold lines just at the outer edges of the fabric; this will aid in aligning the ruler for trimming.
- Place one layer of the Chenille It® in a serpentine line below the snowmen going from the left to right cut edges of the fabric.
- Load white sewing thread on the machine and stitch right down the center of the Chenille It® as it was placed.

- Following along the same line, lay a second piece of Chenille It® aside the first, with the top edge of this second piece along the stitching line of the first.
- Stitch the second piece in place—be sure not to catch any edges of the first piece.
- Repeat laying more Chenille It® and sewing it in place until there are five rows.

- Trim the embroidered fabric to 10.5” tall by 11.5” wide, using the pencil lines as a guide on the ruler.
- Cut the two pieces of blue snowflake fabric 10.5” x 4.5” wide for the side pieces.
- With right sides together, place the side panels to the left and right sides of the pillow front.
- Sew in place using a ¼” seam.
- Press the panels open, with the seams pressed toward the side panels.
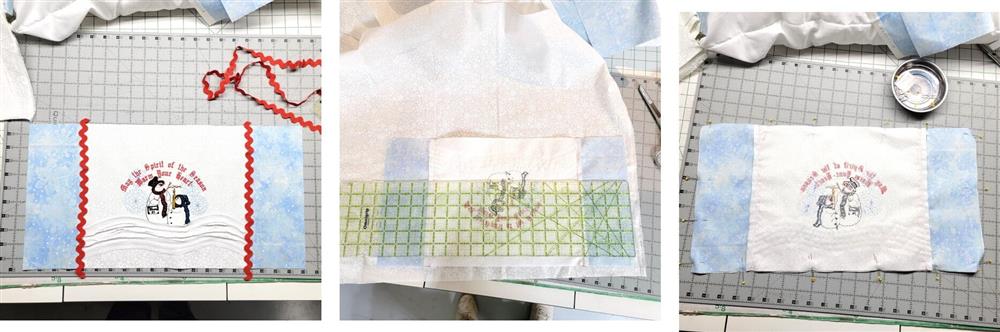
- Center a piece of the jumbo ric rac over each of the panel seams.
- Stitch the ric rac in place.
- Measure and cut a piece of back fabric the length and width of the pillow front (20.5” x 10.5”).
- With right sides together, pin the back and pillow front together.

- Stitch along all four sides of the pillow with a ¼” seam allowance, leaving an opening at the bottom for stuffing.
- Turn the pillow right side out.
- Form all the corners well.
Final Steps:
- Press all four seams flat.
- Turn in the seams of the bottom opening ¼” and press.

- Place Poly-fil first in the corners, then along all sides, and then the middle; softly stuff the pillow.
- Pin the opening closed and hand stitch the opening closed.

- Gently brush the edges of the Chenille It®, fluffing them. Do a little at a time and brush lightly.
Conclusion:
Congratulations! Whether for yourself or a gift, learning new ways to use designs increases your enjoyment of stitching. There is no doubt your project will be a “Grand Slam!”
By the “Grand Slam Designs” Team

