


What you’ll need
- Embroidery thread as stated in color sequences
- Adhesive Cutaway Stabilizer
- Towel to be cut into smaller pieces 39” x 71”(https://t.ly/a9BVm), cut into fourths
- 2- 12” x 12” stiff stabilizer for basket
- Temporary Embroidery Spray Adhesive (TESA)
- 1” Satin ribbon to finish seams
- ½” ribbon to create ribbons for towels
- Craft knife for scoring stiff stabilizer
In addition:
- Items to fill basket such as towels, book, rubber duck, powder, etc.
Featured Design
https://www.grandslamdesigns.com/seahorses-16-embroidery-set
Notes
- The towel featured in this project is extremely soft and lightweight.
- The fringe was retained as a decorative element for the towels and basket
- Slow the machine way down when stitching on such a lightweight material.
- There are several wonderful designs in the set—use others to embroidery more towels and washcloths.
- There are many ways to create a basket. Use your favorite method or use the steps given in these instructions.
- Adjust the measurements to create the basket size you’d like.
Preparation
- Please read through all the instructions before beginning.
- If embroidering on a terrycloth towel, use a water soluble topper in addition to a backing stabilizer.
Note: originally a lightweight fleece was going to be used for embroidering the designs on different pastel colors. However, in testing the design—even though the machine was only running at 400 spi, there was mis-registration of the design so the idea went to Plan B. That is why it is always important to test designs before working on the actual material and project.
Machine prep and hooping
- The towel was cut in half lengthwise and crosswise.
- There was fringe on both ends of the towel that was used as decorative elements at the bottom of the towel and around the basket’s top edge.
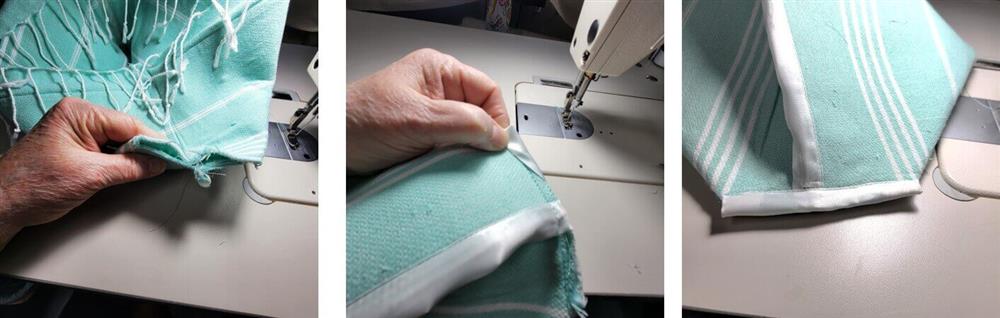
- Two of the quarters were hemmed around the three edges, leaving the fringe free.
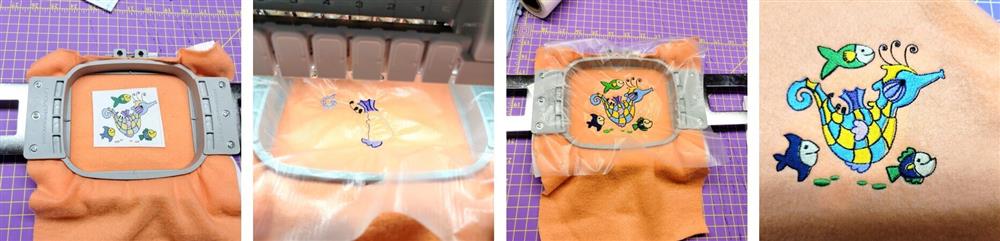
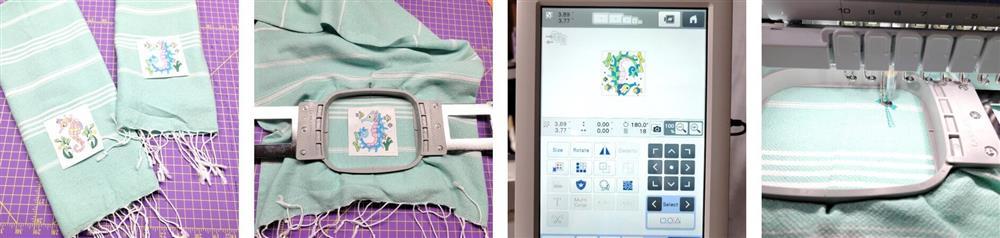
- Print the designs and place one on each towel to determine the placement.
- Hoop the towel, centering the design, with an adhesive stabilizer. In testing, it was determined this was the best stabilizer to use on such a lightweight fabric.
- Load the design on the machine with the chosen thread colors.
- Start the machine and stitch the design following the color sequence.
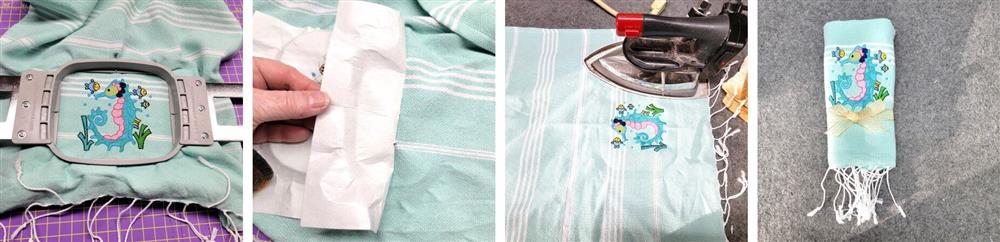
- When the design has finished stitching, remove the fabric from the hoop.
- Carefully separate the stabilizer from the fabric and cut away the excess stabilizer.
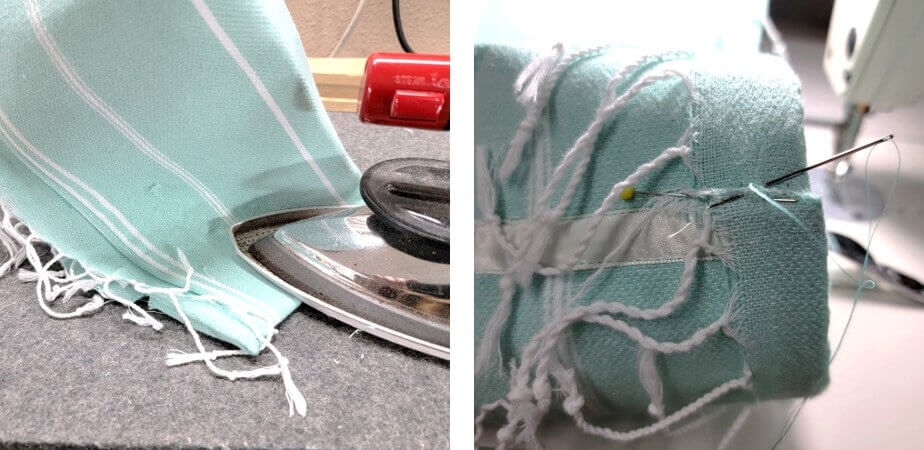
- Press the fabric.
- Fold the towel and using the ½” ribbon, tie a pretty bow around the towel for presentation.

- Load the second design with threads on the machine.
- Stitch the design following the color sequence.
- Unhoop the fabric and carefully separate and cut away the excess stabilizer.
- Press the towel, fold it, and tie a bow with ribbon around the towel.
- Repeat for as many designs being used.
- Creating the basket.
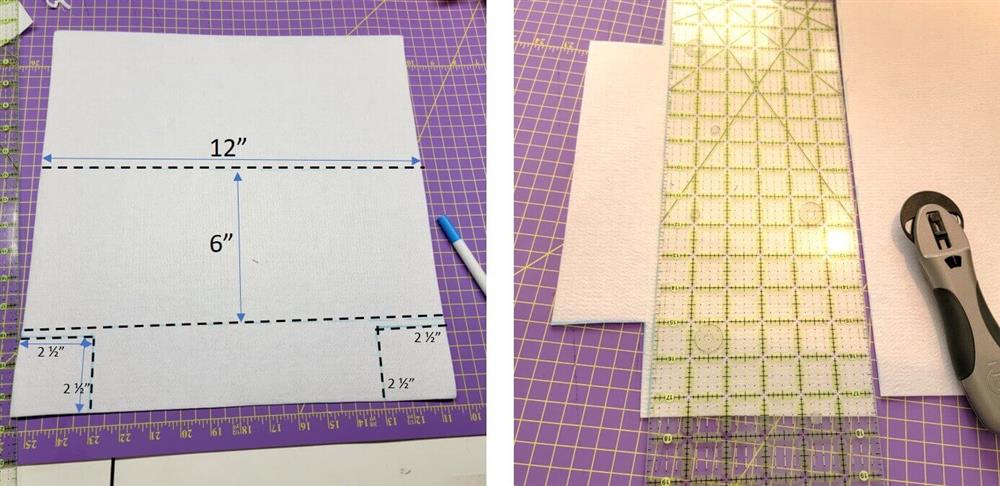
- 12” x 12” stiff craft stabilizer sheets were used for this project.
- Begin by measuring 2.5” in and 2.5” up on the bottom two corners.
- ¼” above those top lines, draw a line from the left to right edge; this will be the seam allowance and scoring line.
- Now draw a line 6” above that for the height of the basket, from the left to right edge.
- Cut along the last line drawn.
- Repeat for the second sheet of stiff stabilizer.

- Using the craft knife, score along the bottom seam line.
- Also score from the seam lines above the 2.5” seam line to the top of the stabilizer.
- These scored lines will make folding the basket easier in the end.
- Repeat scoring the second sheet along the same lines.
- The top edge of the fringe will hang down over the front of the basket.
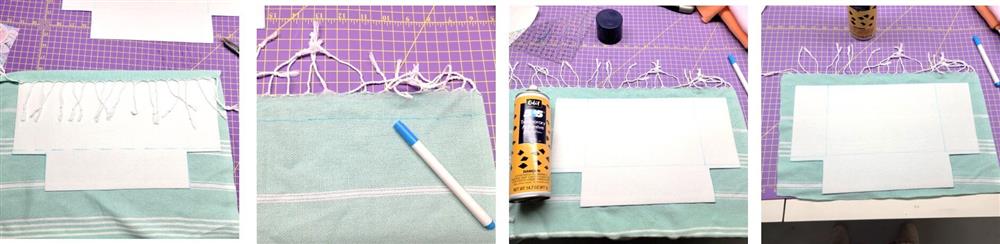
- On each of the two remaining quarter pieces of towel, mark down 1” from the fringed edge and mark.
- Using the TESA, lightly spray the stabilizer.
- Align the top edge of the stabilizer to the drawn line.
- This will now actually be the inside of the basket; the fringe gets flipped from the inside, over the top, and to the outside edge of the basket.

- Trim away the fabric from around the sides and bottom of the stabilizer.
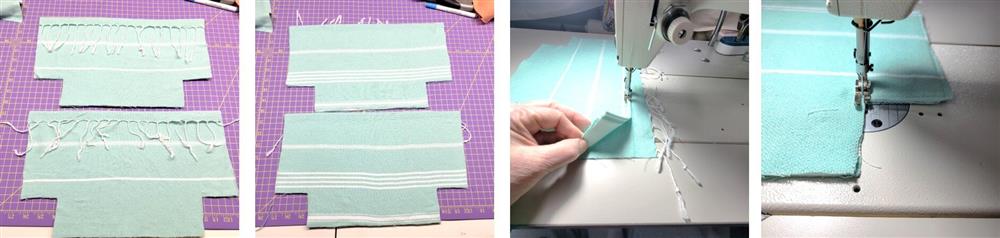
- Fold back the fringe about 1” to allow for the next step.
- Flip the stabilizer over.
- Spray lightly with TESA.
- Use the remainder of the same towel section from step 8.
- Place the top of the stabilizer 1” from the cut edge of the fabric.
- Trim the sides and bottom, cutting away the excess fabric.
- Flip the stabilizer over again and roll the top 1” over the top to the fringed side of the stabilizer.
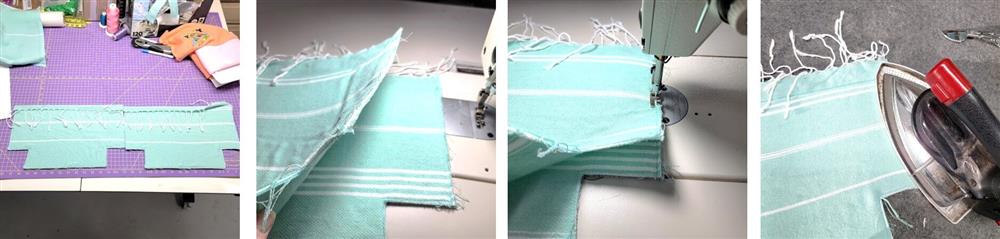
- This will actually be the front of the basket..
- This is how the fringe will look when finished at the top.
- Now flip the fringe back up.
- Place the same colored thread in the top and bobbin to match the towel.
- Keeping the fringed edge out of the way, sew along the top edge ¼”, catching that folded edge.
- Baste around the sides and bottom edge, attaching the fabric to the stabilizer.
- Repeat for the second piece of stabilizer.
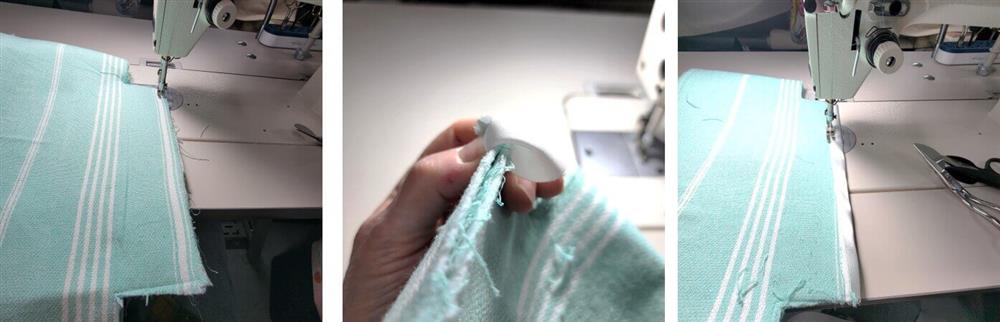
- This is how the pieces should look.
- With wrong sides together, sew ¼” seams at the sides.
- Press to soften the stabilizer at the seam a bit.

- Use a wooden clapper to flatten the seam.
- Stitch a piece of 1” ribbon over the seam, turning under the top edge of the ribbon, and sewing around all four edges.
- Repeat stitching the seam, pressing, and stitching ribbon over the other side seam.
- Now with right sides together, stitch the bottom seam using a ¼” seam allowance.
- Press and flatten the seam.
- Wrap the ribbon around the seam to enclose it and stitch in place.
- Box the corners by bringing the side seam and bottom seams together.
- Stitch a ¼” seam.
- Press and use the clapper to flatten the seam.
- Encase the seam in ribbon, turning under the edges at the ends.
- Repeat for the other corner.
Final Steps
- Turn the box right side out.
- Press the box along the scored lines—the stabilizer will automatically want to fold/crease along those lines.
- Using a hand needle and thread, bring the fringed edges together at the side seams and stitch.

- Place baby towels, a book, a bath toy, powder, and other bath items in the basket for a beautiful baby shower gift.
Conclusion:
Congratulations! Whether for yourself or a gift, learning new ways to use embroidery designs increases your enjoyment of stitching. There is no doubt your project will be a “Grand Slam!”
By the "Grand Slam Designs" Team
