


INTRO
There is still time to do some quick stitching for your July 4th celebrations! Create some light sitch count Snack Mats to dress up your buffet or table.
What you’ll need
For each Snack Mat:
2 layers fibrous water-soluble stabilizer (WSS)
Embroidery thread as stated in design sequence
Tape to hold cork in place on the back, or temporary spray adhesive
Sharp scissors for trimming
Bowls of snacks
In addition, for circle Snack Mat:
1- 8” square polyester felt
1- 8” square cork
In addition, for rectangle Snack Mat:
1- 6” x 8” polyester felt
1- 6” x 8” cork
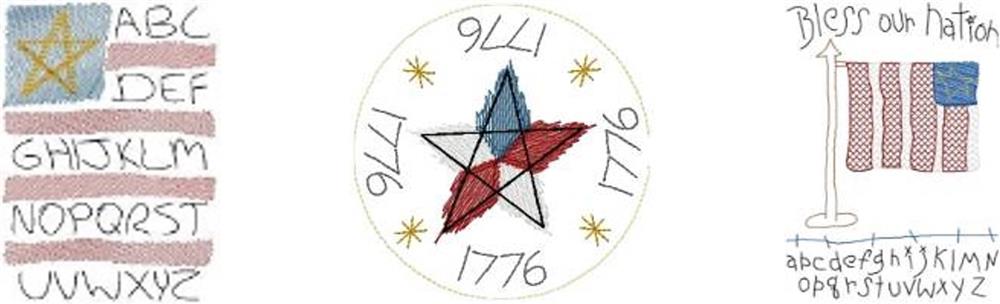
Featured Designs
https://www.grandslamdesigns.com/1776-candle-mat-embroidery-design
https://www.grandslamdesigns.com/american-alphabet-embroidery-design
https://www.grandslamdesigns.com/bless-our-nation-embroidery-design?variant=1
Notes
- Use a washable polyester felt.
- Cork was used for the back side of each Snack Mat.
- Polyester embroidery threads were used in this project.
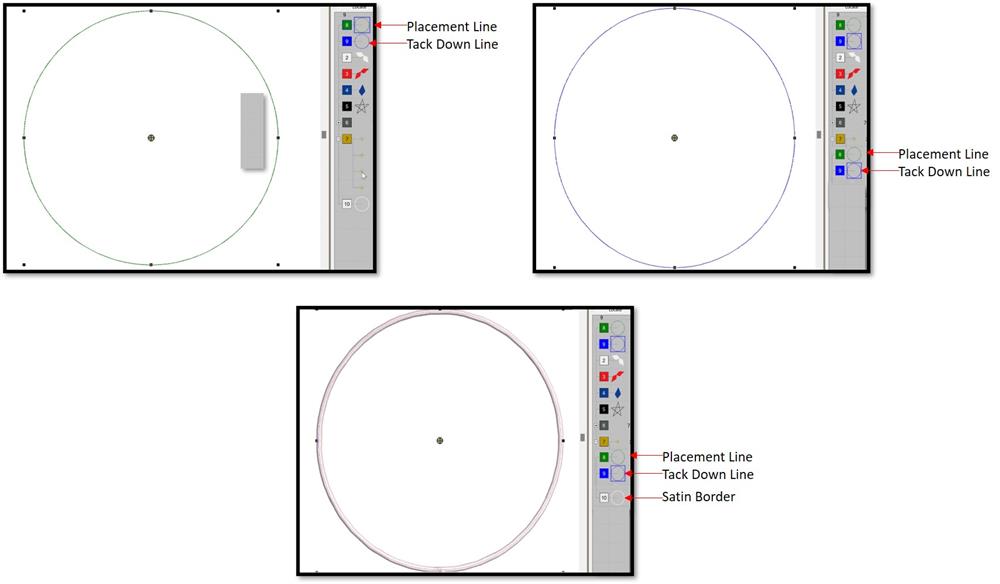
- The placement lines, tack down lines, and satin borders were done in embroidery software; however, it can also be done at the embroidery machine. Even the most basic machines will usually have these features. Consult the machine instruction manual for more information on your particular machine.
Preparation
- Gather all the materials and read through the instructions before beginning.
- In embroidery software or at the machine prepare the design files. The design files were left at their original size, just placement, tackdown lines, and a satin border were added.
- In embroidery software or at the machine prepare the design files. The design files were left at their original size, just placement, tackdown lines, and a satin border were added.
- Use the rectangle or circle tool to create a line around the design. Move the placement line to the beginning.
- Duplicate and change the color so that the machine stops. The tackdown line should be in the second position for sewing.
- Copy and paste both the placement and tack down lines; they should automatically move to the bottom of the color list.
- Copy the last tack down line and convert it to a satin stitch. This should be the last color to stitch.
- Save the design.
- Repeat the steps for each of the designs, saving each file in the format needed for the machine.
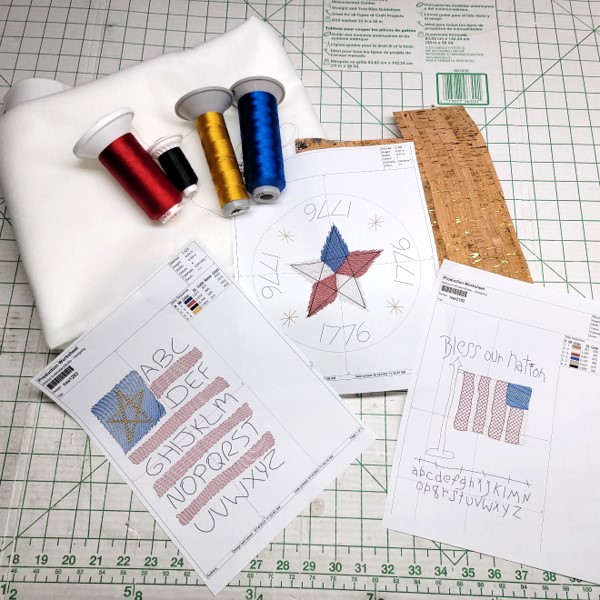
- Print out each of the designs, cut out the fleece and cork pieces, and select the thread colors.
Machine prep and hooping
All the steps are the same for each Snack Mat; just the design color sequence changes.
- Begin with the flag pole design. Cut the poly fleece and cork pieces.
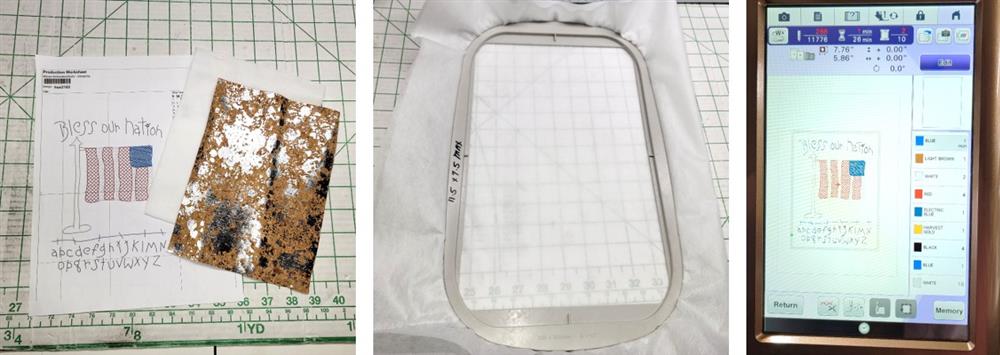
- Hoop 2 layers of fibrous WSS.
- Load the design on the machine.

- Place the hoop on the machine and stitch Color 1, the placement line.
- Place the polyester fleece over the placement line, covering it.
- Stitch Color 2, the tack down line.
- This tacks the fleece in place.
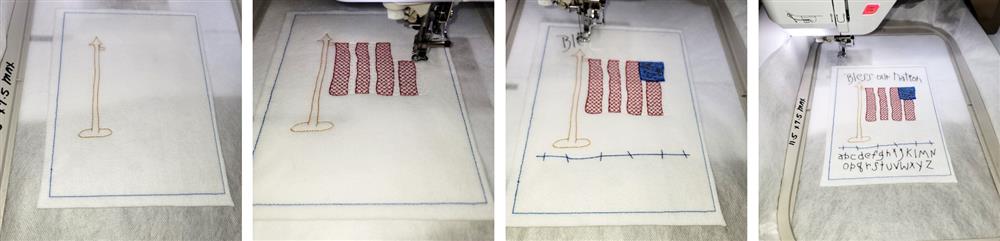
- Continue stitching the design following the color sequence.
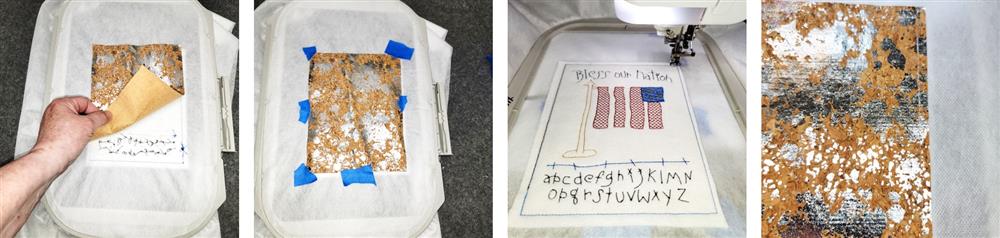
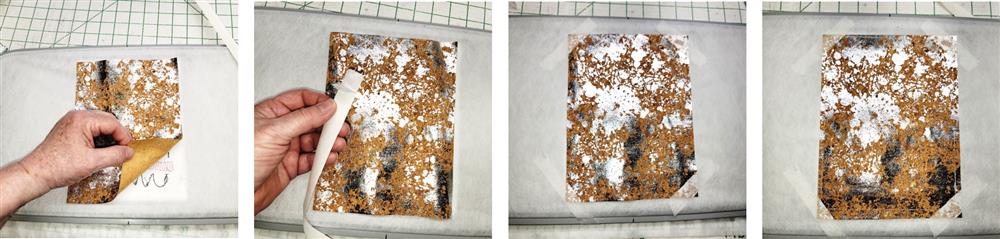
- Remove the hoop from the machine and turn it over.
- Place the cork piece over the back of the embroidery, right side up.
- Tape the cork down, keeping the tape outside of where the tack down stitching will be.
- Return the hoop to the machine and stitch the placement and tack down lines; this gives two lines of stitching to secure the cork.
- Remove the hoop from the machine and remove the tape pieces before stitching the satin outline.
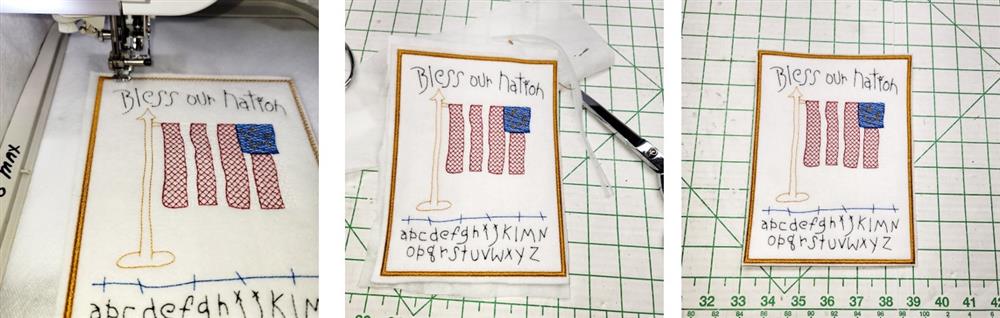
- Return the hoop to the machine and stitch the satin outline in the chosen color.
- After the stitching is completed, remove the embroidery from the hoop and trim away the excess stabilizer to about 1/8” to the outside of the satin border.
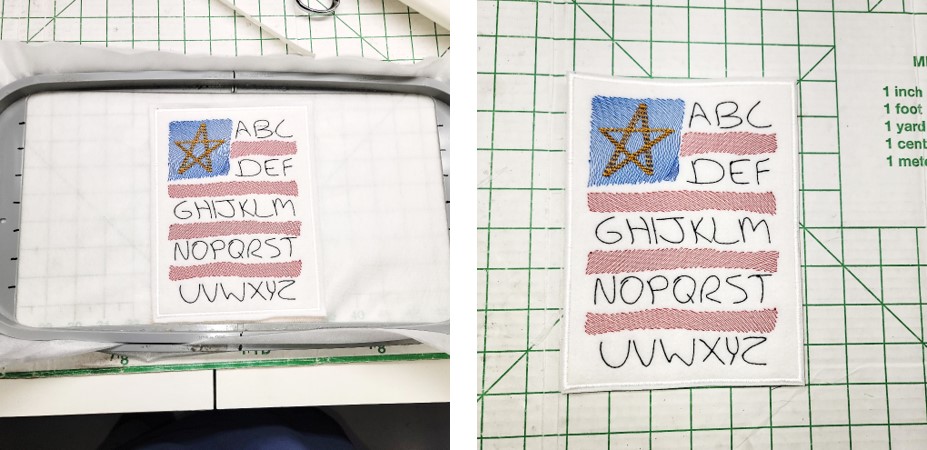
- Repeat the same steps for the Flag design.
- Hoop two layers of WSS.
- Cut the polyester fleece and cork pieces.
- Load the design, insert the hoop, and stitch the placement line.
- Place down the fleece and stitch the tack down line.
- Stitch the flag following the color sequence.
- Remove the hoop from the machine and flip it over.
- Place the cork over the back of the design and tape it down. Tip: cut ½” strips of water soluble adhesive stabilizer for taping down the cork! This tip is good for fabric applique pieces, too!
- Place the hoop back on the machine and stitch the placement and tackdown lines to secure the cork down.
- Stitch the satin border.
- After the design finishes stitching, remove it from the hoop and trim away the excess stabilizer.
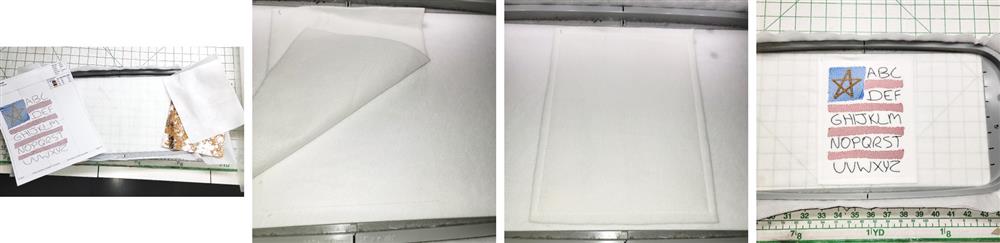
For the circle mat, follow the same steps.
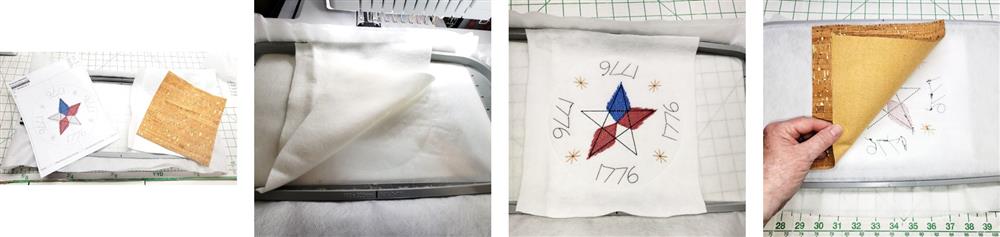
- Hoop two layers of WSS, stitch the placement line, place down the polyester fleece, tack it down, stitch the design and then tape the cork to the back.

- Stitch down the cork and then stitch the satin border in the chosen color. Remove the design from the hoop and trim away the excess stabilizer and fabric.
Final Steps
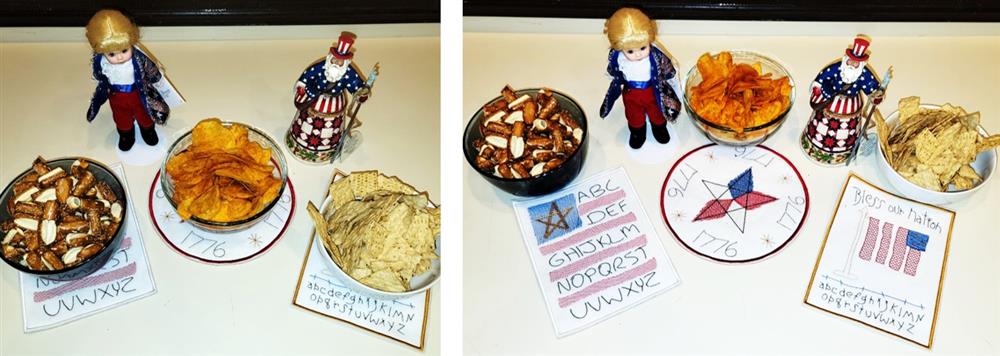
- If desired, use a fabric protector to help protect the fleece.
- Fill bowls with snacks and place them on top of the Snack Mats.
Conclusion:
Congratulations! Whether for yourself or a gift, learning new ways to use designs increases your enjoyment of stitching. There is no doubt your project will be a “Grand Slam!”
By the “Grand Slam Designs” Team


