


What you’ll need
- Bible
- Cork for outside, inside lining, and pocket pieces
- Poly mesh and sticky cutaway Stabilizer
- Embroidery thread as stated in color sequence
- White Felt
- Thread to top stitch pieces together
- Optional: embroidery software
Featured Design
https://www.grandslamdesigns.com/and-the-greatest-embroidery-design?variant=1
https://www.grandslamdesigns.com/heart-corner-13-embroidery-design?variant=1
Notes
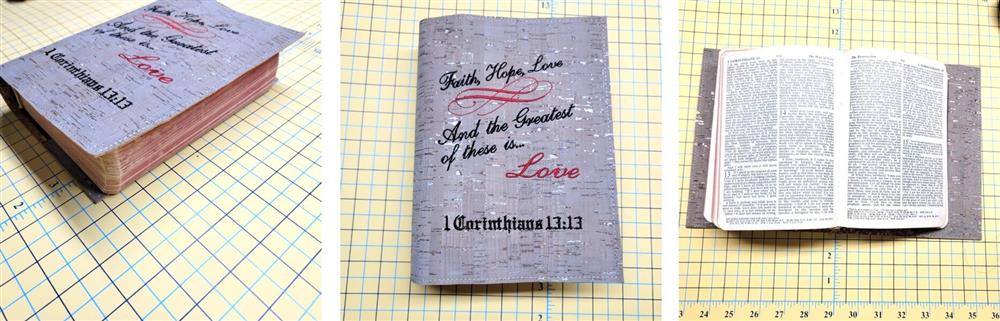
- Since all Bibles are different sizes, general instructions are given here to make this beautiful cover.
- Use a quality cork; the cork used for this project was purchased in the upholstery section of the fabric store.
- One style of cork was used for the outside and inside pockets, and a remnant used for the inside “lining”.
- Use either sewing or embroidery thread to sew the pieces together.
- Though embroidery software is not necessary, it is certainly helpful in positioning the design and adding the Bible verse; this may alternately be done on most modern machines.
- Read through all the instructions before beginning the project.
Preparation
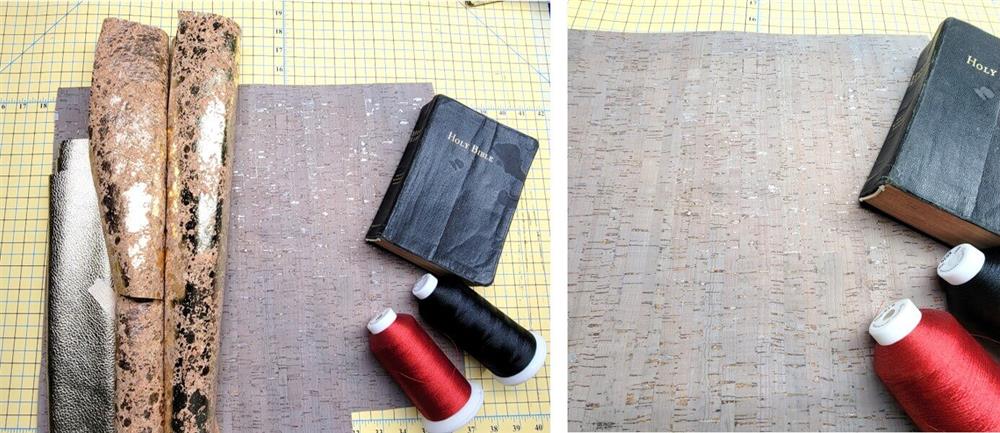
- Gather the materials.
- Cork purchased in the upholstery section of the fabric store will have a woven back to it; this adds strength.
- Choose embroidery thread colors that will compliment and stand out on the cork.

- Measure around the Bible.
- Measure the height.
- Add about an inch all the way around.

- In software (or at the machine), import the embroidery design.
- Rotate the design into a pleasing position.
- If you’d like, select and change the color of the word Love.
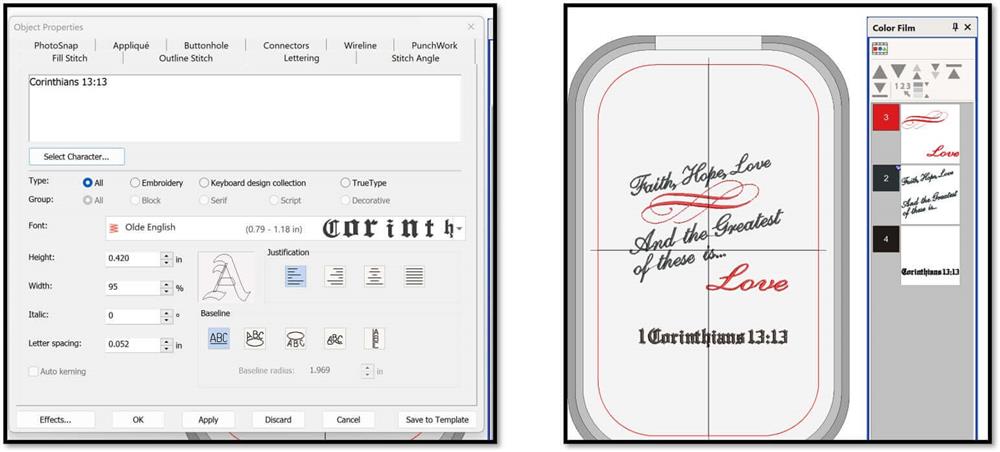
- In the lettering portion of the software (or at the machine), add the chapter and verse number for the quote.
- For something as simple as this, it is ok to color sort.
- Save the file and then export it for stitching.
- Print the design at actual size.
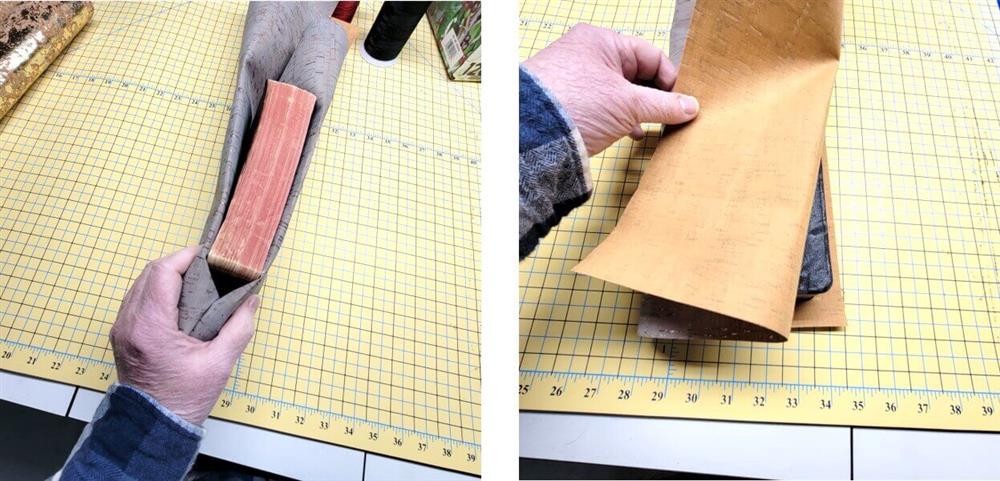
- Instead of having separate pieces, if the cork piece is large enough, the ends can be tucked inside the covers to create the pockets.
 Just be sure to allow 3-4” on each side for the pockets.


- For this project, separate pieces were used for the outside cover and pockets.
- Measure and mark the size needed—remember to add the 1” all the way around.

- With the outer cork piece positioned, determine where the embroidery will fit.
- To do this, cut the design out of the paper and position it on the cover of the Bible.

- To help with alignment, fold the front cover area over the paper and lightly crease along the center line of the design.
- Remove the paper from the Bible.

- Now center and align the center line of the paper to the lightly pressed creases on the cork.
- Double check the position and tape the paper into position.
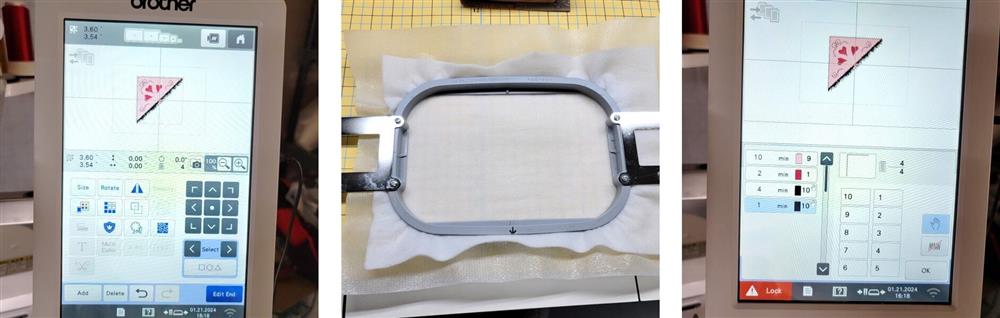
- Determine what size hoop is needed.
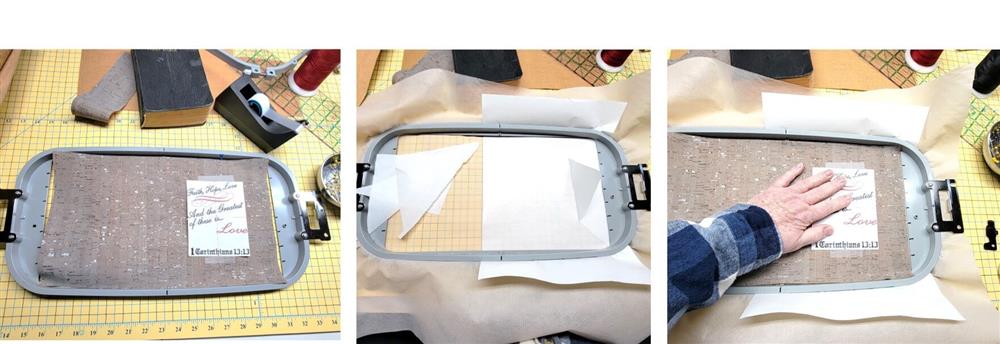
- It may be better to use a larger hoop so the cork lays smoothly in the hoop.
- Hoop a layer of poly mesh stabilizer, and half the hoop with an adhesive cutaway over which the design will be positioned.
- You may need to tape the outer areas of the stabilizer down with painter’s tape.
Machine prep stitching

- Load the design on the machine.
- Place the hoop on the machine and center the needle over the center of the design.
- Remove the paper and stitch the design following the color sequence.

- After the design has finished stitching, remove it from the hoop and remove the excess stabilizer.
- Position the cover over the Bible and use a marker (or crease) to outline where the outer edges of the book are all around the cork.
- For this project, tailor’s chalk was used to lightly mark around all the edges of the Bible, onto the cork.
- A ruler and rotary cutter were used to cut ½” away from the marked lines.
Final Steps

- Cut a piece of cork for the inner lining.
- Place the cover and lining, wrong sides together.
- Cut two pieces for the inside pockets, 3-4” deep and the height of the cork piece.
- Place the wrong side of each pocket, to the right side of the lining piece at the ends.
- Use clips to hold all the pieces together.
- Load the machine, and bobbin, with the color thread that best matches the cork.
- From the right side, stitch ¼” from the cut edge.

- Using the ruler and rotary cutter, trim all around the cover, 1/8” from the topstitching line.
- Insert the covers into the pockets.
- The cover is finished and now it is time to stitch the corner book marker.
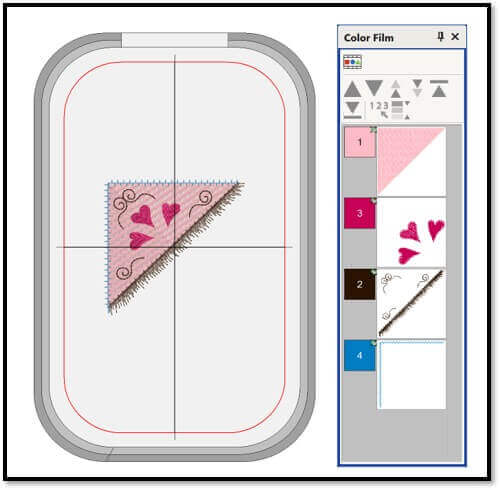
- Insert the book corner into the software (or at the machine).
- Select the three scrolls and fringe and make them one color.
- Select the top and left lines and make them a different color.
- Sequence them to stitch last.
- Export the file needed for the machine.
- Load the design on the machine.
- Hoop a layer of fleece with a layer of poly mesh stabilizer.
- Set the colors, and place a stop on the machine before the last color stitches.
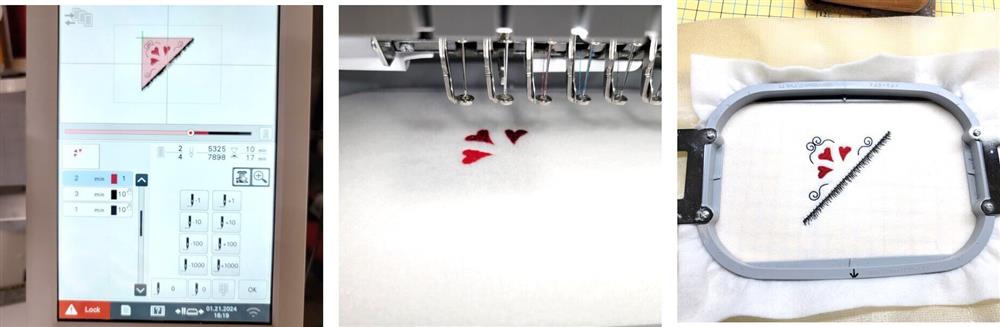
- Forward past the first color.
- Stitch the design following the color sequence.
- The machine needs to stop before the last color.
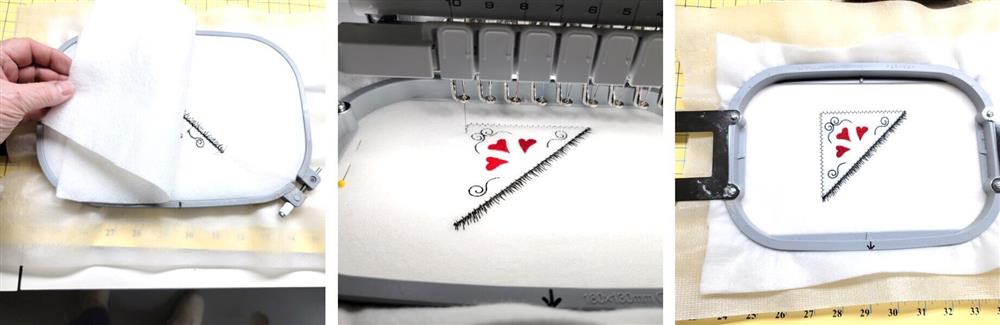
- Remove the hoop from the machine, but do not remove the fabric from the hoop.
- Turn the hoop over and place a second piece of fleece on the back of the hoop, taping it in place.
- Place the hoop back on the machine and stitch the last color to secure the back fabric in place.

- Remove the fabric from the hoop.
- Trim 1/8” from outside the stitching lines.
Conclusion
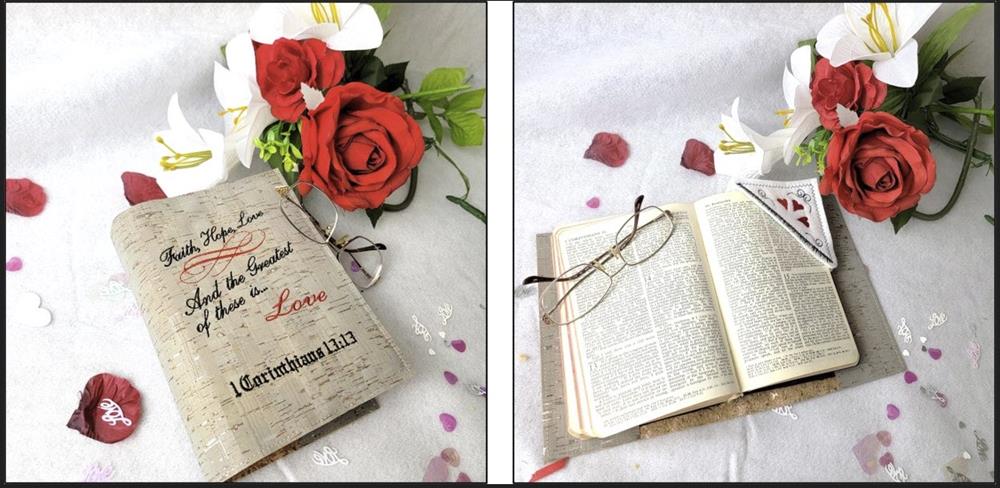
Congratulations! Whether for yourself or a gift, learning new ways to use embroidery designs increases your enjoyment of stitching. There is no doubt your project will be a “Grand Slam!”
By the “Grand Slam Designs” Team
By the "Grand Slam Designs" Team

