You have no items in your shopping cart.
RSS

Blog

The Ultimate Guide to iPad Apps for Embroidery Design

Explore Digital Tools for Stitching with Confidence and Precision 

Digital design is no longer just an advanced tool for professionals it’s a creative companion for hobbyists and seasoned digitizers alike. iPad apps, in particular, have become an integral part of the modern embroidery workflow, offering tools to sketch, plan, color-match, and visualize embroidery patterns like never before. 

At Grand Slam Designs, we understand the shift toward digital creativity, and we support our community in exploring technology that enhances traditional craftsmanship. That’s why we’ve created this comprehensive guide to iPad apps for embroidery design along with important insight from experienced embroiderers on practices like test stitching and app accessibility. 

Important Note: These apps are not sold through Grand Slam Designs. For your convenience, we’ve indicated where you can purchase or download each app  

Why iPad Apps Are Gaining Popularity in Embroidery? 

More embroiderers are turning to digital tools for speed, accuracy, and design flexibility. From visualizing colors before buying threads to drawing motifs that match specific fabric placements, iPad apps provide unmatched convenience for both planning and pattern creation. 

That said, the shift to digital also raises valid questions especially among those who have worked traditionally for years. Some professionals wonder whether the ease of design now leads to shortcuts, such as skipping the essential step of test stitching. 

This is where experience meets innovation and why this guide includes both the best tools and time-tested advice from long-time embroiderers. 

 Top iPad Apps for Embroidery Design 

Below are seven of the most recommended iPad apps tailored for various parts of the embroidery process—each with strengths in sketching, charting, organizing, or visualizing. 

 Procreate

  • Platform: Apple App Store 
  • Price: $9.99 (one-time purchase) 
  • Where to Buy: Apple App Store 

Procreate is a powerful digital illustration app often used for embroidery design thanks to its flexible brush tools and canvas settings. 

Highlights: 

  • Create stitch-style brushes for satin, French knot, or backstitch simulations 
  • Use symmetry tools for floral and mandala designs 
  • Add fabric photos as backgrounds to plan placements 
  • Export files in JPEG or PDF formats 

Best For: Freehand embroidery sketches with detailed brush visuals. 
Pro Tip: Purchase embroidery brush sets from Etsy for a more realistic design experience. 

 StitchSketch

  • Platform: Apple App Store 
  • Price: $3.99 (Basic), $7.99 (Full) 
  • Where to Buy: Apple App Store 

StitchSketch is built for stitchers. It lets you convert images into embroidery patterns and create counted charts with thread compatibility. 

Highlights: 

  • Compatible with DMC and Anchor thread libraries 
  • Grid view for creating cross-stitch or counted-thread designs 
  • Exportable as PDF for easy printing 

Best For: Transforming images into embroidery-ready charts. 
Pro Tip: Simplify your photo background before conversion for cleaner results. 

 Concepts

  • Platform: Apple App Store 
  • Price: Free with optional $9.99 upgrade 
  • Where to Buy: Apple App Store 

Concepts is a vector-based app, ideal for technical stitch planning. You can resize, measure, and precisely lay out designs. 

Highlights: 

  • Scalable vector lines with no quality loss 
  • Design layouts for different hoop sizes 
  • Works well for logos, text placements, or detailed motifs 

Best For: Creating embroidery patterns that need accurate scaling or garment alignment. 
Pro Tip: Use shape guides and grid overlays to maintain symmetry. 

 Adobe Fresco

  • Platform: Apple App Store 
  • Price: Free version; $9.99/month Premium 
  • Where to Buy: Apple App Store 

Adobe Fresco is ideal for mixed media. It combines raster and vector capabilities, allowing you to build multi-texture embroidery concepts. 

Highlights: 

  • Realistic brush textures simulate density and fill types 
  • Supports layering by stitch type 
  • Syncs with Adobe Cloud for cross-device use 

Best For: Visualizing the look and depth of different stitch areas. 
Pro Tip: Use live watercolor brushes to map stitch density—darker areas = tighter stitching. 

 Stitch Fiddle

  • Platform: iPad-optimized web app 
  • Price: Free basic version; Premium from $5/month 

Designed for stitch chart creation, Stitch Fiddle is browser-based and perfect for cross-stitch or chart-based embroidery. 

Highlights: 

  • Grid layout with symbol and color matching 
  • Thread library compatibility 
  • Community sharing features 

Best For: Building and sharing counted-thread patterns. 
Pro Tip: Save templates for repeated pattern types (e.g., monograms or alphabets). 

 PaperDraw: Pattern Maker

  • Platform: Apple App Store 
  • Price: Free with $3.99/month or $19.99/year upgrade 
  • Where to Buy: Apple App Store 

PaperDraw is perfect for designing embroidery charts using grids and embroidery stitch symbols. 

Highlights: 

  • Clean grid system for counted patterns 
  • Pre-made symbols and color palettes 
  • Easy to use for beginners and pros alike 

Best For: Charting symbol-based embroidery designs. 
Pro Tip: Begin with their template library for faster pattern setup. 

Wisdom from the Embroidery Community: The Importance of Test Stitching 

As embroidery technology evolves, so do the habits of stitchers. Some rely heavily on digital previews, skipping over a critical phase that long-time embroiderers still consider sacred: test stitching

One highly experienced embroiderer expressed this concern: 

“Many of today’s digitizers don’t test stitch. I guess they have more confidence than I’ve had over the years, simply because at one time I digitized without software. I had to be sure, so I test stitched and for me, it has become part of the process.” 

This insight speaks volumes. No matter how advanced your app or machine, nothing beats watching your design stitch out on real fabric. Here’s why test stitching remains essential: 

Why You Should Always Test Stitch?

  • Check stitch flow and direction: Even well-aligned designs may pull differently on fabric. 
  • Evaluate density and spacing: Threads that look perfect on-screen can be too tight in reality. 
  • Spot layering or underlay issues: Especially in filled or satin areas. 
  • Ensure thread colors work in real lighting: Digital previews can mislead you. 
  • Protect your final garment or product: Always use a test swatch first. 

At Grand Slam Designs, we always recommend making a test stitch a non-negotiable step in your process especially when using self-digitized designs or experimenting with new apps. 

Tips for Using iPad Apps in Your Embroidery Workflow 

Here’s how to fully integrate these digital tools into your creative routine: 

1.Set Yourself Up for Success: 

  • Use an Apple Pencil for accuracy in sketching 
  • Organize your app workspace by project folders 
  • Regularly back up designs to cloud storage 

2.Enhance Your Digital Workflow: 

  • Use layers for different stitch types 
  • Create templates for hoop sizes you use frequently 
  • Export designs in both editable and printable formats 

3.Going from iPad to Fabric: 

  • Always print your pattern before transferring 
  • Use proper transfer methods (e.g., carbon paper, soluble stabilizer) 
  • Compare digital and physical thread palettes to avoid surprises 

Final Thoughts 

Embroidery apps on iPad are revolutionizing the design process. They allow you to sketch, chart, experiment, and plan all before you thread a single needle. But the wisdom of experience still holds: test stitching is where your digital idea becomes a stitched reality

Technology is a tool, not a replacement for craftsmanship. Let these apps enhance your creativity—but let your care, attention, and test stitching keep the quality consistent. 

Ready to Bring Your Designs to Life? 

While we don’t sell iPad apps, Grand Slam Designs offers thousands of digitized embroidery patterns, including fonts, monograms, and alphabets that are perfect complements to your iPad-created designs. 

Visit Grand Slam Designs to explore premium embroidery designs ready for machine stitching. 
Your next masterpiece begins with a plan and ends with a perfect stitch. 

Bobbin Work

Bobbin work allows you to embroider designs with beautiful textured threads and ribbon— threads that cannot be sewn through the needle. For best results, you not only need a specially digitized design but you need to modify your technique and make some machine adjustments.


Please note: Bobbin work requires some testing and adjusting of your machine tensions. Please refer to your machine manual or consult your sewing machine dealer for specific help with your machine.


Supplies


  • Design specifically digitized for bobbin work
  • Heavier threads such as Pearl Crown Rayon, 2mm silk ribbon, Madeira Decora 6, other decorative threads and fibers generally used for bobbin work. (Note: Heavier yarns are not recommended due to the short amount you will be able to wind on the bobbin.)
  • Monofilament invisible (polyester or nylon) upper thread
  • 70/10 or 75/11 embroidery needle
  • Specialty or second bobbin case
  • Screw driver for adjusting bobbin case tension
  • Fabric, stabilizer


Preparation: Filling the Bobbin


Bobbins can be wound by hand or by machine. If winding by machine, wind slowly. Since you probably will not be able to run the thread through the normal thread guides, use your fingers to control the winding tension. Be careful not to wind too tightly or too loosely.


Be sure to check the amount of thread on the bobbin each time you start a new design. If the bobbin runs out during stitching:


  • Remove the hoop
  • Thread the “tail” to the back (top side of hoop_ using the tapestry or chenille needle
  • Wind and insert a new bobbin
  • Replace the hoop
  • Reposition the needle to where the “tail” comes to the back
  • Bring the bobbin thread to the wrong side by hand as when beginning a design
  • Continue stitching the design


Avoid using heavier yarns as you will not be able to wind enough on the bobbin to complete a single design. I tried winding a textured knitting yarn and only got about 30” on the bobbin before it was full.


Preparation: Machine Tensions


Most home embroidery machines have automatic tensioning that cause the top (needle) thread to be pulled to the bottom side of the hooped fabric. This is perfect for traditional embroidery because under proper tensions, the bobbin thread will never be seen on the design side.


However, with bobbin work, the design will be sewn on the bobbin side using thread many times heavier than embroidery bobbin thread. Also, monofilament thread is quite thin and slips through the tensions easily. These three issues will require tension adjustments to accommodate the thread weights and to prevent the monofilament from pulling through to the design side.


Proper bobbin and needle thread tensions will take some trials. Use a small design and be sure to test with the same weight and type of thread you will be using in your project.


Using a separate bobbin case for bobbin work will make switching between specialty stitching and standard easier and more enjoyable. Be sure to label your bobbin cases if they do not look different. Be sure to read the manual for your machine; some threads may be so heavy that bypassing certain tensioners is the best route. I found that with Pearl Crown Rayon I had to loosen the tension screw on the bobbin case quite a bit (be careful not to unscrew it all the way!) and raise the needle thread tension for a good result.


How much should you loosen the tension? I suggest inserting embroidery bobbin thread in your regular case and feeling the tension of the thread as you pull it through the bobbin. This should give an idea for what the tension should feel like after adjusting for a heavier thread. If you have a front loading bobbin case, you might try the “bobbin drop test.” Hold the threaded bobbin in one hand by the thread tail with the other hand cupped a few inches below. Give a little jerk on the tail and see if the bobbin drops a bit. If the bobbin doesn’t drop, loosen some more; if it drops a lot, tighten a bit.


Allow plenty of time for testing since you can’t see the results until you remove the hoop from the machine because they are on the bottom. Chances are that you won’t be pulling these heavy threads to the back of the embroidery but you don’t want the needle thread pulled to the design side.


While you’re at your machine, turn off the automatic thread cutter if your machine has one and slow your machine down.


Preparation: Fabric


The only trick here is remembering that the right side of the fabric faces the bed of the machine and the stabilizer goes on top. In general, bobbin work designs are open and lower stitch count, which means a lower distortion type of design. Choose an appropriate stabilizer for the fabric. I prefer to use a light-weight, no-show cutaway when the stabilizer can stay in. Tearaways can be difficult to remove since these designs do not have a lot of needle penetrations to perforate this type of stabilizer. You may want to choose a water soluble product.


Embroidering the Design


Advance your machine to the first stitch in the design. Manually turn the hand wheel of the machine to pull the bobbin thread to the top. Many machines will sink the needle in the center of the design and then travel to the first stitch. If you pull the thread up here and the design doesn’t start in the center, you will probably end up embroidering over a long thread tail later in the design.


Hold both thread tails for the first couple of stitches; do not trim.


You may get better stitch formation if you slow your machine down.


When the design is finished, leave a bobbin thread tail several inches long. Pull the bobbin thread to the back or use a tapestry needle to inserted near the stitch to bring the tail to the wrong side. Tie off the starting and ending thread tail with a knot close to the fabric to secure if desired and trim threads to about one inch long.


Other Notes:

You will need to change the bobbin whenever you want to switch to a new color. Stop the machine, remove the hoop and follow the steps for running out of thread.


Sewing Continuous Hoop Designs

Endless or continuous hoop designs are specially digitized for creating borders and other long connected designs seamlessly. Some collections may have corner connectors included to permit easier continuous borders around a corner.


Sewing these designs is quite easy, especially when using one of the specialty hoops that are available for most home embroidery machines with a minimum 5” x 7” sewing field. This How To covers tips for getting good results with specially digitized continuous designs and an appropriate hoop.


Many embroidery programs provide tools for building continuous designs. These instructions only cover working with pre-made designs intended for this use.


Supplies

  • Design specifically digitized for continuous hooping by Lindee G Embroidery
  • Appropriate hoop
  • General embroidery supplies
  • Fabric cut into strips and pieced if necessary
  • Suitable stabilizer
  • Starch (optional)


Design Notes


Continuous designs are easier to align when a registration stitch is included. I’ve found a line of basting stitches in the form of a “Z” is much more accurate than a single stitch point. The Z provides more stitches to verify placement, while a single point only provides a start point that is also a pivot point allowing the design to more easily get off track.


Each continuous design has a starting Z stitch and an ending Z stitch to make perfect connections easy. Some designs may have a pair of Z stitches at each end. These registration marks are longer, set as a separate color change, with one at the beginning of the design and a second at the end of the design. These stitches are meant to be temporary and removed after the embroidery is complete.


These stitches also make it easy to combine elements in software if you have a larger sewing field. The Z stitches are set in a different color for utility reasons. A color change will force the machine to stop and it makes it easy to skip these stitches or delete them in editing software, if desired.


I usually just sew the first registration stitches using the first color of the design (color #2) and the last set of registration stitches using the last color of the design.


While these designs are intended for a specialty border hoop, they can also be used with standard hoops. With standard hoops, you’ll need to pay a little more attention to hoop and aligning.


About the Hoop

Most specialty border hoops use a clamping mechanism to allow for easy rehooping. Simply release the clamp, slide the fabric to the next place, align the needle, and sew. Due to the clamp mechanics, it’s important to understand where you can place the embroidery—and that is within a few inches of the hoop side where the clamp hinges.


Fabric Preparation


When cutting your fabric, you’ll need to allow a few extra inches at each end to allow for hooping. Depending on your project, you may want to piece strips together either before or after embroidering.

For best results, plan your design to sew from one end to the other. If you try sewing from the center out, you’ll need to mirror one half for the pattern to match.


You also need to consider how you will stabilize the fabric. On washable fabrics, starching the fabric helps tremendously. For backing, I prefer to use a softer stabilizer like fusible mesh cutaway or wash-away fiber. Crisp tearaways will be creased by the hoop making it harder to rehoop without pressing. If a tear-away is needed, slide a smaller piece under the hooped and stabilized fabric.


When using a non-fusible stabilizer, I sometimes machine baste strips of stabilizer to the fabric (using a sewing machine, not a baste in the hoop feature), especially when working on extra long pieces or strips that will require a long period to embroider.


I also like to mark guide lines on the fabric using dressmaker’s chalk to keep the design from skewing over multiple repeats. I generally draw these guides to align with the Z stitches rather than the actual design center. Test any marking aid you use to make sure it can be completely removed.


If the strip is quite long, roll the fabric around a cardboard tube and use clips or pins to secure the tail around the tube. This keeps the fabric clean and reduces additional wrinkling. It will also reduce the possibility of the fabric tails becoming caught while sewing.


Sewing


Sew from the top of the strip to the bottom. When rehooping, the bottom of the previous design needs to be just within the upper edge of the sewing field so that the Z stitches can be aligned. This means the upper edge of the hoop will be over an embroidered area, which translates to uneven hoop tension all the way around. If you are using a standard hoop, make sure it is not too tight to avoid damaging the embroidery.


You can skip the first Z on the first pattern and the last Z on the last pattern unless you plan to connect the ends to each other. When the embroidery is complete, remove the Z stitches and stabilizer.


Other Notes:


If you want to mirror designs, be sure to test first to make sure they will connect properly. Also, you may need to edit the designs to add extra registration stitches.


Stabilizers - The Why, What and Where
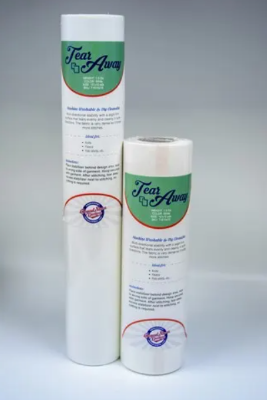
There are just so many different stabilizers out there- how do I know which one is right for my project that I am working on today??? Do I use a heavy cut away stabilizer, what if I am working on something that will be touching sensitive skin such as a babies? We have put together a comprehensive and up to date list and explanation of just when you want to use the different stabilizers and the why! Exactly what you need to know about pairing the right stabilizer with your fabric selection and design for the perfect machine embroidery project!

Free Design Warnings

3 free designs per week with no purchase,

6 free designs per week with $35 purchase, or

9 free designs per week with $75 purchase.

Close
Close