What you’ll need
- White felt: 1 piece to fit the hoop and one piece for the back 6” x 8”
- 1- poly mesh stabilizer to fit hoop
- Embroidery thread as stated in color sequence
- 8” of ¼” ribbon—your choice of color
- Glue stick/painter’s tape
- Optional: Embroidery software
- Optional: pin back
Featured "Windmill" Designs
https://www.grandslamdesigns.com/i-have-a-dream-embroidery-design
https://www.grandslamdesigns.com/mlk-day-embroidery-design
Notes
- If the fleece being used is a bit thin, use two pieces for the front.
- Using embroidery software makes projects easier. The files can be created and saved for future use.
- Most newer machines have the capability of adding text and borders, so if you don’t have software, just use the information for creating the project in software, for adding the steps in your machine.
Preparation
- Please read through all the instructions before beginning.
- Gather the materials needed.

- Prepare the file in the embroidery software.
- Insert the I have a Dream file and position it toward the top of the embroidery hoop.
- Insert the MLK Day ribbon and center and position it about ¼” below the first design.
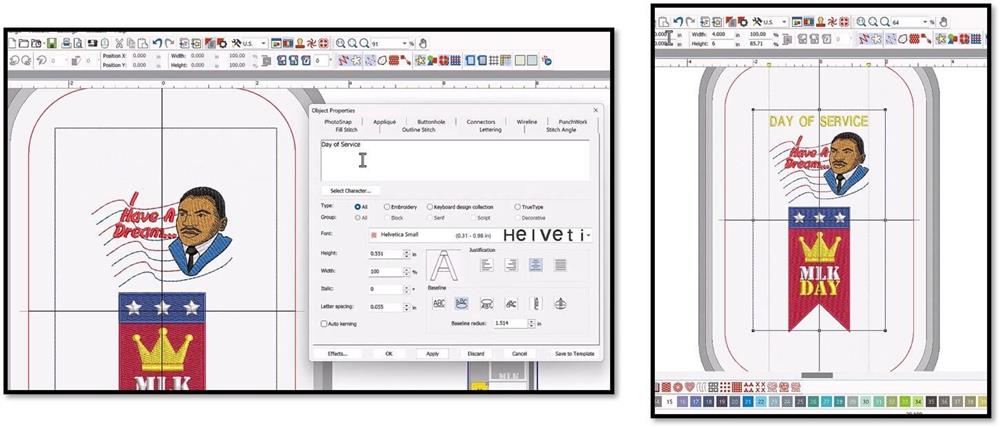
- In the lettering portion of the software, type DAY OF SERVICE in your choice of font.
- Position the text, centered, above the first design.
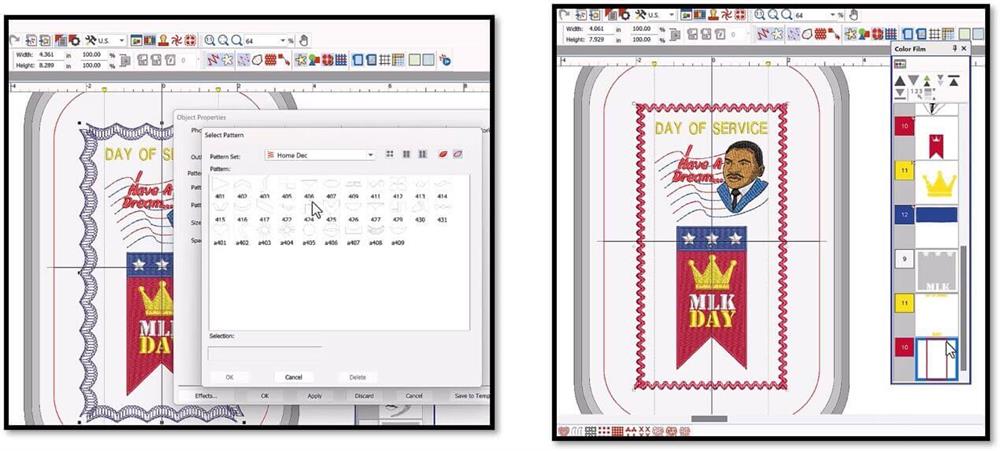
- Create a border using the tool, and choose a pattern stitch to create a nice border around the whole design as shown. This one, when stitched, looks like ric-rac.

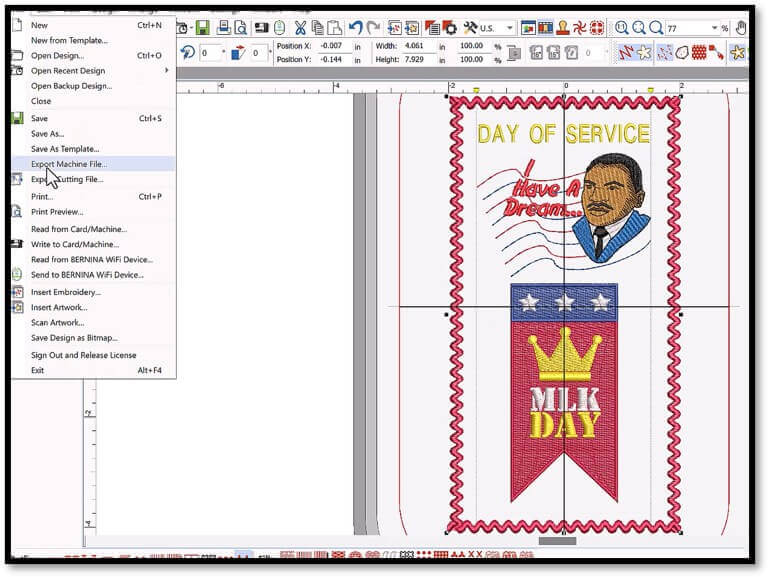
- Be sure to save the file and then export the design in the file format needed for the machine.
Machine prep and hooping
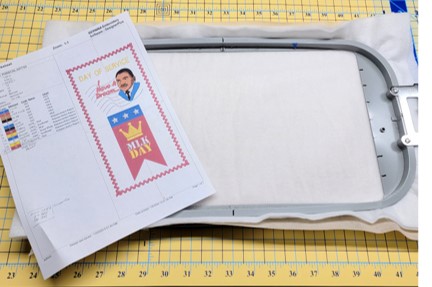
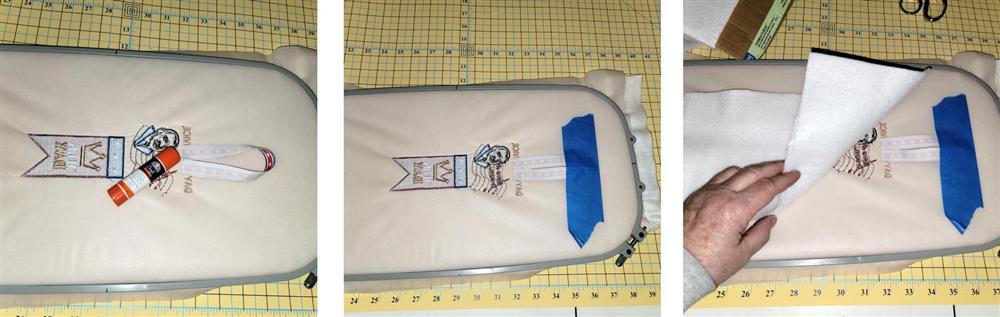
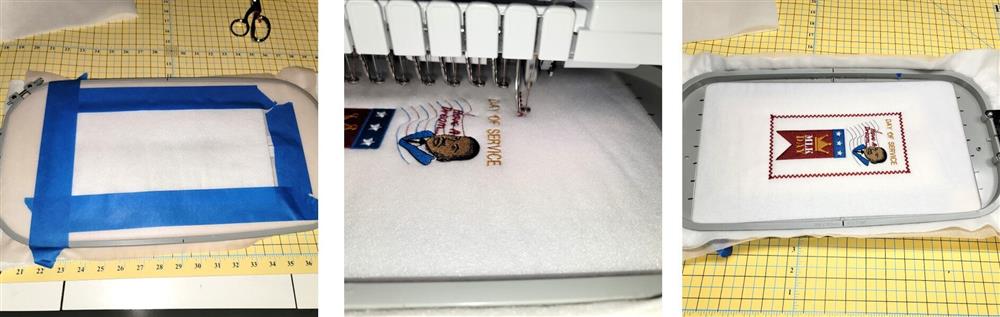
- Hoop one piece of polymesh stabilizer with the fleece to fit the hoop.
- Load the design on the machine, rotating if necessary.
- Load the threads and set the colors on the machine.
- Be sure to add a pause or stop prior to the last step of stitching the border so that the ribbon and back felt piece can be added.
Stitching

- Stitch the design following the color sequence.
Border
- Remove the hoop from the machine, but do not remove the fabric from the hoop.
- Flip the hoop over.
- Add the ribbon piece at the top of the embroidery; use a bit of glue stick to hold it in place temporarily.
- Center the back felt piece on the back of the embroidery; use a bit of glue stick (or painter’s tape) to hold it in place temporarily.
- Place the hoop back on the machine.
- Make sure the back felt piece is still in position.
- Stitch the final color, the border.
Final Steps
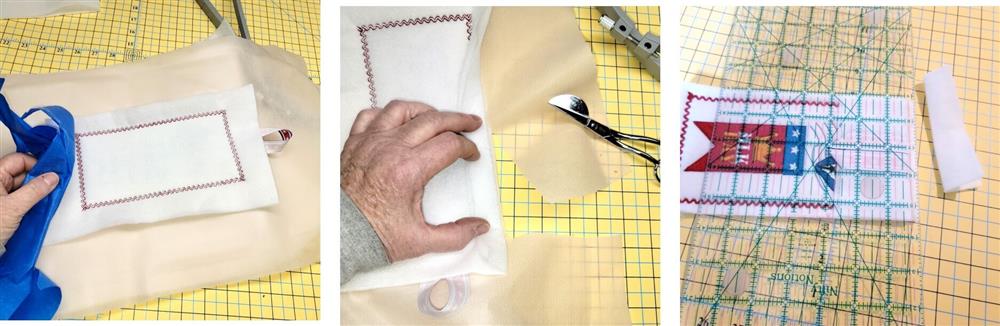
- Remove the project from the hoop, and remove the painter’s tape.
- Fold back the felt front and back pieces and trim the poly mesh stabilizer close to the border.
- Using the border as a guide, trim the edges about ¼” away from the outer edge of the border.
- Be sure not to cut the ribbon!

- To wear the ribbon on the Day of Service, affix a pin back (found in the jewelry findings section of a hobby store) to the upper back of the ribbon.
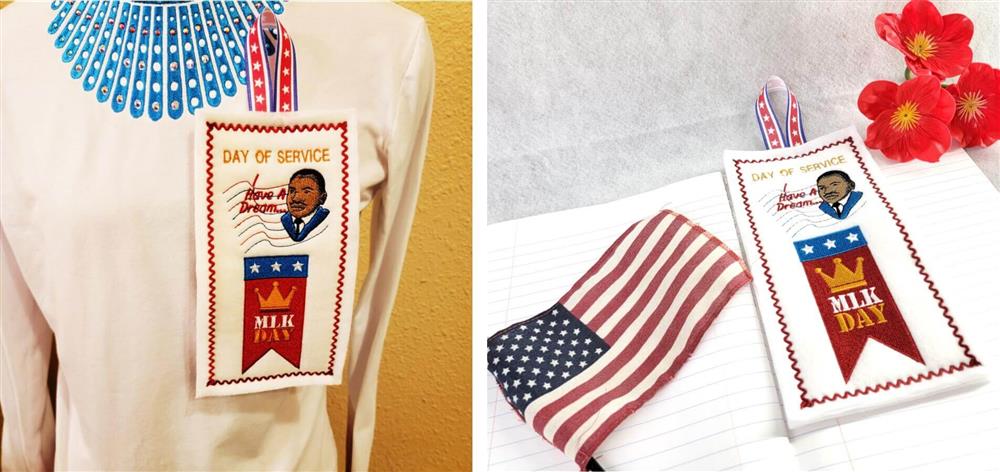
- Wear the ribbon on a shirt or jacket when performing your Day of Service. When not in use, use the project as a bookmark.
Conclusion:
Congratulations! Whether for yourself or a gift, learning new ways to use embroidery designs increases your enjoyment of stitching. There is no doubt your project will be a “Grand Slam!”
By the “Grand Slam Designs” Team