


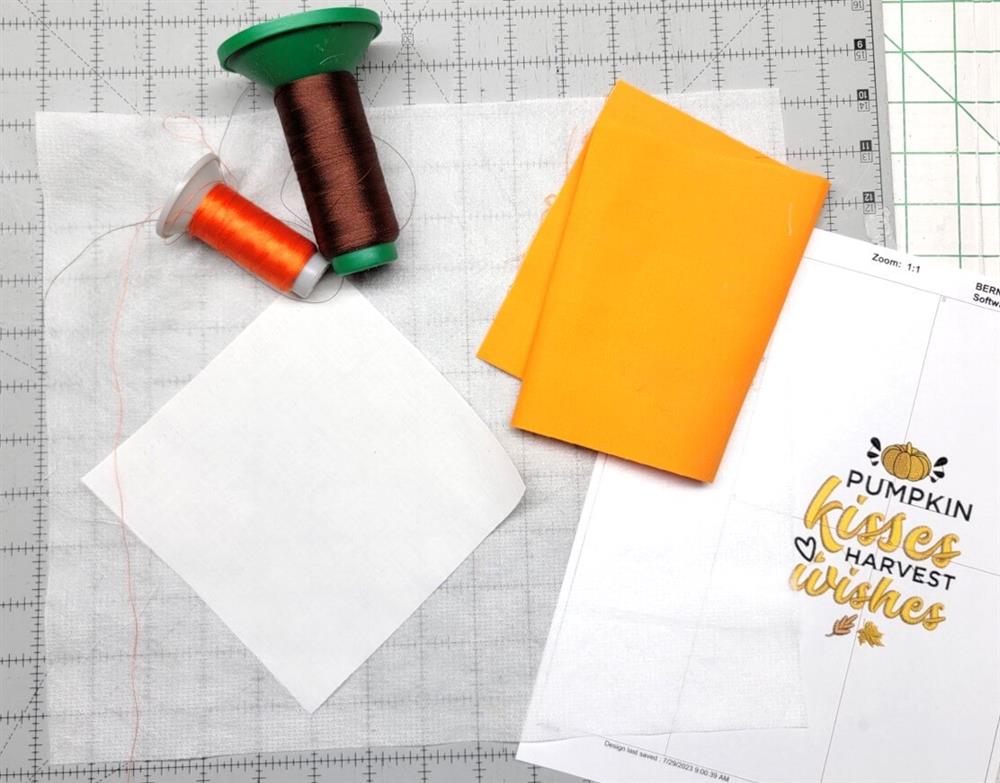
What you’ll need
For each coaster:
1- Poly mesh stabilizer to fit hoop
1- 6” square white cotton fabric
1- 4.75” square cotton batting
2- 6” squares backing fabric
Embroidery thread as stated in color sequence
Embroidery software to add square stitch files (or can be done at the machine if it is capable)
2- 5” long x 1” wide heavy duty adhesive magnetic strips
Featured Designs
https://www.grandslamdesigns.com/pumpkin-kisses-harvest-wishes-embroidery-design
https://www.grandslamdesigns.com/leaves-are-falling-embroidery-design
Notes
This project may be created as just coasters—just leave off the magnetic strips.
Starch and press the fabrics well, and then cut them to size.
Design Preparation
Preparation of the design was done in software; however, if your embroidery machine has a the capability of adding a stitching box around the outside, then software is not needed. Just add the boxes and place them in the order needed for stitching as outlined below.
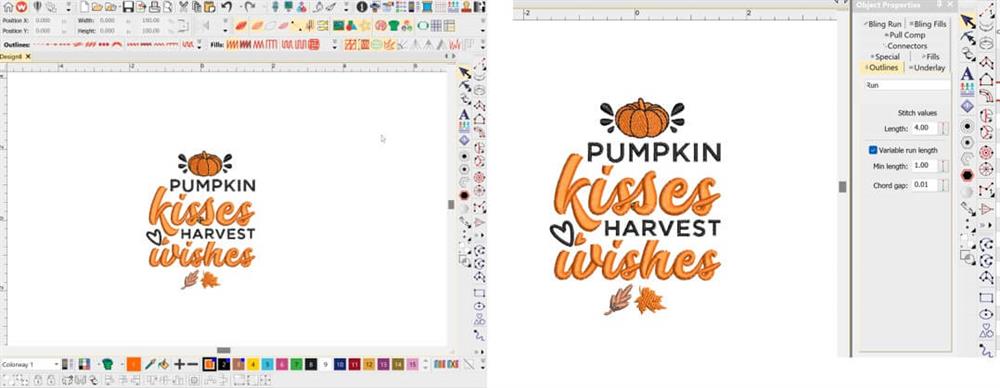
- Import the Pumpkin Kisses design into a new page in the software. Save as a new file so as not to overwrite the original file.
- In the Object Properties, set the stitch length to 4 mm—this will be the placement stitch.
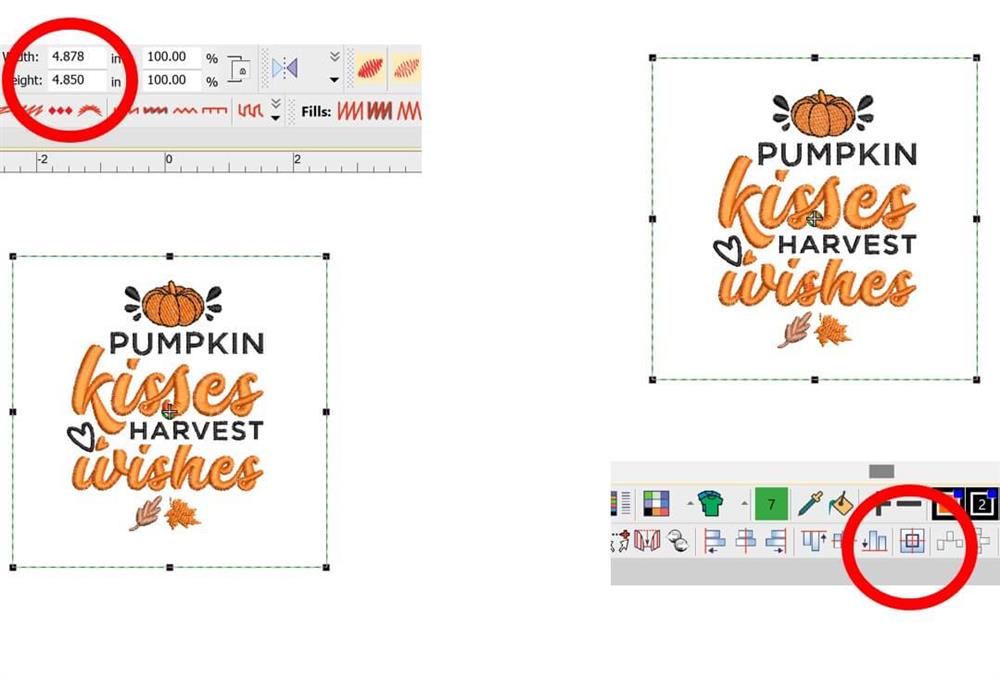
- Create a bounding box around the design and size it to a width of 4.878mm by 4.850 mm in height.
- Select the box and then select the design and use the Center Alignment tool to place the design in the center of the box.
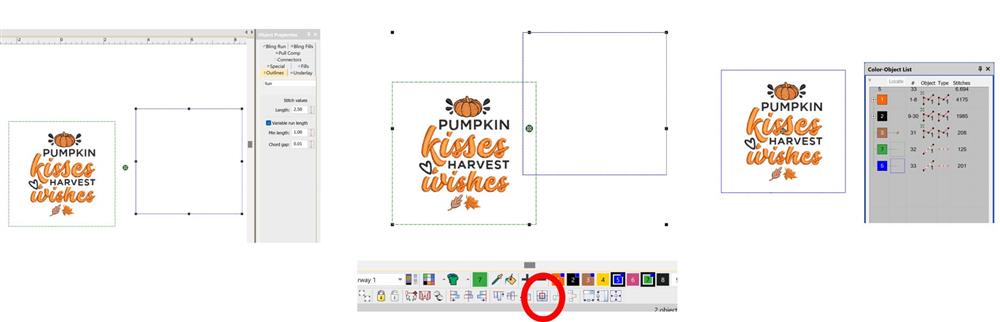
- Make a copy of the first box and change the stitch length to 2.5mm; this box is to tack down the fabric.
- Select this second box and align it with the first box, using the Center Alignment tool.
- Because they were brought in after the design, the boxes will be at the bottom of the color sequence list.

- Select both boxes and move them to the top of the color sequence. Be sure the colors are different than any of the other colors so that the machine will stop after each color.
- Now select the Tack Down box from the color list, copy and paste it—this will sequence it to the bottom of the color list to sew last.
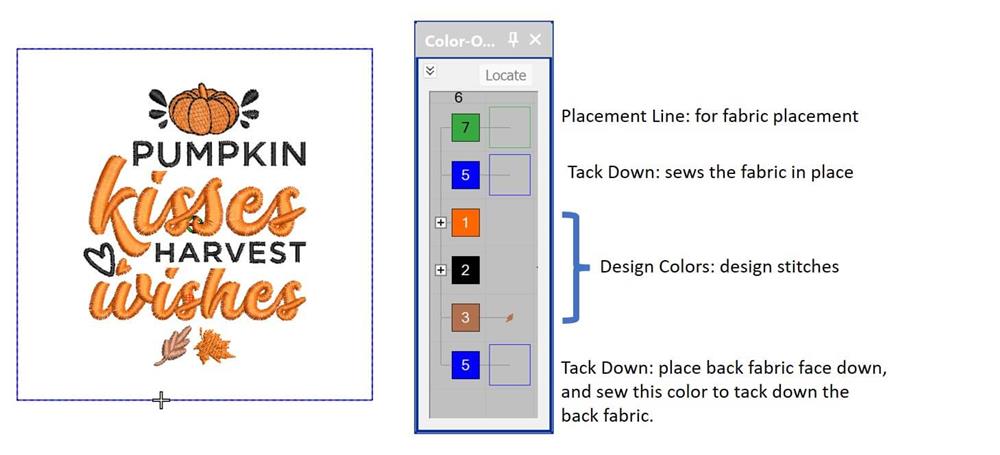
- So now the color sequence should look like this.
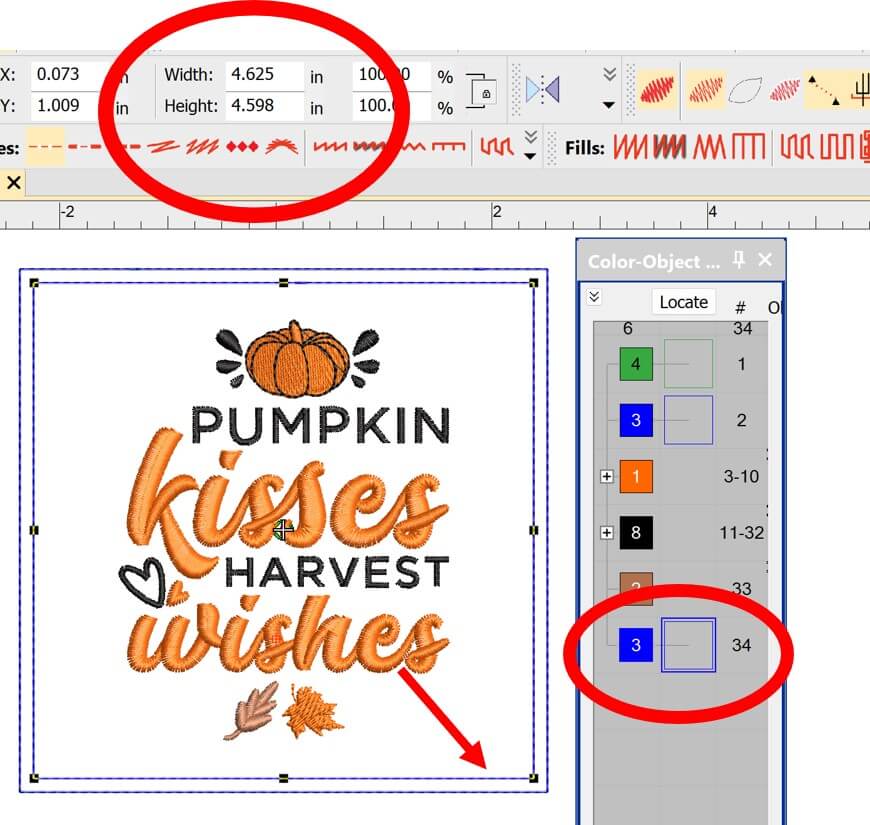
- The last box will be to stitch the backing fabrics in place. Because there will be some push and pull as the design stitches, the last box needs to be made smaller. Select the box and change the width to 4.625, and the height to 4.598; this box will now stitch inside the previous stitched boxes. Save the once more and then export the file for stitching.
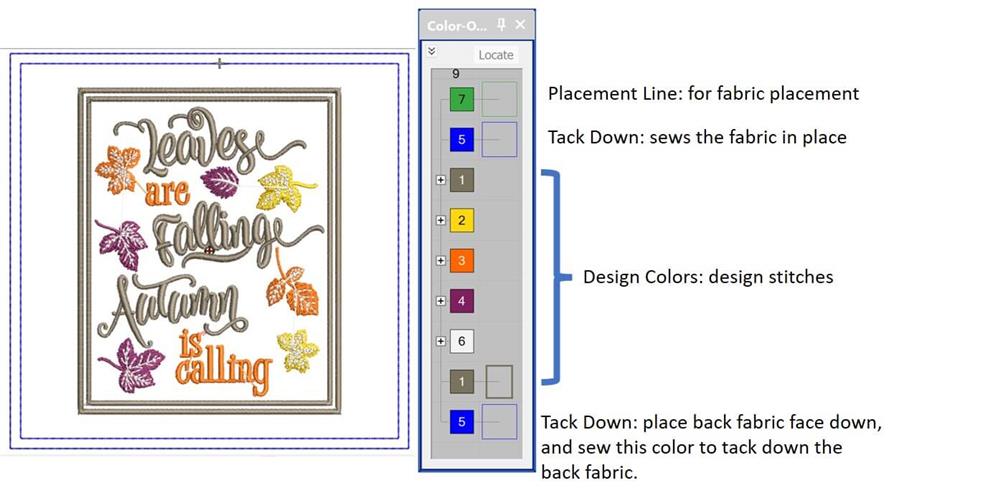
- Prepare the Leaves are Falling design in the same manner. To save time, just copy the boxes from the first design and paste them into the second design, and save it with a new name so as not to overwrite the original design. Be sure to center the design inside the boxes. Save the design once more and then export the file for stitching.
Machine Prep, Hooping, and Stitching
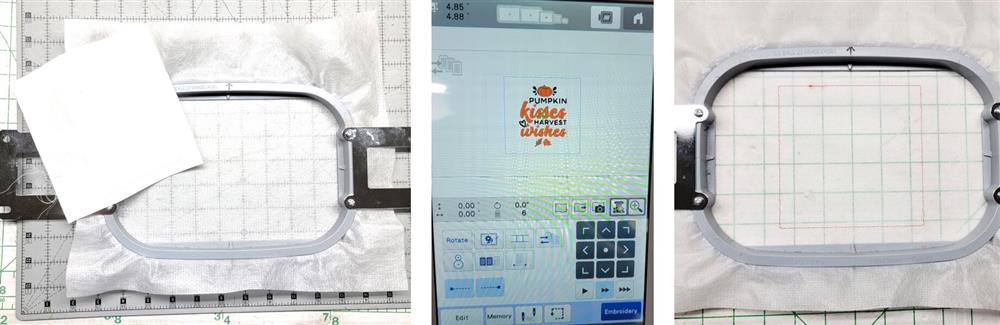
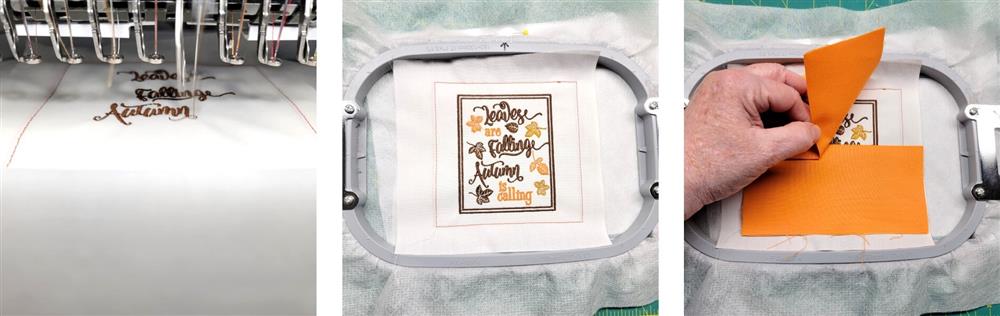
- After the designs are prepared, it is time to stitch the designs. Hoop a layer of poly mesh stabilizer. Load the Pumpkin Kisses design on the machine and select the thread colors. Stitch Color 1, the Placement Line.
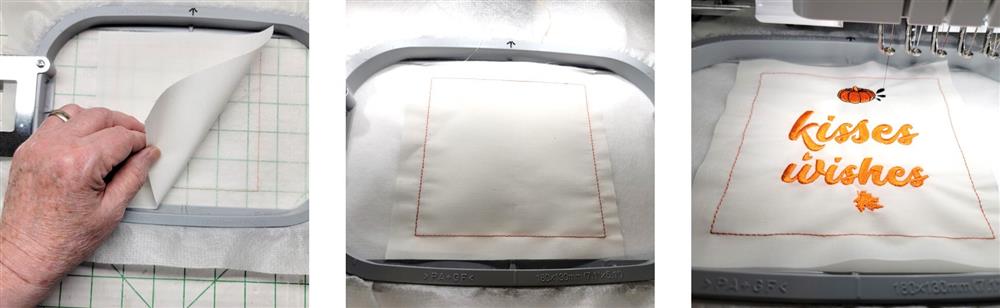
- Center the piece of white cotton fabric over the placement line. Stitch Color 2 to tack the fabric in place. Continue stitching the design following the color sequence.
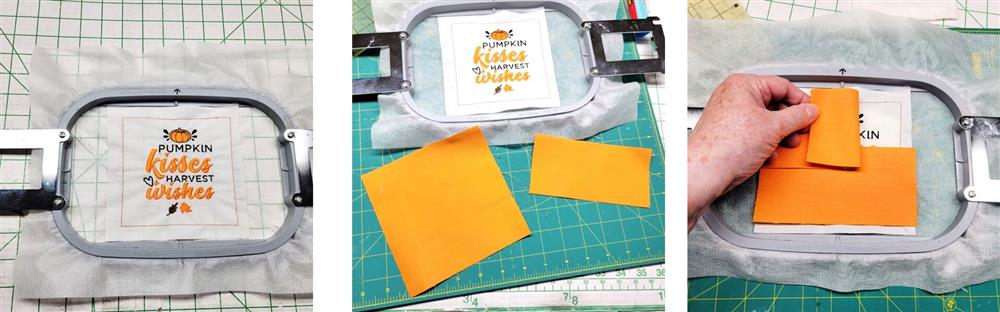
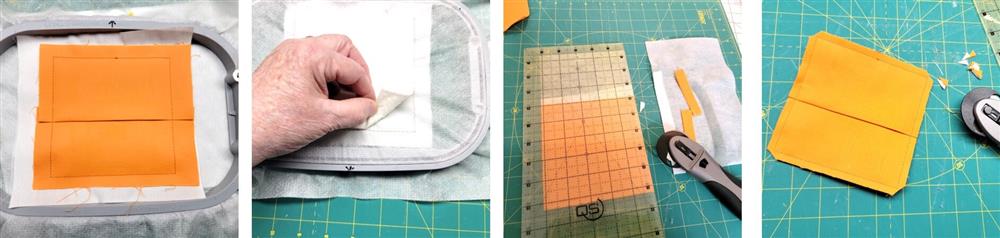
- Remove the hoop from the machine. Fold the two 6” backing squares in half and press well. With the folds placed to the center and overlapping about ½” or so, place the backing squares in place as shown.
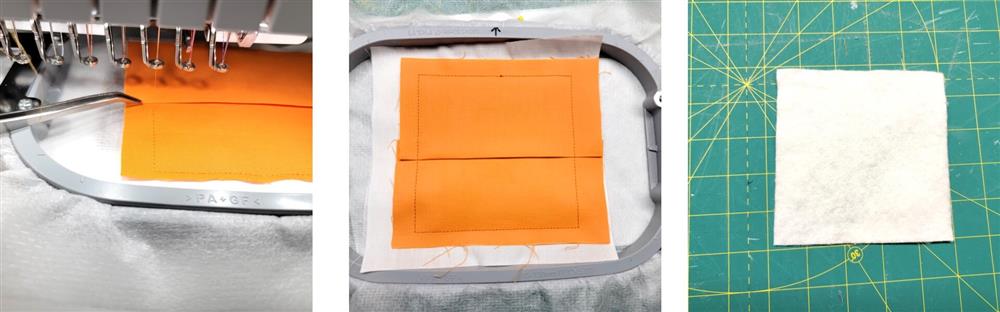
- Place the hoop back on the machine, slow the machine down, and stitch the last color to tack the backing fabrics in place.
- Cut the square of batting.
Final Steps
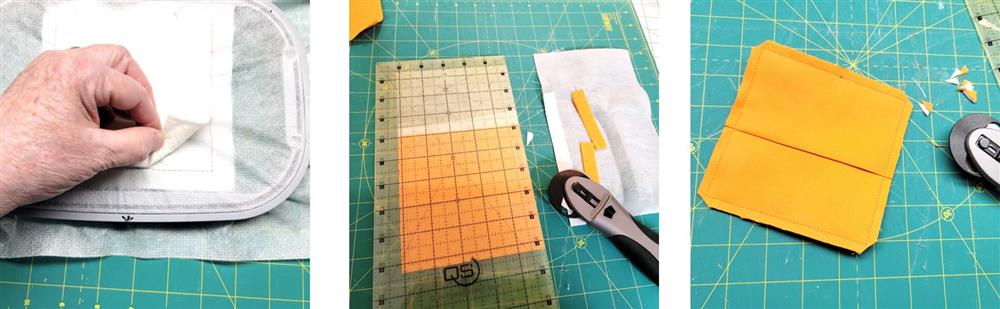
- Remove the hoop from the machine and using a bit of glue or spray, tack the batting inside the lines of the inside stitching lines.
- Trim the coaster ¼” outside the outer stitching lines all the way around.
- Clip the corners to eliminate some of the bulk.

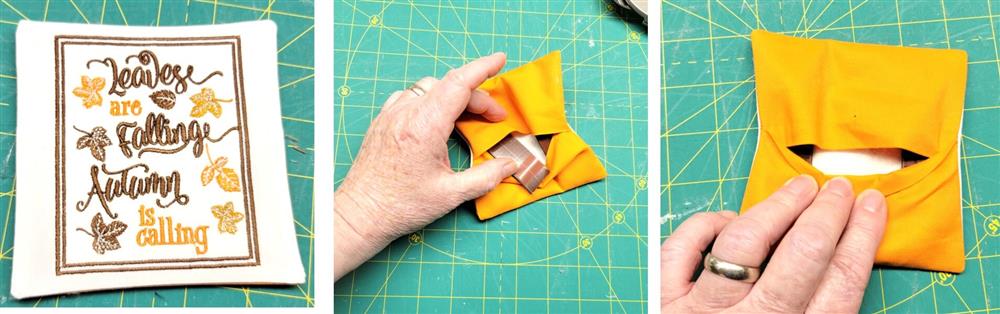
- Turn the coaster right side out, forming the corners well; press.
- Using old scissors, cut two strips of magnets and remove the protective paper.
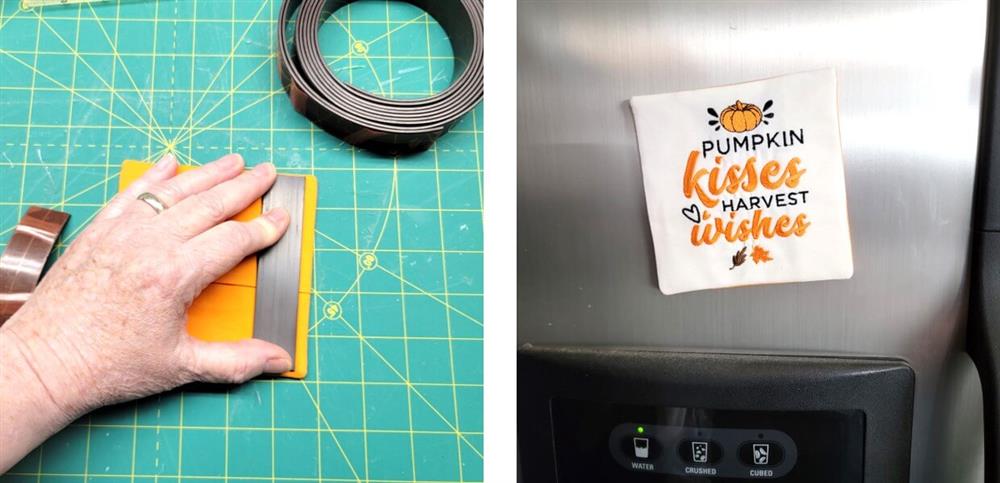
- On the back, press the magnets in place.
- Place the coaster on a flat surface and put a heavy book or two on top of the magnets to make sure they’ll adhere to the fabric.
- Place the magnetic coaster on the refrigerator until it is needed to be used as a coaster!
Repeat the Steps for the Second Coaster
- Repeat all the steps for the second coaster.
- Load the design.
- Stitch the design.
- Add the backing pieces.
- Tack the backing in place.
- Add the batting.
- Trim the coaster and clip the corners.
- Turn the coaster right side out and press.
- An option to adding the magnets to the back of the coaster over the fabric, is to insert them inside, through the back of the coaster. Just be sure the magnets are strong enough to still adhere to metal. These magnets weren’t strong enough, but there are really strong magnets available at hardware and craft stores.

- What FUN! Dual-duty Magnetic Coasters. Decorate the refrigerator and have them handy when needed to protect furniture.
Conclusion:
Congratulations! Whether for yourself or a gift, learning new ways to use designs increases your enjoyment of stitching. There is no doubt your project will be a “Grand Slam!”
By the “Grand Slam Designs” Team

