


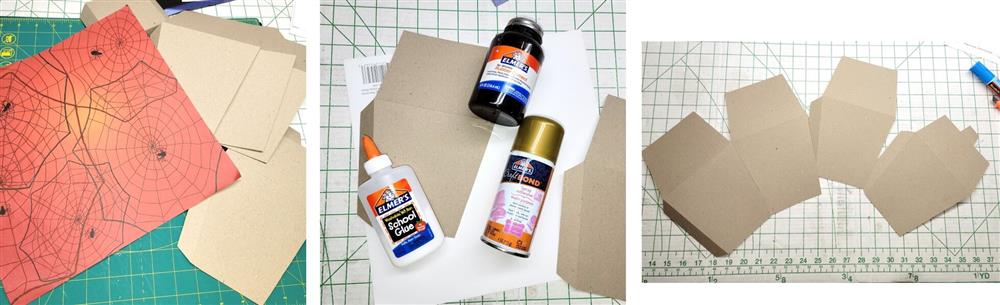
What you’ll need
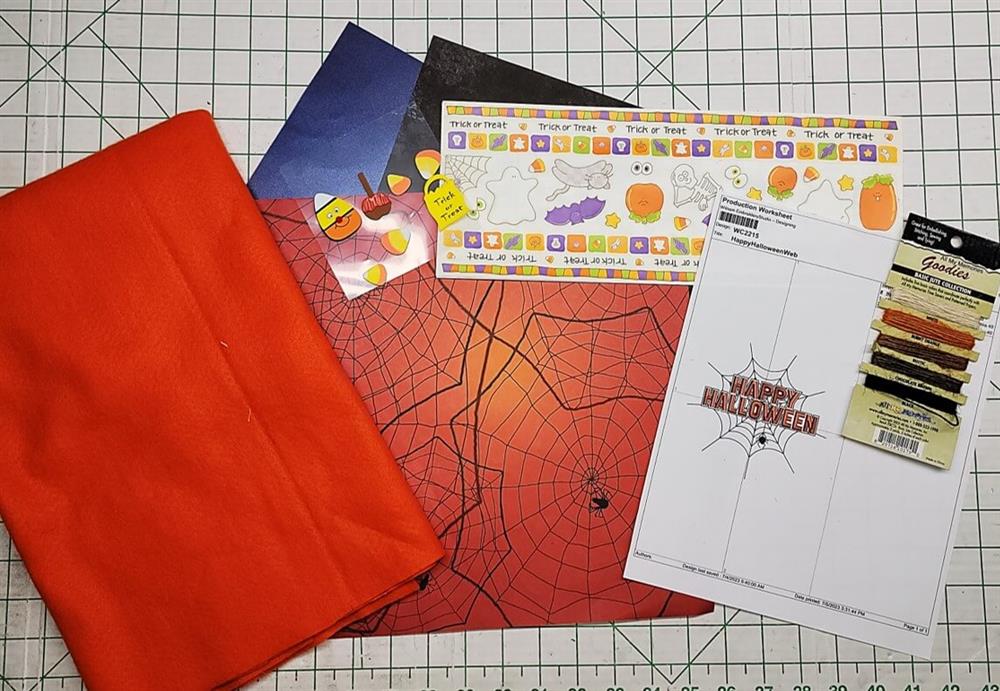
Felt-choose quality polyester felt: colors of white, black, orange, purple and yellow are good choices
Cut away stabilizer to fit hoop
Embroidery thread as stated in the color sequence and to coordinate with the felt
Link for Chinese box template: https://tinyurl.com/94ztzdx3 (follow template instructions for printing and final assembly)
Card stock and printer paper for printing box template (orange, black, or Halloween themed are good choices)
Glue for adhering paper
Glue to adhere felt to the various surfaces
Halloween Candy
3/8” Halloween themed ribbon and stickers for decorating
Featured Design:
https://www.grandslamdesigns.com/happy-halloween-100-embroidery-design
Other designs that would work well:
https://www.grandslamdesigns.com/happy-halloween-99-embroidery-design
https://www.grandslamdesigns.com/halloween-boo-3-embroidery-design?variant=1
Notes
- Dimensions for the felt are not given because different size containers may be used; just measure and determine how much felt is needed.
- The design comes in various sizes; use the one that fits the box being created
- For a fun option, use “Glow-in-the-Dark embroidery thread in parts of the designs, was done for the Happy Halloween text in this project—kids love this thread!
- Depending on the felt, a ball point or universal embroidery needle may give better stitch quality.
- If using black card stock for the Chinese Candy Box, print on regular white paper first, cut out the template, and then trace onto the black card stock and cut out—black ink won’t show up on black card stock.
- Slow the machine way down when stitching on felt.
- 12” square sheets of scrapbook paper were used for this project. They are thin, so the box was created from cardstock first and then the paper glued on top. If you can find cardstock in Halloween themes, try that, too.
- Let the kids have fun decorating the completed box with stickers, ribbons, etc.
- If you don't want to go through all the steps of creating the box, craft stores have Chinese food boxes for crafting; purchase one of those, take it apart, glue on the paper, and reassemble.
Preparation
- Read through all the instructions before beginning and assemble all the materials.
- Begin by creating the box.
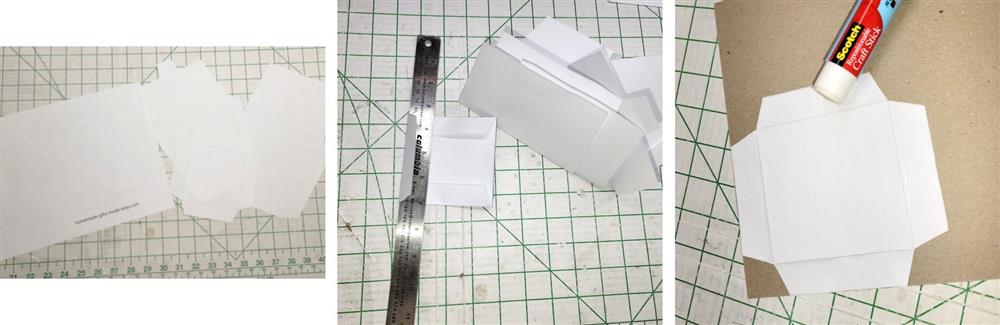
- For this project, the box pattern was downloaded from the link given above and printed on standard computer paper.
- Cut out the templates from the paper along the lines and fold along the lines -use a ruler to get nice, straight folds.
- Use a glue stick to adhere the templates to the card stock.
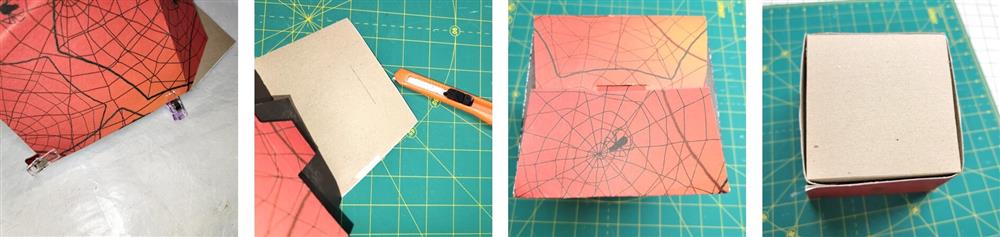
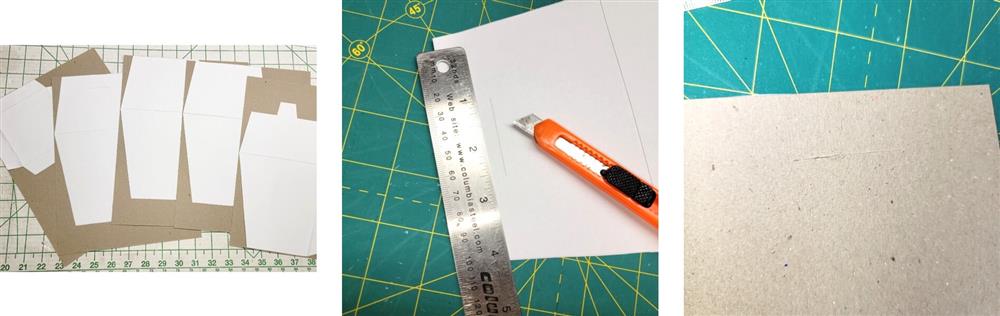 Cut out the templates from the card stock. Make a slit in the box top as indicated on the template.

 Using the template lines as a guide, with a craft knife and ruler, score the fold lines on the outside of the box pieces—this will help the box fold nicely.
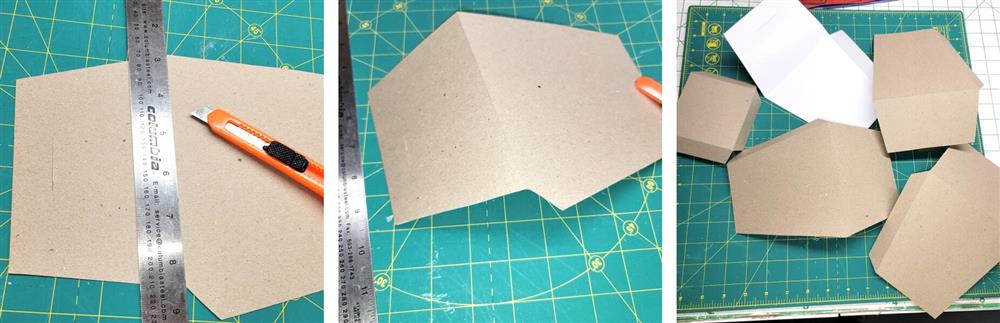
 Determine where the design will be on the box front, and make sure the design will fit within the hoop.

 Decide which decorative scrapbook paper will be used on what sides of the box. For this project, the sides were covered with black paper and the front and back with spider web paper.
- Choose the glue to use for the box assembly. For the project, Elmer’s School Glue was used.
- Lay the card stock pieces in order they are to be assembled.
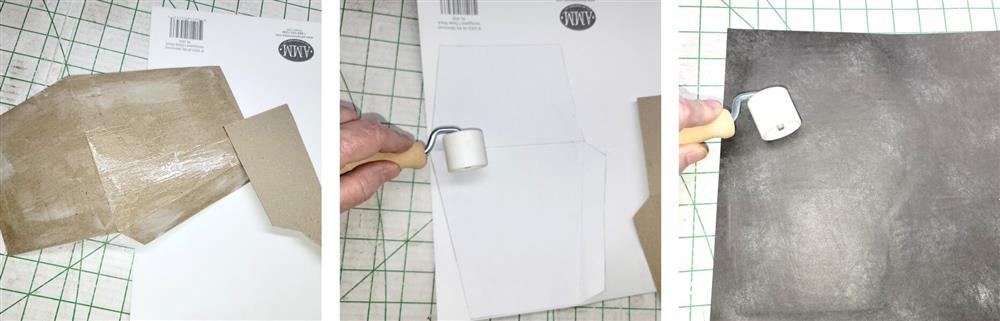
- Use a scrap piece of card stock to evenly spread glue on top of the template, place the glued side of the template to the back of the scrap book paper and use a brayer to adhere the paper and glue together.
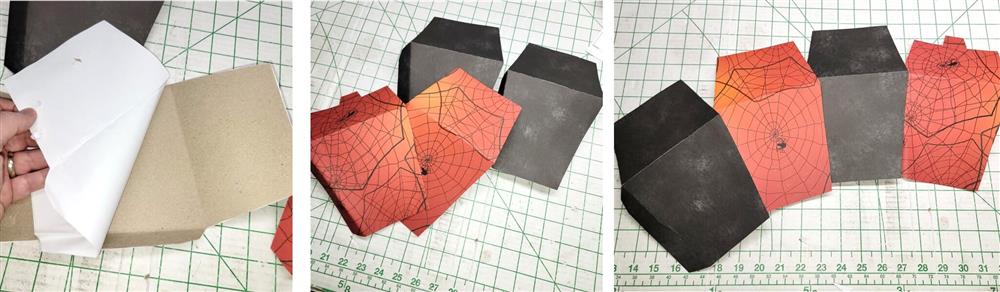
- Remove the paper template pieces as you go.
- Cover all the box sides and then glue them together.
- It is helpful to temporarily hold the pieces together with small clips.
- Cut a slit through the scrapbook paper.
- Fold the tab through the slit.
- Flip the box over and glue the bottom in place.
- Set the box aside to let the glue dry while the design is being stitched.
Machine prep and hooping
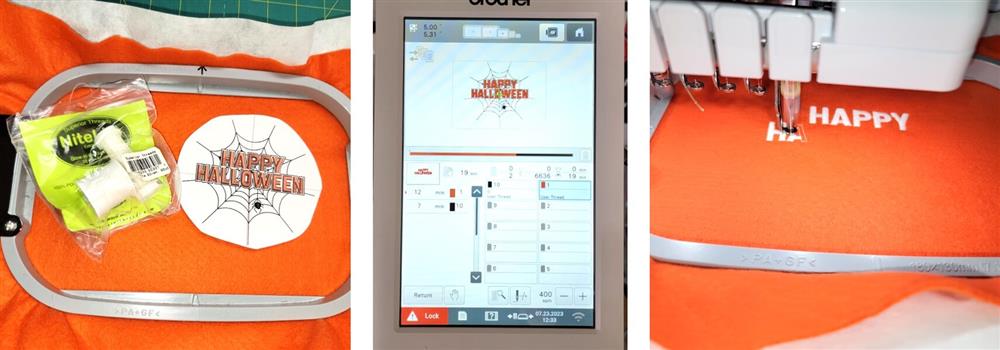
- Hoop the felt with a layer of cutaway stabilizer.
- If desired, use a glow-in-the-dark thread for the text.
- Load the design on the machine and set the colors.
- Stitch the design following the color sequence.
- NOTE: when stitching on felt, slow the machine way down. This design was run at 400 spm.
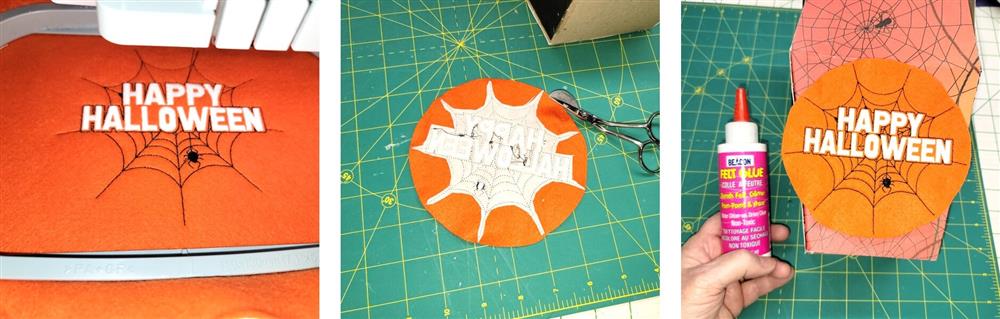
- Continue stitching the design until it is finished.
- Remove the design from the hoop and trim away the stabilizer.
- Use felt glue to adhere the design to the front of the box.
Final Steps
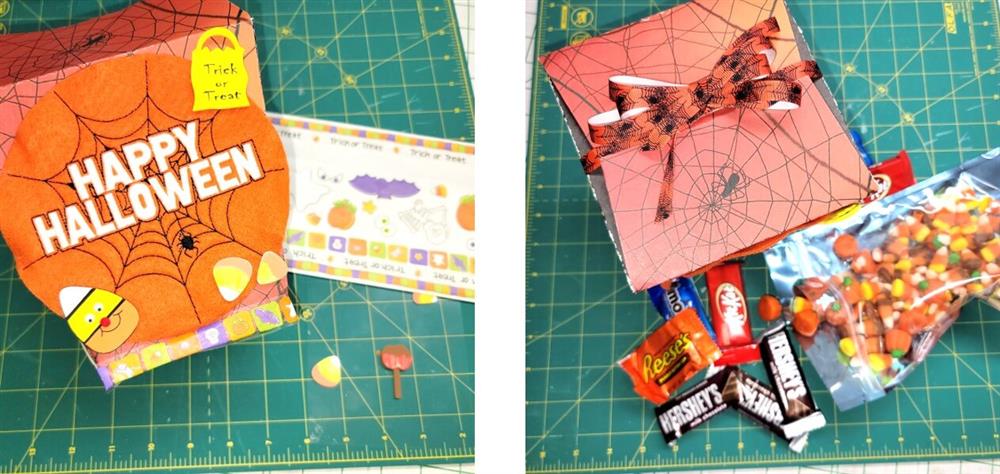
- Let the children have fun decorating the box with fun Halloween stickers.
- Fill the box with Halloween treats and tie a ribbon around the box with a bow at the top to keep the lid closed.
- Read the directions on the thread to make it glow!
Conclusion:
Congratulations! Whether for yourself or a gift, learning new ways to use embroidery designs increases your enjoyment of stitching. There is no doubt your project will be a “Grand Slam!”
By the “Grand Slam Designs” Team
By the "1Z Embroidery" Team


