


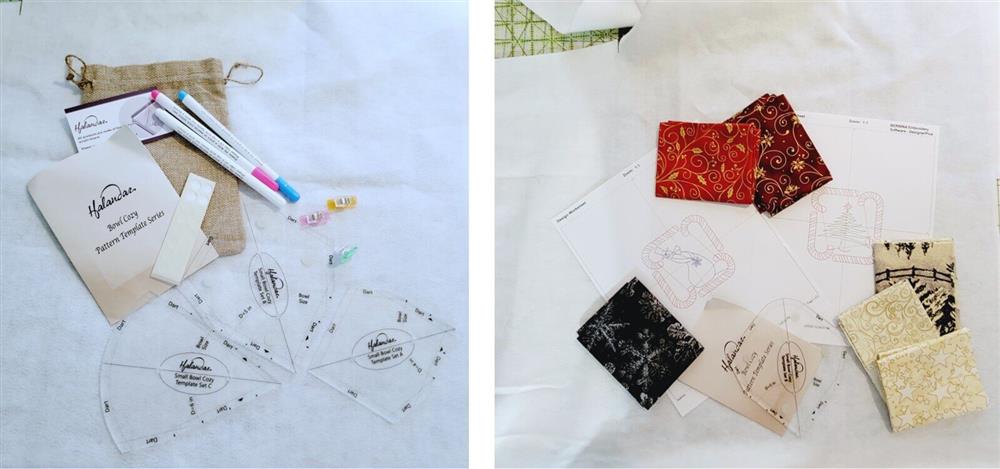
What you’ll need
- Cozy Bowl Template Set (Template B from the Halandar Bowl Cozy Pattern Template Series was used in this project)
- Scraps of fabrics to embroider and fit template size used- 4 for embroidery, 4 for contrast
- Cotton Batting- cut 8 pieces from template
- Tearaway stabilizer
- Embroidery thread to coordinate with fabrics
- Sewing thread to stitch bowl together
- Optional: embroidery software to create text, or lettering on the machine
- Printout of designs
Featured Designs
https://www.grandslamdesigns.com/sweet-snowman-embroidery-design
https://www.grandslamdesigns.com/christmas-tree-19-embroidery-design?variant=1
Notes
IMPORTANT! THIS BOWL SHOULD NOT BE USED IN THE MICROWAVE!!!
There are instruction on the Internet for other types of bowls that say they can go in the microwave; however, they do not have embroidery thread stitched on them! So, with this bowl which is intended ONLY to be used to HOLD a hot bowl, cotton batting should be used (polyester conducts heat) and either polyester or rayon embroidery thread may be used, along with festive fabrics containing metallic threads!
AGAIN! THIS BOWL SHOULD NOT BE USED IN THE MICROWAVE!!!
Preparation

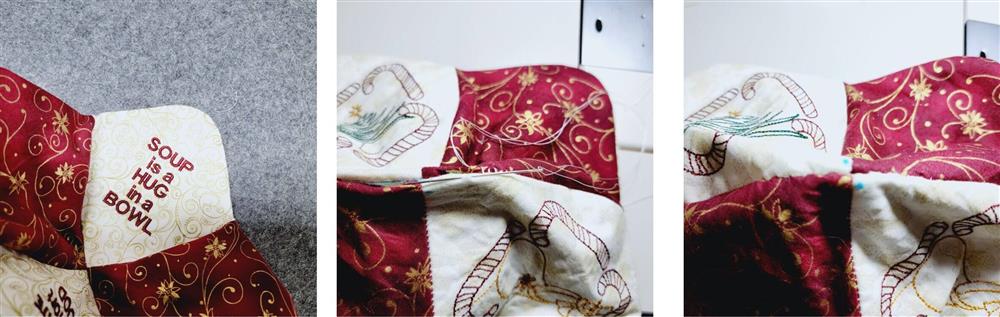
- Optional text may be used on sections of the bowl.
- If you’d like to do this, search the internet for saying such as these that you like and then create the text in the software (or at the machine) to fit within the area of the template.
- Be sure to keep the text simple and the lettering large enough so the text can easily be read.

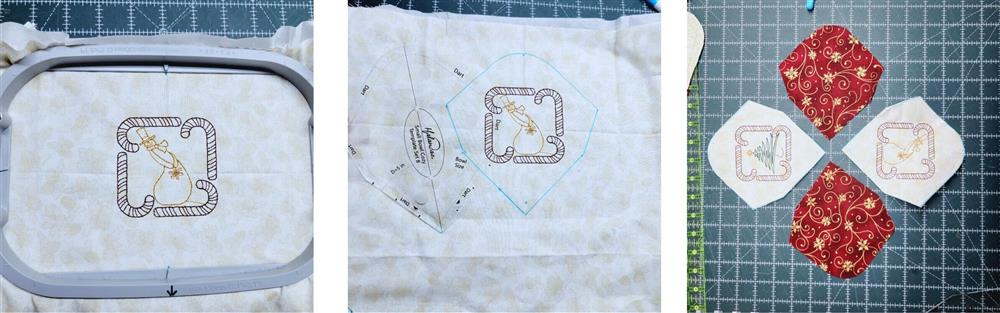
- The Harlandar template set used comes with three templates for different size bowls, along with instructions. Please read the instructions that come in the set.
- Template B was used for this project.
- The original size of the embroidery designs used were just slightly too large for the template/fabric area.

- Because the designs used were outline style designs, they may be resized 10%. This was done in software but may also be done at the machine.
- Print out another template (or do a test stitchout) to be sure the designs are as large as possible to fit the area, but small enough to be out of the way for sewing the seams and turning the fabrics to complete the bowl.

- Here 8 pieces of batting are cut, and 4 pieces for the inside of the bowl.
- If you are not doing any text, the pieces for the inside of the bowl may be cut now.
- Choose embroidery thread for the embroidery designs that will coordinate with the fabrics.
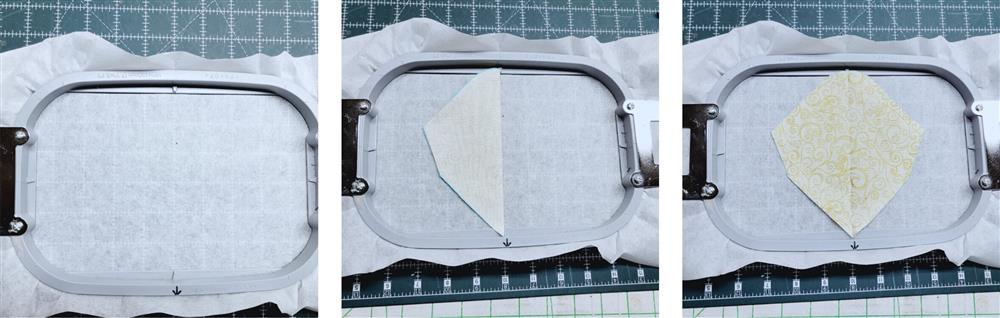
Machine prep and hooping
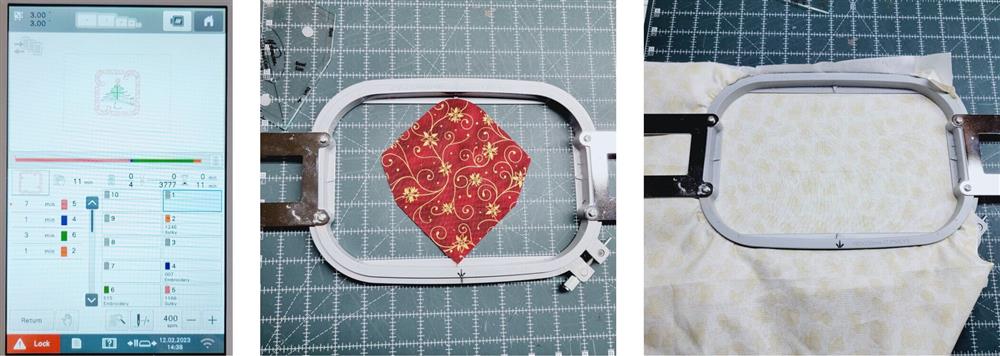
- Load the first design on the machine.
- Basically, the design will be stitched on a full piece of fabric and then cut out using the template.
- Hoop the chosen fabric with a layer of tearaway stabilizer.
Stitching
- Load the threads on the machine.
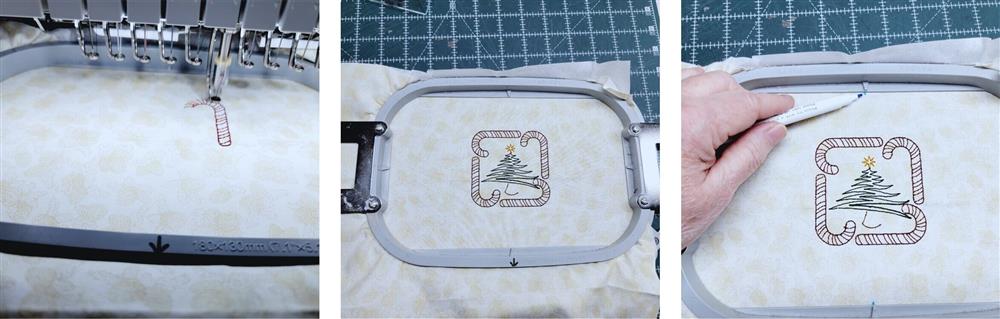
- Stitch the design with the chosen thread colors
- Before removing the fabric from the hoop, use the top and bottom tick marks on the hoop to make tick marks on the fabric; these marks will aid in aligning the template for cutting out the fabric.
- Remove the fabric from the hoop.
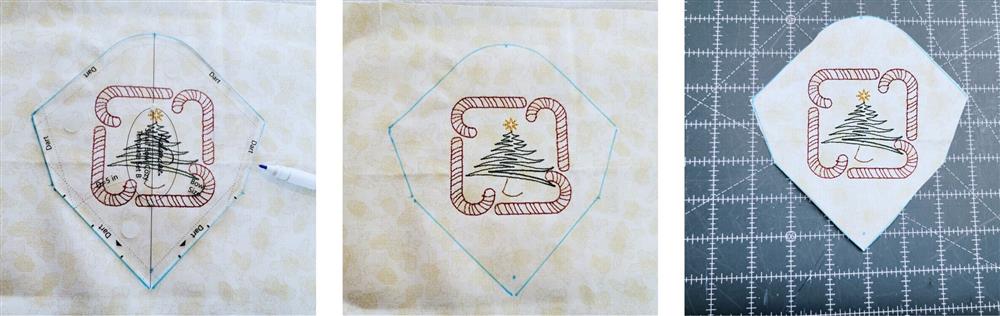
- Align the template center line with the tick marks on the fabric.
- Trace around the template.
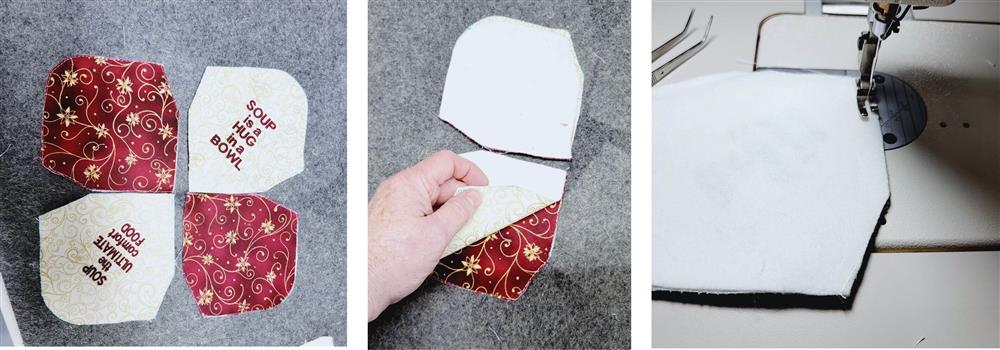
- Cut the fabric along the traced line.
- Note: to add a little additional stabilizing to the bowl, the tearaway stabilizer was left in place and cut along with the fabric; the stabilizer was left in the bowl.
- Stitch the second design using the same process as was done for the first design.
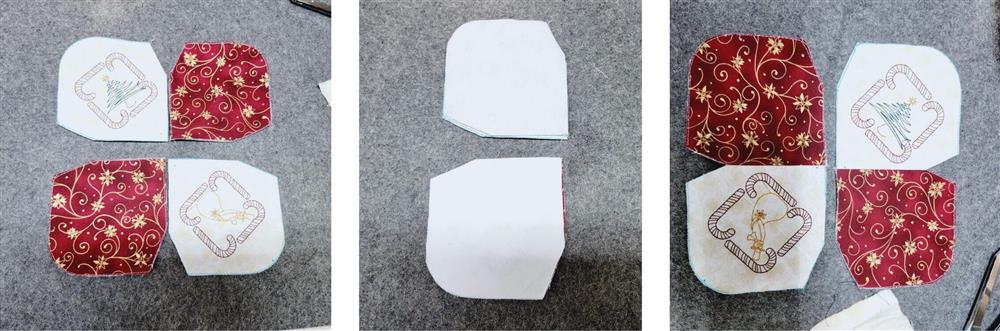
- Cut out two contrast fabrics using the template.
- If you have enough fabric, stitching of the next may be done like was done for the designs.
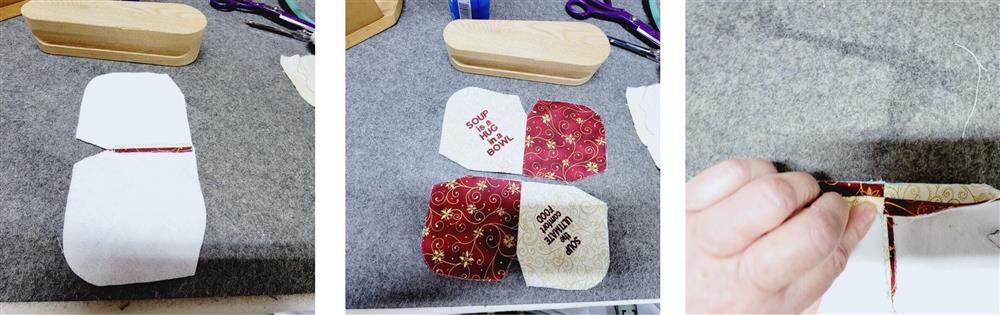
- The fabrics had already been cut when it was decided it would be nice to add some text.
- So, a layer of tearaway was hooped, and the hoop laid on a gridded board with the tick marks on the hoop aligned to the grid marks.
- The plain fabric was folded in half and aligned to the center of the hoop, and then opened up.

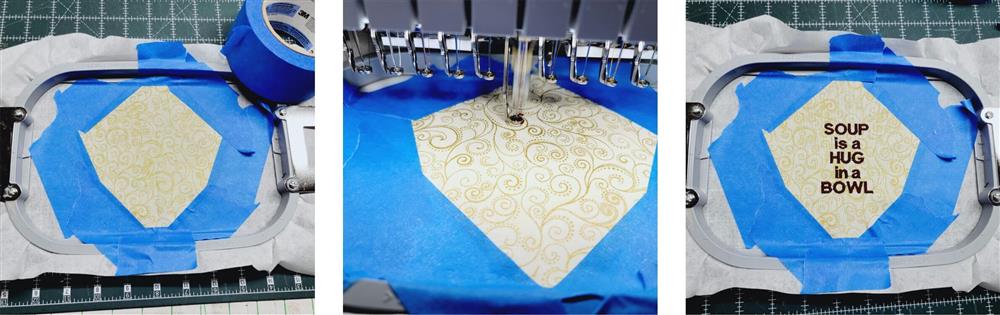
- Painter’s tape was used to carefully secure the outer edge of the fabric to the stabilizer. Care must be taken so the fabric stays centered and is not stretched out of shape.
- The first text was loaded on the machine (or text may be created at the machine).
- The machine was slowed way down for stitching so as not to dislodge the fabric.

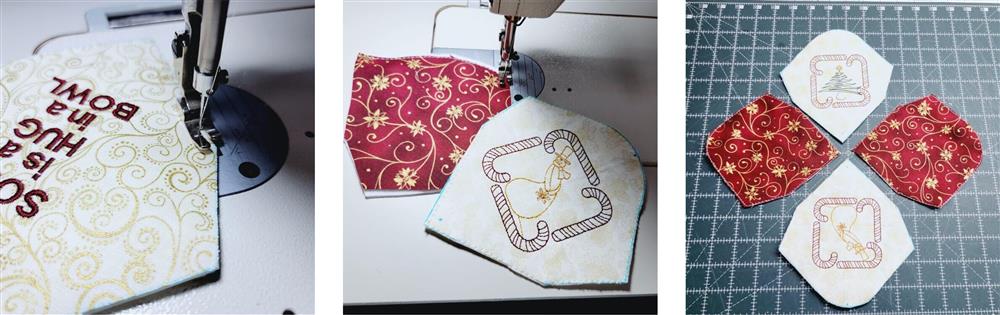
- Very carefully remove the tape from the fabric; remove the stabilizer/fabric from the hoop and trim the stabilizer.
- Double check the fabric with the template to make sure it wasn’t distorted.
- Repeat for the second text.
- Layer one piece of batting underneath all 8 of the fabric sections.
- Note: This next step is not necessary, but really made stitching the bowl together easier.
- Baste the fabric and batting together 1/8” from the cut edge all the way around each fabric piece.
- Lay out the fabric pieces as they are to be assembled.
- The straight seams will be sewn first.
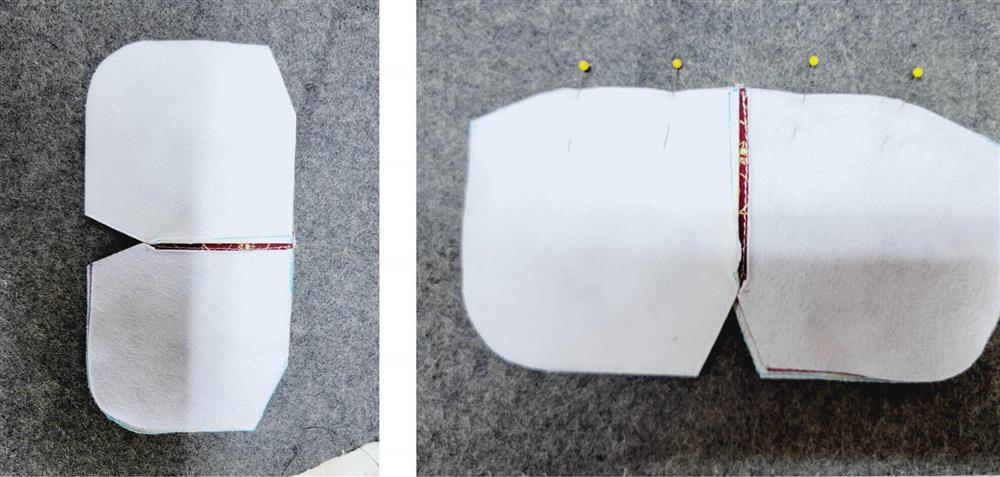
- With right sides together, place a contrast fabric piece with an embroidered piece and sew them with a ¼” seam.
- Press the seams open. If you have one, use a clapper to make the seam nice and flat.
- Now stitch the center seam by placing the two sections just sewn, right sides together, matching the intersection of seams.
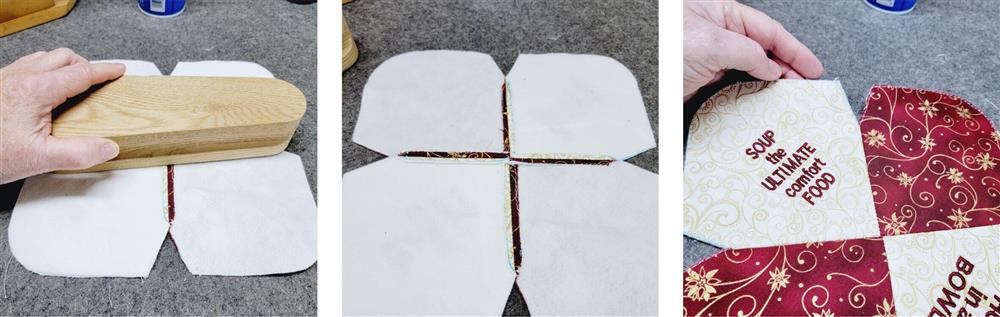
- Press and clap the seam.
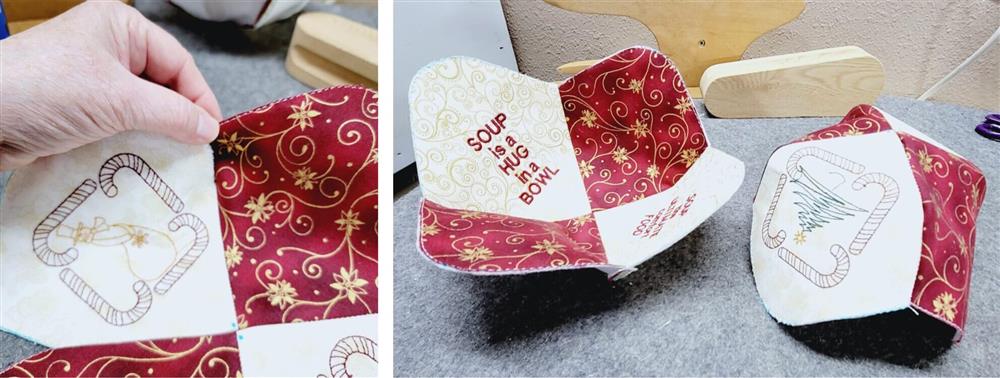
- This is how the wrong side should look, and the right side.
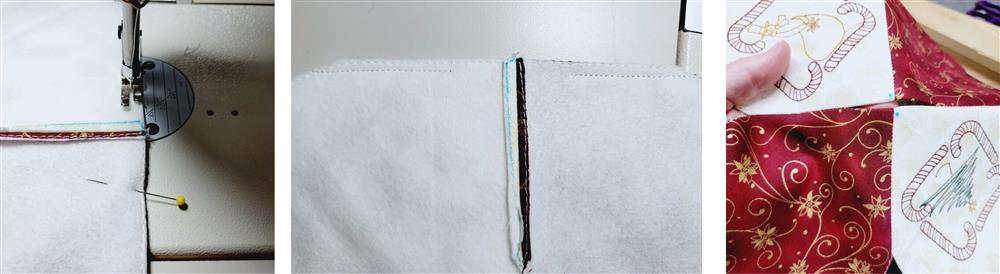
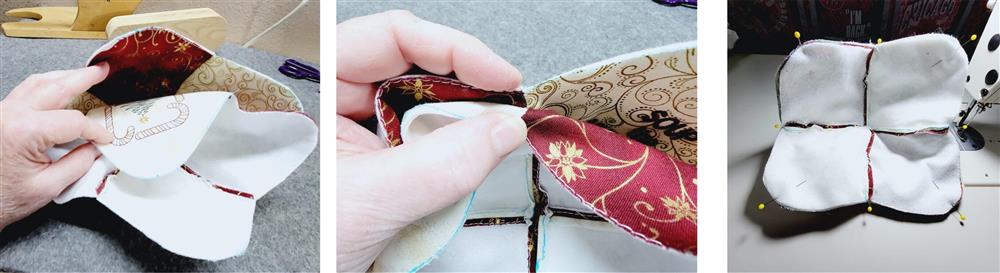
- Next will be to stitch the four darts.
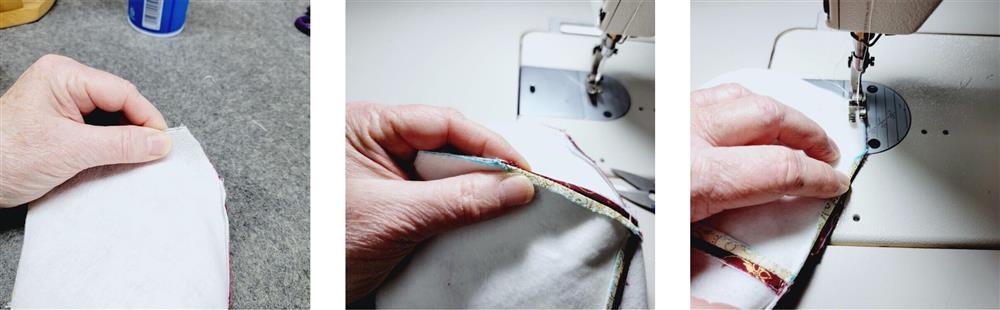
- Bring adjoining sides together, matching the top edges and dart cut edges.
- Fold the straight seam allowances back.
- Stitch the dart using a ¼” seam.
- Here is the inside of the bowl section completed.
- The darts shape the bowl so it stands up.
- Repeat the steps of joining the embroidered and contrast fabric sections together and sewing ¼” seams along the straight edges.
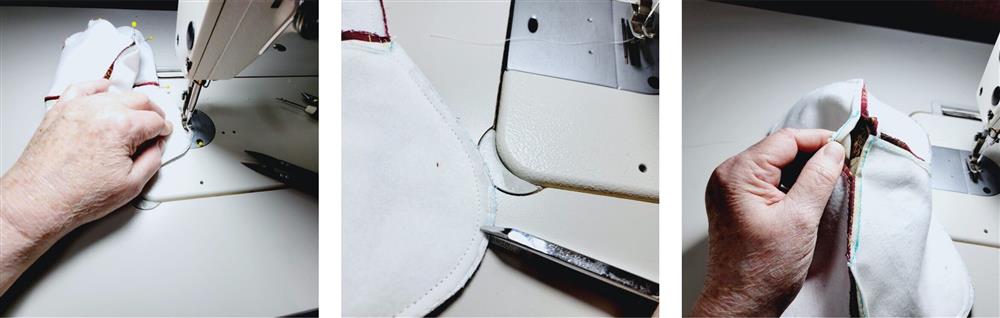
- For the bottom seam, an opening needs to be left for turning the bowl right side out at the end.
- Pin the sections together and use pins to remind you when stitching that the center area between the pins should not be sewn.
- Sew from the edge to the first pin toward the center and do and backstitch.
- Move on to the next pin, backstitch, and continue stitching to the end of the seam.
- The opening should be about 2”.
- Now join right sides together at each of the dart areas and stitch those.
- This completes the back section of the bowl.
Final Steps
- Bring the right side of the bowl bottom to the inside bowl, with an embroidered section to a contrast fabric section.
- Match the seams and pin all the way around the bowl top.
- Using a shortened stitch length so the corners will be nice and rounded, stitch all the way around the bowl using a ¼” seam.
- Clip around the corners, being careful not to cut any threads.
- Find the opening at the bottom of the bowl.
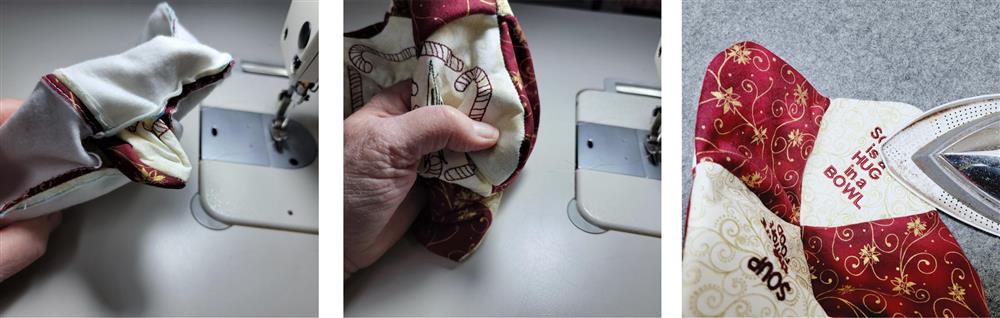
- Turn the bowl right side out through the opening.
- Use your fingers to smooth around the corners.
- Press the edges of the bowl well.
- The top edge should be nice and smooth.
- With a needle and thread, use a ladder stitch to close the opening, matching the intersecting seams.
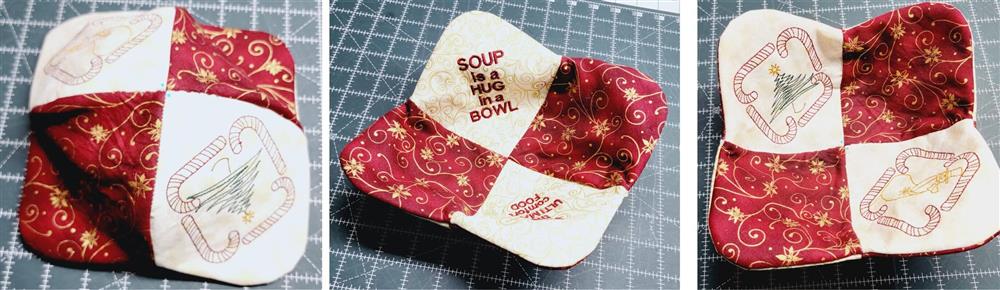
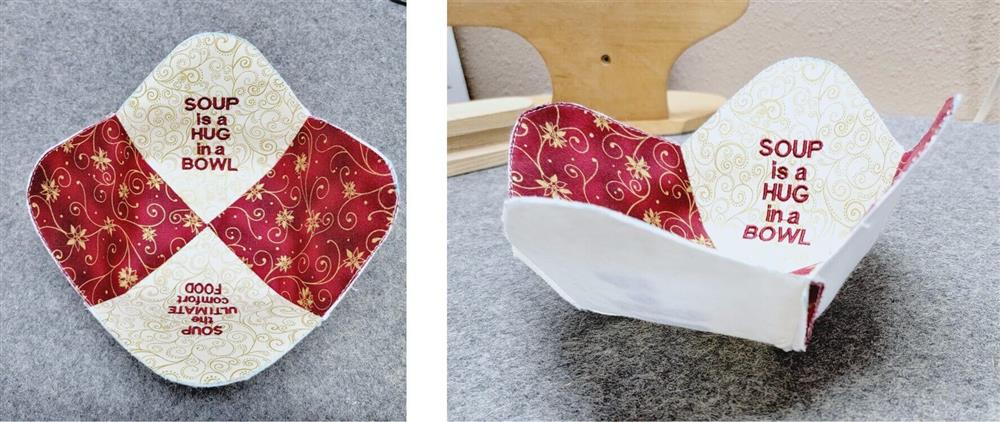
- The way this bowl was done, it could actually be reversible.
- Choose which side you’d like to the inside and the outside of the Bowl Huggee.
Conclusion:
These make great gifts for all ages! Use fabrics and embroidery designs to fit an occasion such as a chili cookoff, a bowl of soup for a sick friend, a housewarming gift for newlyweds, a casual holiday party—you’ll think of lots of reasons to use up your scraps of batting and fabrics. Why, there are even pre-cut batting pieces to make the stitching even faster. Just embroider the fabric then quilt the piece to the batting and add a back fabric.
Congratulations! Whether for yourself or a gift, learning new ways to use embroidery designs increases your enjoyment of stitching. There is no doubt your project will be a “Grand Slam!”
By the “Grand Slam Designs” Team

