


INTRO
Just in time for the 4th of July, stitch up a quick "quilt-as-you-go" insulated table mat for a picnic table or counter top buffet. Using a heat-resistant fleece will provide insulation to protect the table or counter top surface.
There are different sizes of the embroidery design used. For this project, the largest size was stitched. General directions are given so if a smaller design size is used, just measure and adjust the amounts of materials needed.
What you’ll need
White Kona cotton for embroidery-to fit hoop
1 1/2" Red cotton fabric strips
1 1/2" Blue cotton fabric strips for binding
2 1/4" Gold strips for binding
Embroidery thread as stated in design
Cutaway stabilizer
1 - 15" sq. Insulated Fleece such as Insul-Bright®
1- 15" sq. Cotton batting
1- 15" sq. White cotton for back
Sewing thread to coordinate with fabrics
Featured Design
https://www.grandslamdesigns.com/cheer-6-embroidery-design?variant=2
Other designs that may be used:
https://www.grandslamdesigns.com/july-4th-3-embroidery-design
https://www.grandslamdesigns.com/4th-of-july-9-embroidery-design
https://www.grandslamdesigns.com/4th-of-july-4-embroidery-design
Notes
- In order for the mat to be used with hot pans, the fleece needs to be heat resistant. It comes in a variety of brands.
- Be sure the thermal fleece brand purchased will withstand the heat for the intended counter mat use.
- Thermal fleece is easy to sew; read the package instructions.
- Use cotton batting to keep the heat resistant properties of the mat; polyester batting and fleece can actually conduct heat.
- 1/4" seams are used throughout the project unless otherwise stated, and the seams are sewn through all the layers.
Preparation

- Gather all the supplies and materials needed for the project. Print out the design at actual size.
- Choose fabric and thread to coordinate.
- Press the fabrics well, using spray starch if needed.
Machine prep and hooping

- Cut out the paper design. Select a hoop that will fit the design size.
- Cut the white cotton for the embroidery and the stabilizer to fit the hoop. Quarter fold the white fabric to find the center.
- Hoop the fabric with a piece of cutaway stabilizer.
- Load the design on the machine. Load the threads on the machine.
- Center the paper design on the fabric in the hoop.
Stitching
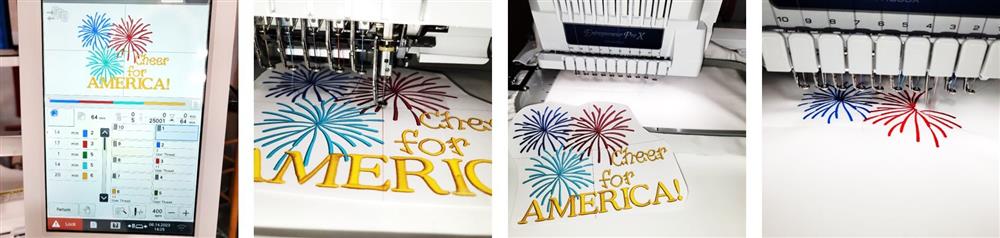
- Load the design on the machine and select the thread colors.
- Place the hoop on the machine and center the needle over the center mark on the fabric.
- Remove the paper design and stitch the design following the color sequence.
Preparing the Base
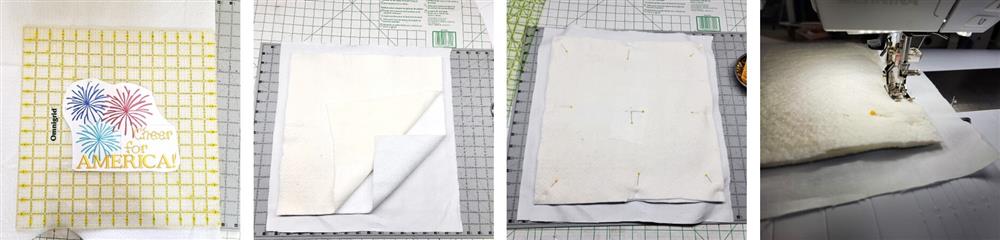
- While the design is stitching, the base can be prepared. The three bottom layers were cut larger than needed then cut down in the end.
- Layer in this order: white backing, the thermal fleece on top of that, and then the cotton batting at the top.
- Pin all the layers together.
- Baste all the edges.
- After the embroidery has finished it will be trimmed to size and then the borders put on in the "quilt as you go" method, and then the binding attached to finish the table mat.
Quilt As You Go

- To aid in squaring up the design, use the straight edges of the hoop. Just make marks on all four sides of the hoop.
- Using a squaring ruler, trim to size. This piece was squared up larger at first.
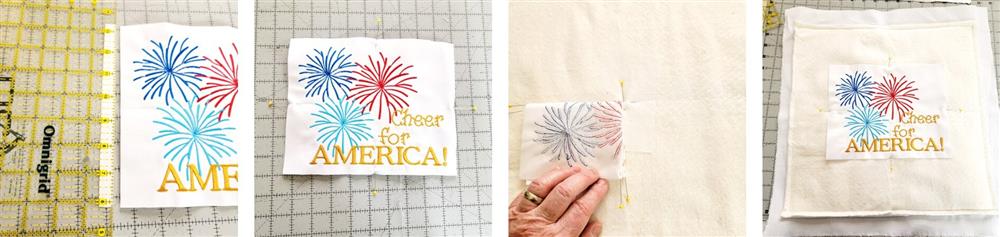
- Then the piece was squared up 1/2" from all the outer edges of the embroidery.
- Quarter fold the piece and align it to the center of the base.
- Open up the embroidery and pin it to the base.
- Baste the embroidery to the base fabric.
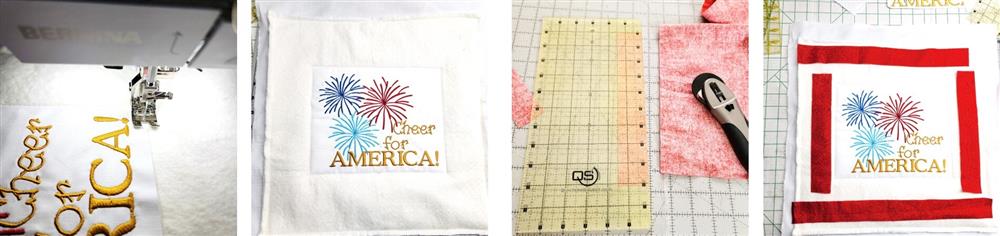
- Measure and cut the red border strips 1 1/2" wide.
- The left and right borders will be sewn on first and then the top and bottom strips.
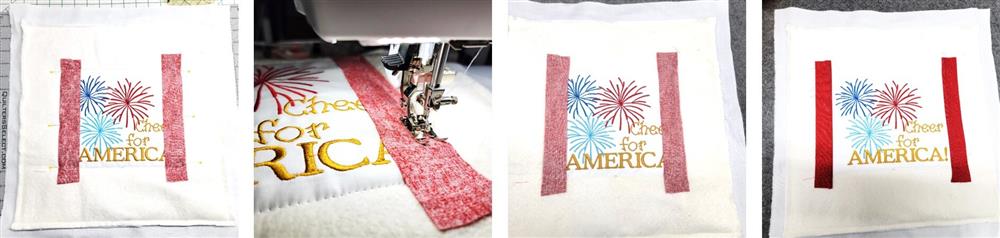
- Place the left and right strips right side down as shown.
- Stitch on the strips using a 1/4" seam allowance.
- Flip the strips right side up and press.

- Place the top and bottom strips right side down. Stitch them on.
- Flip the strips right side up and press.
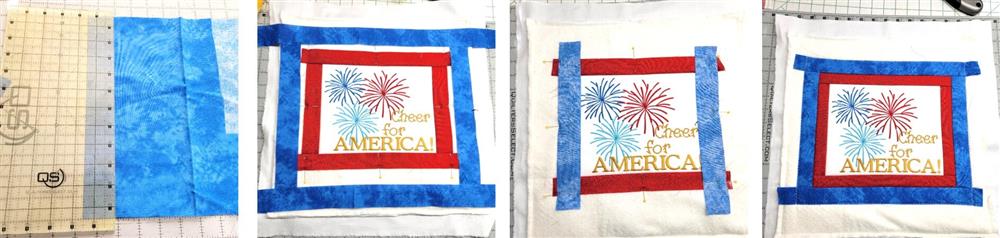
- Cut the blue strips 1 1/2" wide by the length needed.
- Place the left and right strips, right side down, and stitch them on.
- Stitch on the top and bottom strips.
- Trim the top and bottom strips even with the side ones.
- Trim the top and bottom strips even with the left and right strip outside edges.
- Baste the outer edges of the blue strips down.
Final Steps
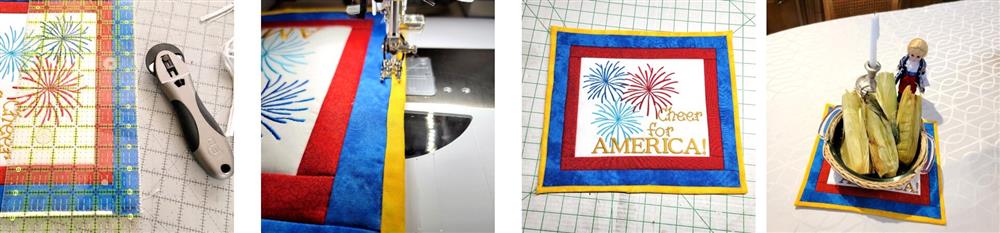
- Trim away the excess bottom layers 1/4" away from the outer edge of the blue .
- Cut the binding strips 2 1/4" wide by the length needed.
- Attach the binding from the wrong side and then flip it to the right side and edge stitch it on, mitering the corners.
- Give the mat a final pressing.
- The layers of cotton batting and insulated fleece will help protect the table or counter from excessive heat from a hot plate or pan.
Conclusion:
Congratulations! Whether for yourself or a gift, learning new ways to use designs increases your enjoyment of stitching. There is no doubt your project will be a “Grand Slam!”
By the “Grand Slam Designs” Team
By the "1Z Embroidery" Team


