


What you’ll need
- 100% white Kona cloth (for two of the labels)
- Stabilizer- medium weight cutaway to fit hoop
- Embroidery thread in your choice of color to coordinate with project for which label is being done
- Word processing software
- Printer fabric sheets (June Tailor brand is used for the project)
- Permanent fabric pen
- Optional: embroidery software to create text (or it can be done at the machine)
Featured Design
Notes
- Labels are very important to document a project created.
- Some information that may be included is: who is the project for, is it for a special occasion, who made the project, where did they live, the date the project was created, and any other historical information that will years from now tell someone the history of the project.
- All projects should have a label no matter how large or small the project is.
- Embroidery is a wonderful way to make the label very special and is a permanent way to document.
- Embroidery thread colors may be used to compliment the project colors.
- Be sure to use a marker made specifically for fabric which will be permanent.
- Read through all the instructions before beginning.
- Starch and press the fabrics.
Preparation , Hooping, and Stitching
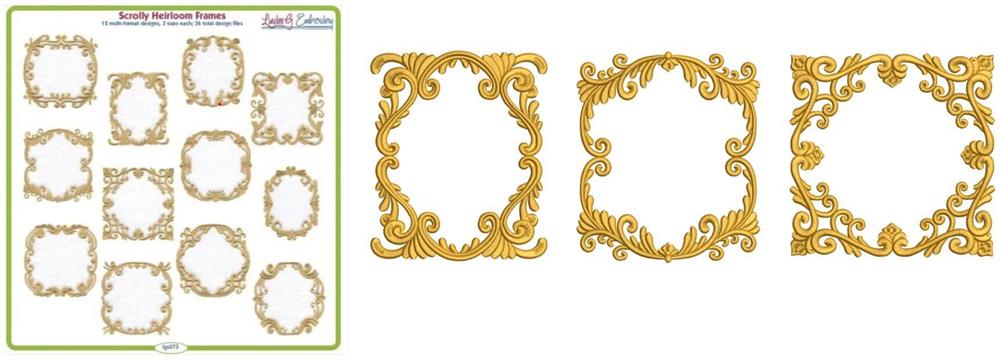
- There are many beautiful frames in this collection which are flawless in their stitchout. Shown in gold thread, they are exquisite stitched in many colors as you will see. For this project, three were chosen to stitch and used in three different ways.
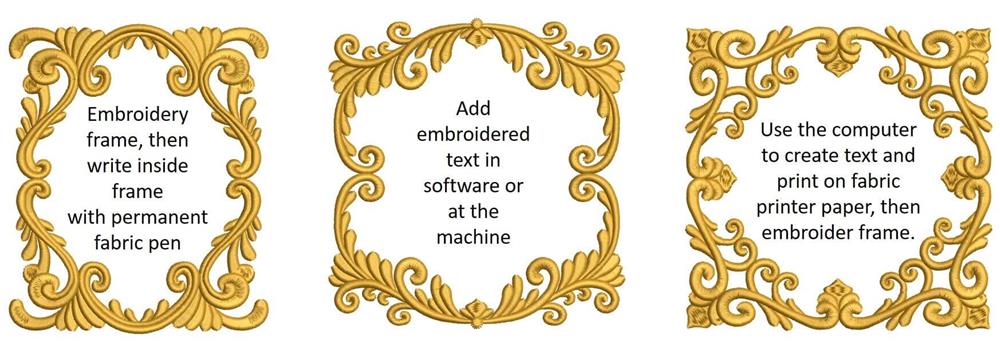
- The first was stitched on white Kona cotton and then a permanent fabric marker used to write on the label.
- The second is done by adding text within the frame using embroidery software (or it can be done on the machine with the capability).
- The third uses a word program to create text, print it on fabric printer sheet, and then the embroidered frame added.
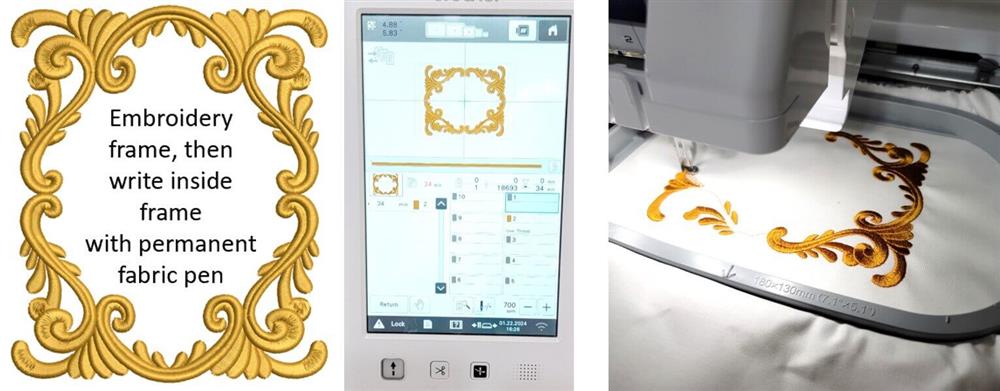
- The first label is created by stitching the frame on white Kona cotton.
- Load the design on the machine, and select the thread color.
- Hoop the fabric with a layer of medium cutaway stabilizer.
- Stitch the design using the selected color.
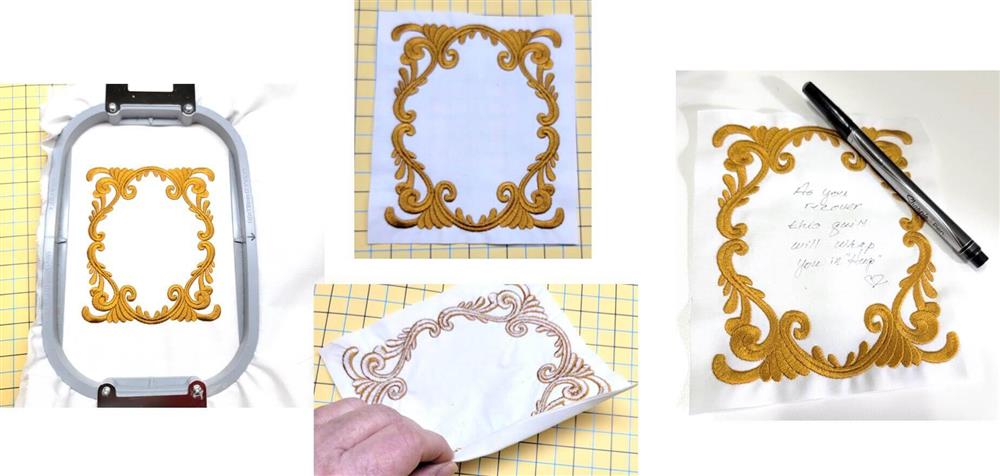
- Remove the design from the hoop.
- Depending on how and where the label will be placed on a project, use a clear ruler to cut outside the design, using the desired seam allowance.
- For this label, a ½” seam allowance was left all around the design.
- Using a permanent fabric marker, write what you wish inside the frame.
- To attach the label to the project, fold back the seam allowance and press.
- Hand or machine stitch the label to the project.
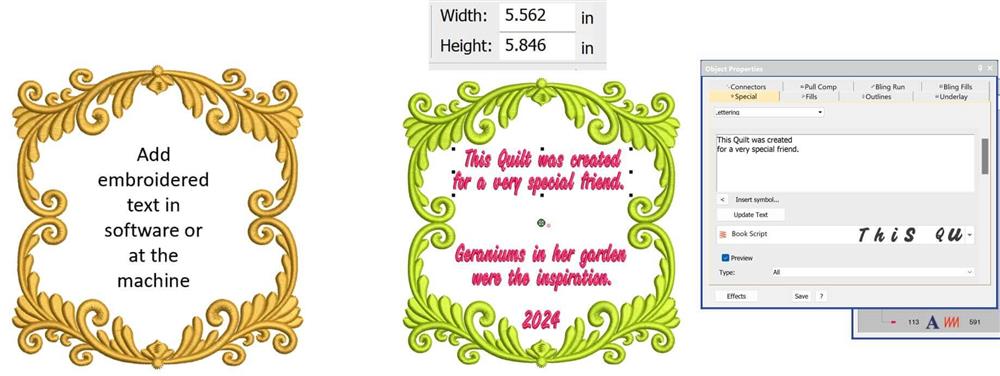
- The second way to create a label is to add text using embroidery software, or the text feature on the machine (follow the machine manual instructions to add text).
- To do this, open the software and import the chosen frame.
- So as not to overwrite the original file, SAVE AS and give the file a new name; save the desired location on the computer.
- Select the entire frame and change to the desired color to coordinate with the fabric.
- Open the Lettering or Text feature in the software.
- Choose the font type and lettering size..
- Type in the desired information.
- Center the text within the frame.
- Select the text and choose the color to coordinate with the fabric in the project.
- Save the file.
- Export the file in the needed machine format for stitching.
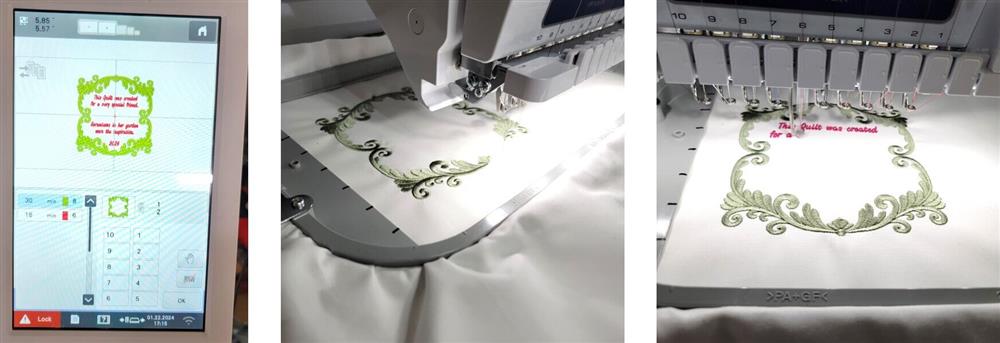
- Load the design on the machine and set the thread colors
- Hoop a layer of white Kona cotton with a layer of medium cutaway stabilizer.
- Place the hoop on the machine and stitch the design with the chosen colors.
- If the design is stitched in a larger hoop, it can be moved to one side of the hoop so a second label may be stitched on the other side.
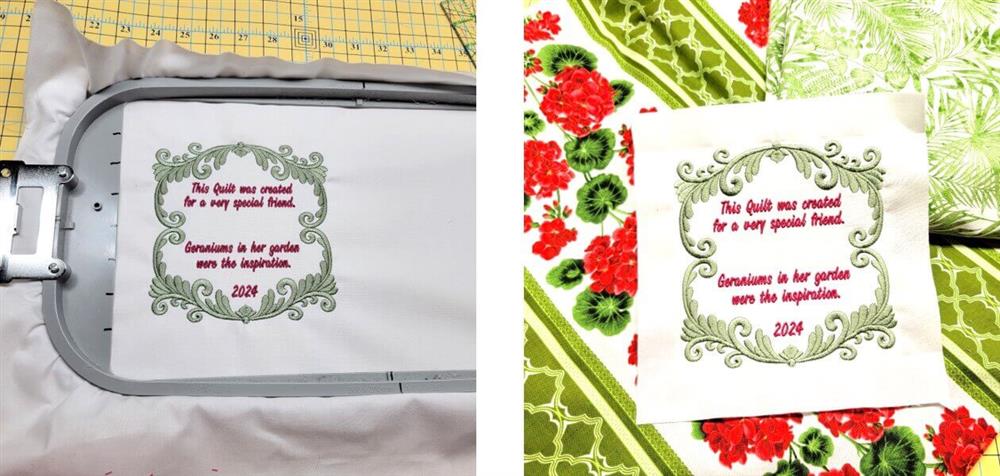
- Remove the design from the hoop and trim.
- This label is to be added to a quilt yet to be made from the fabrics in the background, so the label was trimmed leaving 1” seam allowance all around.
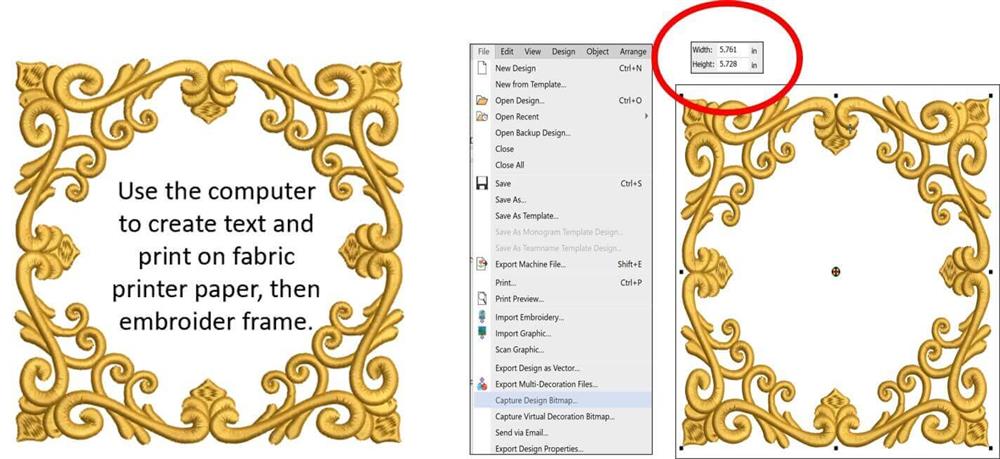
- The third label is created using a computer word program to create the text, and then printed on a fabric printer sheet.
- There are a few more steps to making a label this way, but once the file is saved, it can be created over and over.
- Open the embroidery software, insert the frame design, and then export the .bmp file of the design; be sure to note the size of the frame design.

- Embroidery software is different, but in general, save the .bmp file at actual size, name it, and save it to either the desktop or a designated folder.
- Open the word program.
- Set the page to 8.5” x 11” (which is the same size of the fabric printer sheet).
- Import the .bmp file just saved, by locating where it was saved.
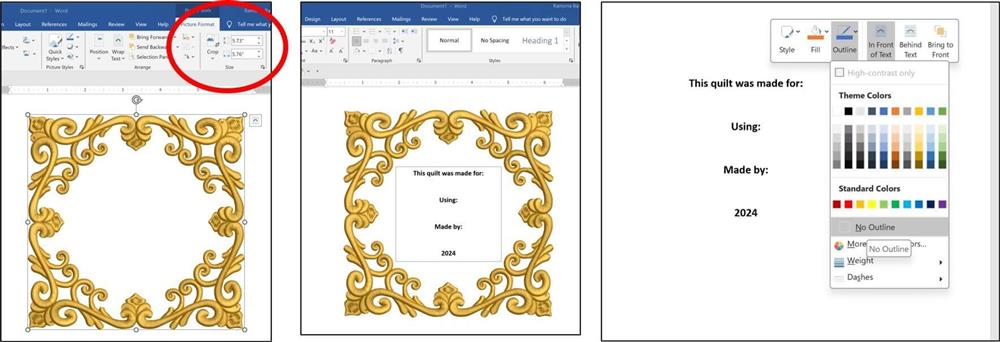
- The design will appear on the page.
- Note the size of the photo.
- If needed, change the measurements to the size that was noted in the embroidery design.
- Align the frame to the center of the page.
- Create a text box in the word program and type in the desired text. This can be lines with area left below for writing, or all the information to be included may be typed.
- Be sure there is No Outline box surrounding the text (if there is, and it is not omitted, it will be printed).
- Select and delete the frame picture.
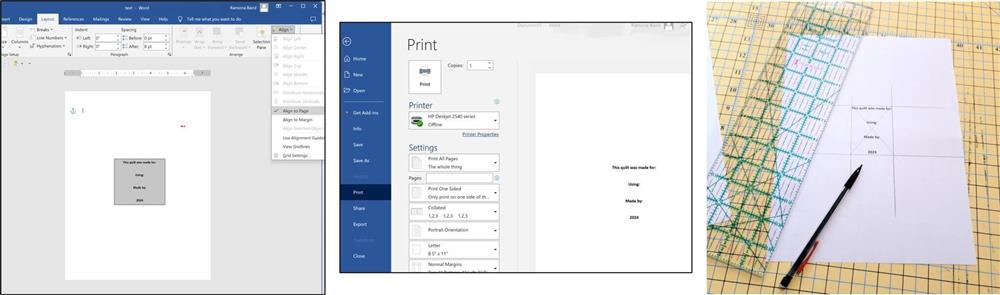
- Select the text and align it to the page.
- Save the file to a designated folder.
- Print the page on regular paper first, to make sure it prints currently.
- To aid in alignment at the machine, mark a box around the letters of the text, and then create an X going from corner to corner in the box. The intersection of the X is the center of the design.

- Read through the instructions for use and setting print on the chosen fabric printer sheet being used.
- Note on the printer how the fabric printer sheet should be fed through the printer. It is best to feed the sheets one at a time through the printer.
- Print the printer fabric sheet at the recommended printer settings stated in the package instructions.
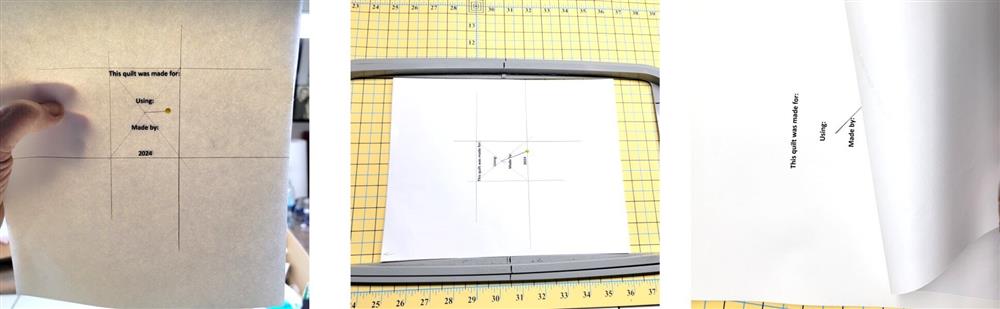
- Place the printed paper over the printed fabric sheet and align the text.
- Place a pin through the center of the paper into the fabric sheet.
- A small hole will be created; this will be the center alignment for the embroidery design to the text.
- Follow the instructions to peel the paper on the back of the fabric and set the printing on the fabric.
- To help in centering the sheet in the hoop, quarter fold and lightly pinch the sheet to crease.
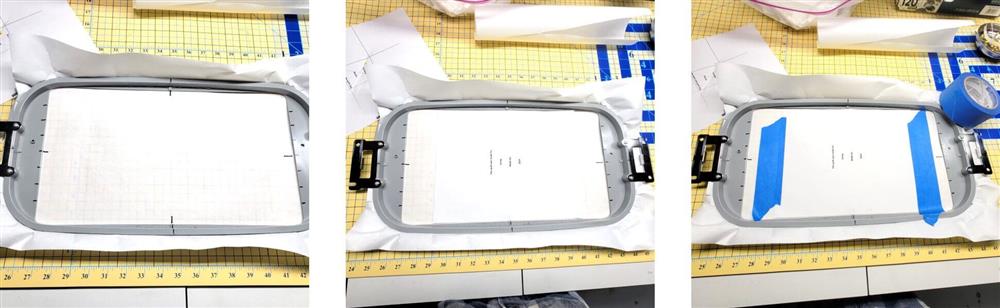
- Hoop a layer of medium weight stabilizer.
- Using a gridded mat, align the marks on the hoop to the grid lines on the mat at the top, bottom, left and right.
- On the stabilizer, make tick marks as shown.
- Keeping the hoop in the same position, use the crease marks to align with the tick marks made; this will center the fabric printer sheet in the hoop.
- Use painter’s tape to secure the fabric sheet to the stabilizer.
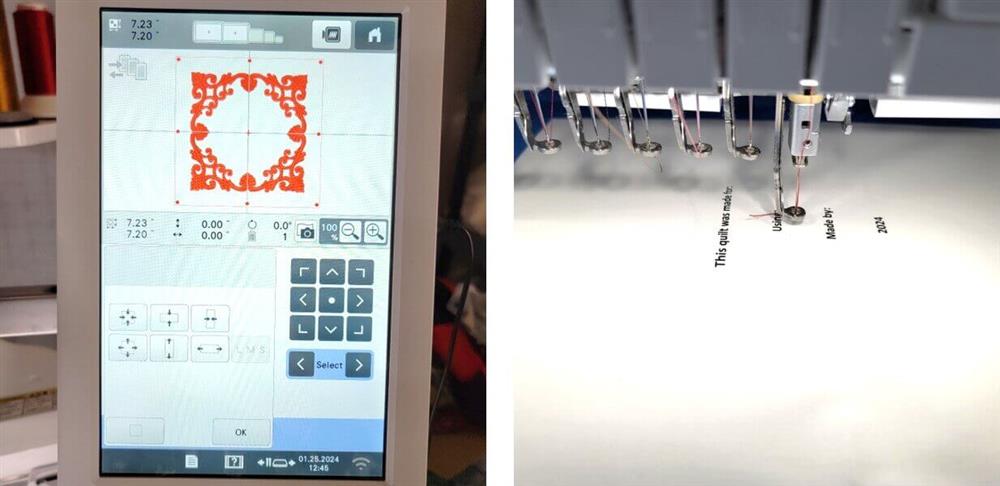
- Load the design and embroidery thread on the machine.
- Create a basting box around the design. The basting box will stitch first to hold the fabric sheet in place on the stabilizer. Increase the basting box so it is between ½-3/4” outside of the design.
- Place the hoop on the machine.
- Align the needle to the pin hole at the fabric sheet.

- If there are skipped stitches when stitching on the fabric printer sheet, simply pull up the bobbin thread before starting. Pull out enough thread so that when the machine is started your fingers will be well out of the way of the needle.
- Stitch the basting box and then stitch the frame in the chosen thread color.
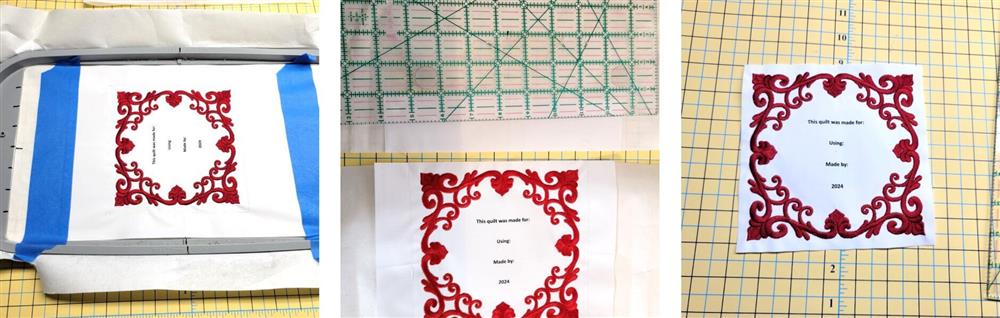
- Remove the fabric from the hoop.
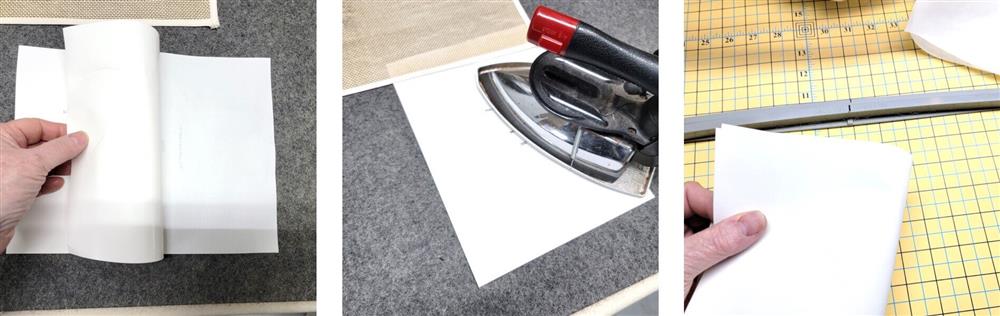
- Trim around the frame leaving the desired seam allowance.

- To create a nice edge for turning the printed sheet back, fold back the seam allowance and trim the stabilizer at the desired distance from the fold. Here 1/8” is left beyond the fold and the stabilizer cut around all edges.
- Fold back the seam allowance and press.
Final Steps
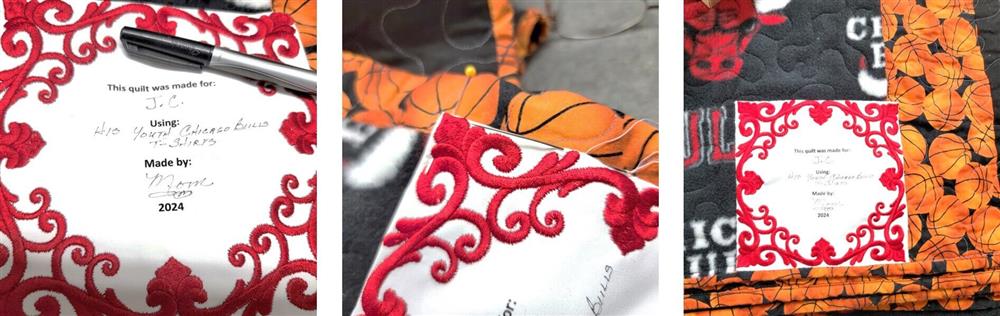
- If all the information was not printed on the fabric sheet, use a permanent fabric marker to fill in the remaining information.
- Using a needle and thread, hand stitch the label in place.
- Here the label was sewn to the loser right back corner of the quilt.
Conclusion
- Congratulations! Create beautiful project labels for all your hand crafted projects! Whether for yourself or a gift, learning new ways to use embroidery designs increases your enjoyment of stitching. There is no doubt your project will be a “Grand Slam!”
By the "Grand Slam" Team
By the "Ramona Baird" Team

 Machine Embroidery Design")
 Machine Embroidery Design")
 Machine Embroidery Design")