


MATERIALS
- 10 pieces of fibrous water-soluble stabilizer to fit a 5x7 hoop
- Green embroidery thread for leaves
- Pumpkin orange embroidery thread for the panels and circles
- 2 or 3- 9” pieces of green floral wire
- Hot glue and glue sticks
| Preface: |
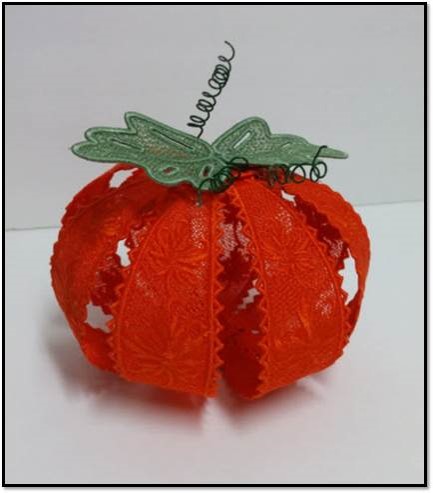
| This project is so easy to stitch and will get comments galore when you tell guests the entire pumpkin is just thread! Stitch 8 panels, 2 leaves, and four circles, remove the stabilizer, let the pieces dry, and then hot glue them together for a fun project that is easy to create. |
Step 1: |
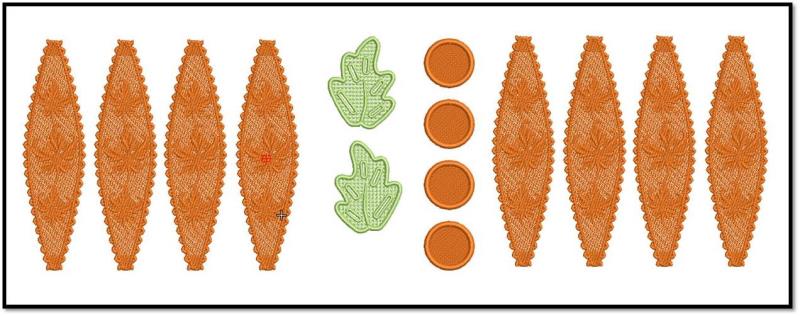
Gather the materials and read through the instructions before beginning. Print out a paper template of the design and color sequence. DO NOT run this as one color! The color stops are needed for the machine to stop and for you to rehoop new stabilizer for each of the sections. For your convenience, all sections for the pumpkin are in one file. You will be stitching 2 leaves, 4 circles, and 8 panels. The time stated is approximate stitching time; there is also time needed for drying the pieces. |
| Step 2: |
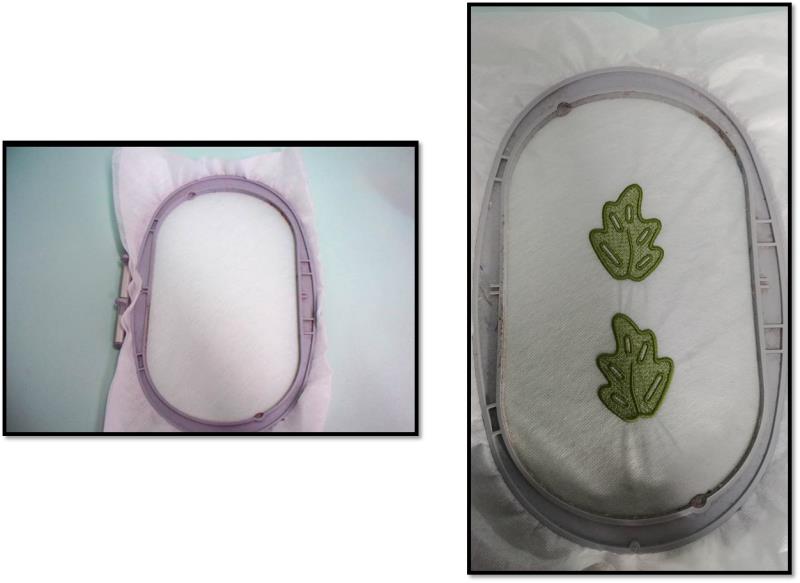
Hoop two layers of fibrous water-soluble stabilizer. Place the green embroidery thread in both the top and bobbin. Stitch color 1 which is the two leaves. Remove the leaves from the hoop and set them aside. |
| Step 3: |
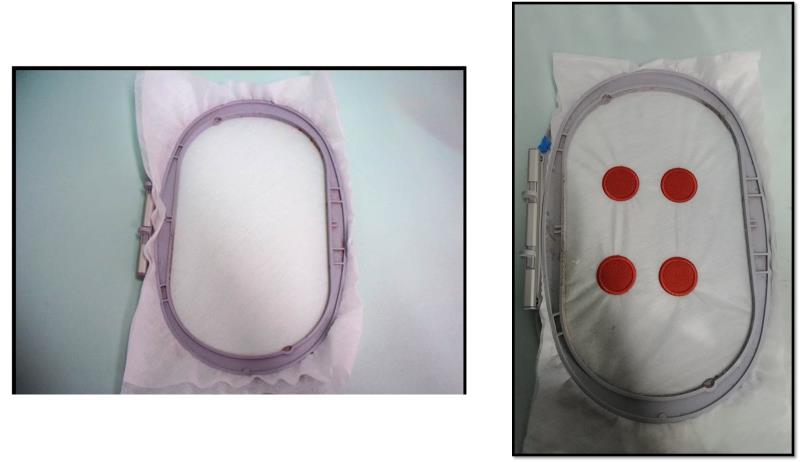
Hoop two layers of fibrous water-soluble stabilizer. Place pumpkin-orange (or your choice of color) embroidery thread in both the top and bobbin. Stitch color 2 which will stitch four circles. Remove the circles from the hoop and set them aside. |
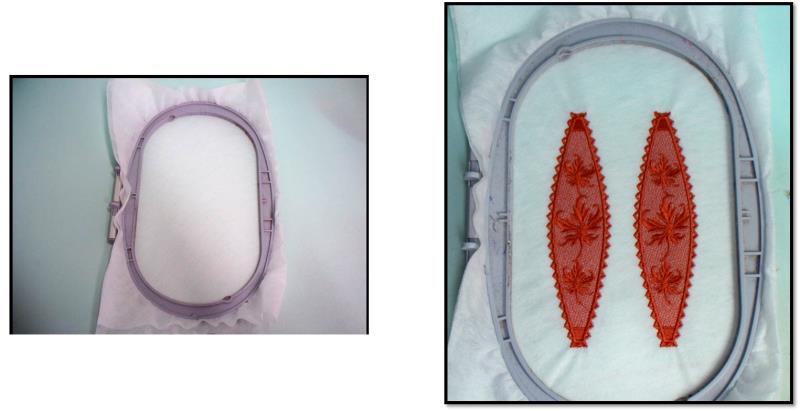
Step 4: |
Hoop two layers of fibrous water-soluble stabilizer. Make sure the bobbin is full. Stitch color 3 which will stitch 2 panels. Remove the panels from the hoop and set them aside. |
| Step 6: |
Hoop two layers of fibrous water-soluble stabilizer. Make sure the bobbin is full. Stitch color 5 which will stitch the last w panels. Remove the panels from the hoop and set them aside. |
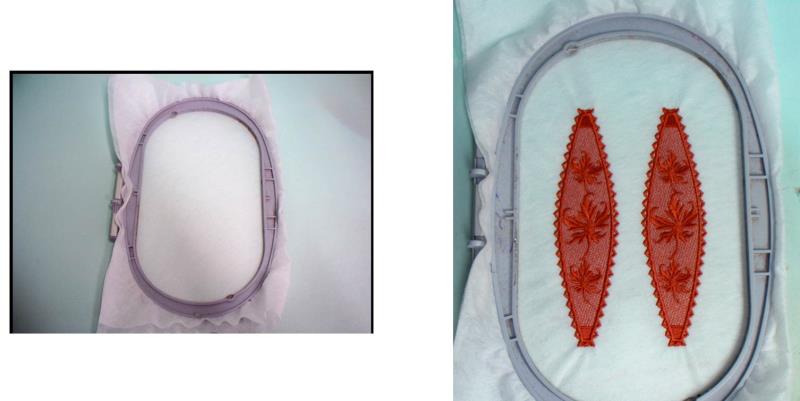
Step 6: |
Hoop two layers of fibrous water-soluble stabilizer. Make sure the bobbin is full. Stitch color 5 which will stitch the last w panels. Remove the panels from the hoop and set them aside. |

| Step 7: |
Generally, cut out the embroidered pieces from the stabilizer and then trim away the excess stabilizer leaving about 1/8-1/4” all around |

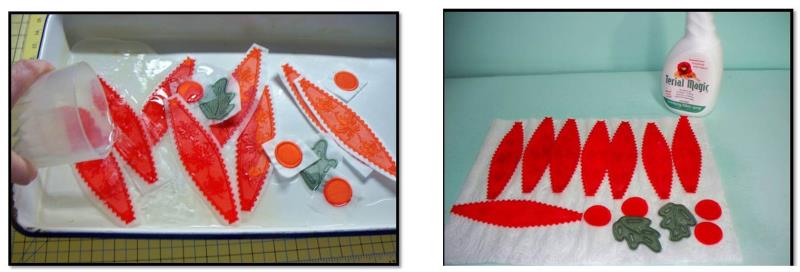
| Step 8: |
Follow the manufacturers’ directions for rinsing the stabilizer and then blot the pieces and lay them on paper towels to completely dry (preferably overnight). You want to rinse only enough to open the holes between the stitching—do not rinse out all the stabilizer—most of it needs to be left in so the pieces will be stiff after they dry. If more stabilizer is rinsed away than intended, just use something like “Terial Magic” or a heavy starch to stiffen the pieces. Spray each side with the product and then leave the pieces to dry completely. |
| Step 9: |
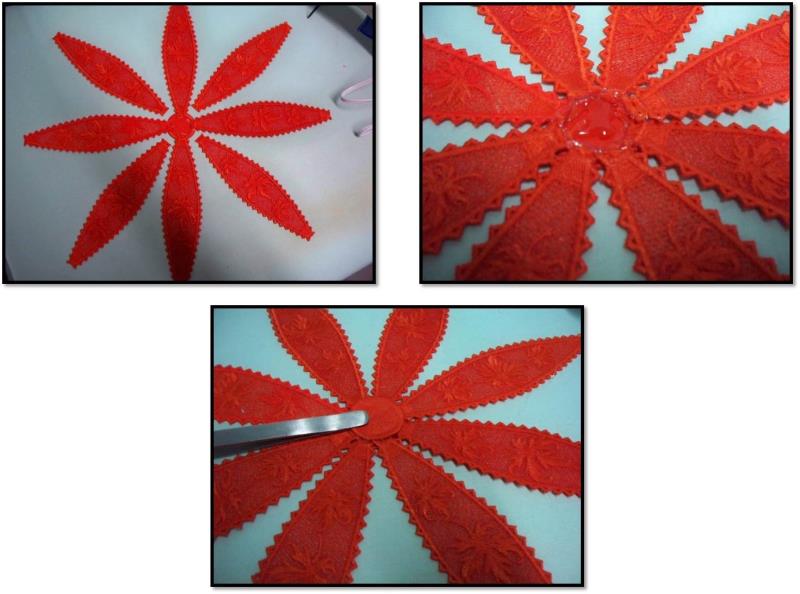
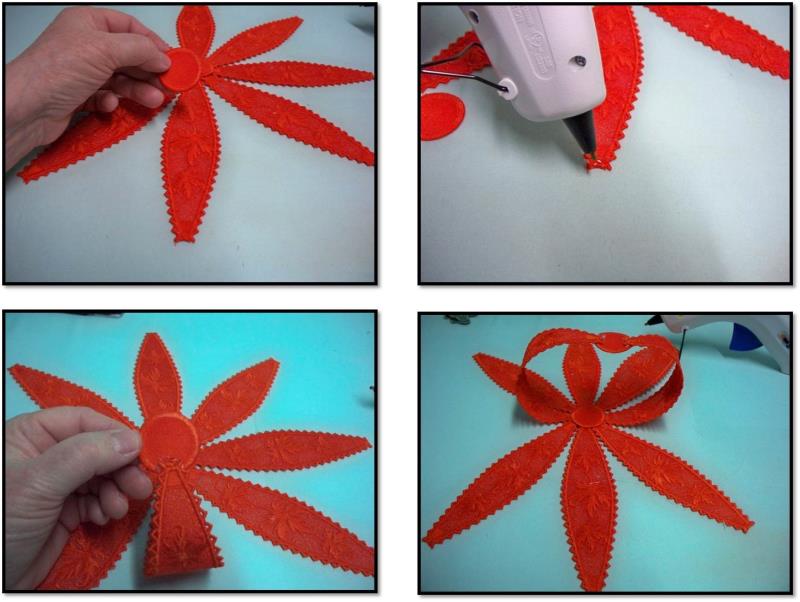
After all the pieces are completely dry then it is time to assemble the pumpkin. Heat the hot glue gun. Lay one of the circles, wrong side up, on a flat surface. Lay four panels, wrong side up, in the noon, 3, 6, and 9 o’clock positions. Working around the circle, form a bead of hot glue around the outer edge of the circle. Use tweezers to gently position the bottom of the pumpkin panel at the edge of the circle. Repeat for the remaining three panels. |

| Step 10: |
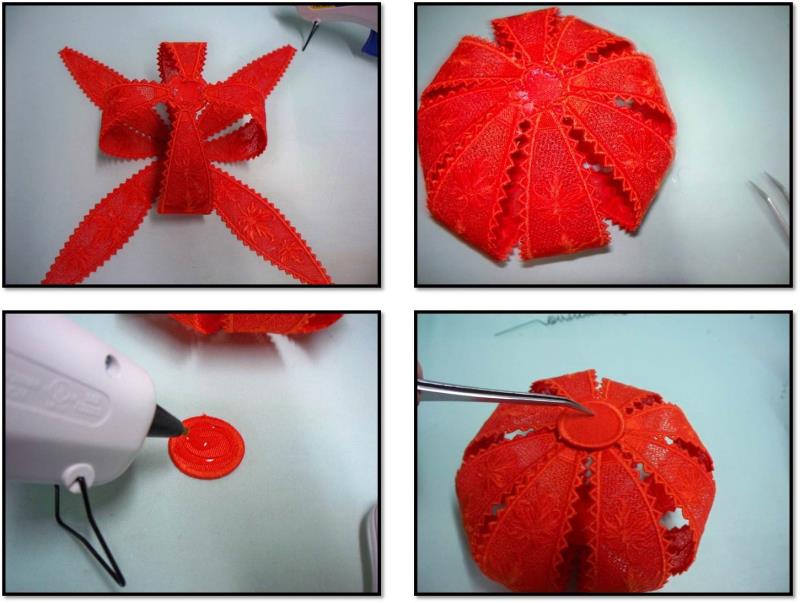
Now do the same for the next four panels, aligning them between the glued panels, and then gluing them into position. The panels should just barely touch each other when they are aligned on the circle. Fill the center of the circle with hot glue and then place the second circle, right side up, on top of the first circle and panel edges—be sure the circles align. Let the glue cool. |
| Step 11: |
Now will be forming the pumpkin by gluing the remaining edges of the panels to the wrong side of another circle. Place a small amount of hot glue at the edge of one panel. Align the circle directly above the previous glued circles and position the edge of the pumpkin to the edge of the third circle. Work the next panel directly across from the first panel in the same manner, gluing it on the opposite edge of the third circle. Be sure the edges of the panels remain parallel to the edge below as shown otherwise the pumpkin will twist. |
| Step 12: |
Work the next two panels, and then continue with the remaining four panels working with opposite pairs. Fill wrong side of the fourth circle with glue and then position it on top of the third circle. Let the glue cool. |
| Step 13: |
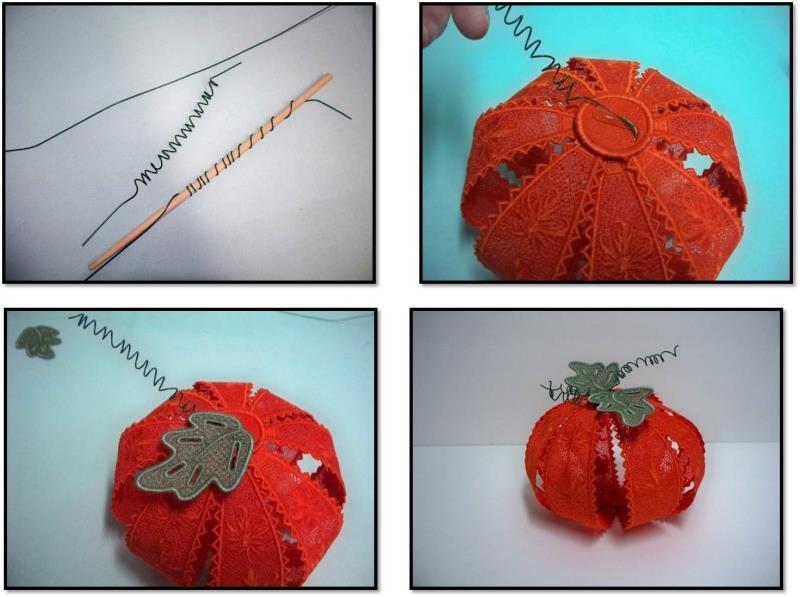
Use a pencil or chopstick to wrap each piece of floral wire to form three tendrils. Use the hot glue to glue the wires to the top of the circle and then glue the leaves in place as desired. Spread out and cut the wires to the desired lengths for your pumpkin. |
| Step 14: |
Congratulations on creating a FSL 3D Pumpkin! You’ll want to make several of these in various shades of pumpkin orange—and even cream colors—to decorate your fall and Thanksgiving tables. |
By the "Grand Slam Designs" Team
