


Appliqué is a very versatile machine embroidery technique. Creating free-standing ornaments is fun and easy! 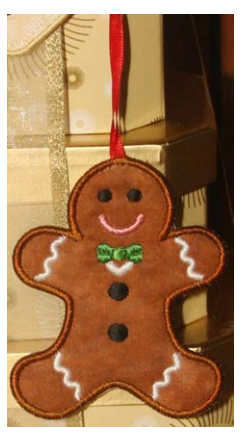
Skill Level
These instructions assume that you already know how to work with templates printed on fusible tearaway, a method I use most often for machine embroidered appliqué. If you’ve never used this technique, detailed instructions are included in the Appliqué Basics pdf that is included with most Lindee G Embroidery appliqué collections
What You’ll Learn
- How to use simple yet creative techniques to expand your embroidery options
- How to make double-sided free-standing designs with appliqués
Selecting a Design
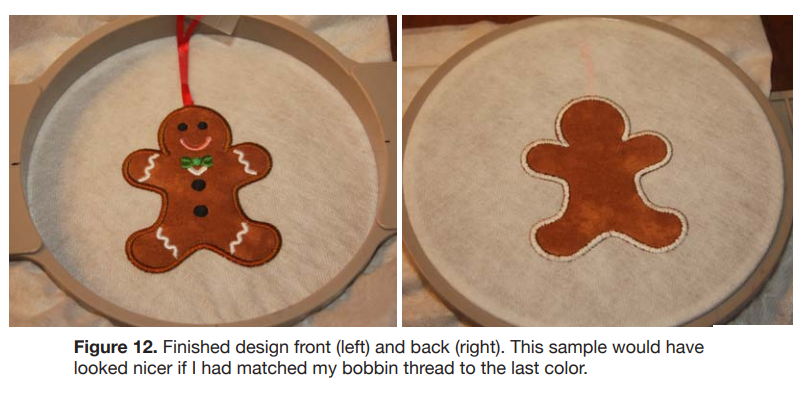
This technique works best when the satin cover stitching that finishes the appliqué sews last, as it so happens in the gingerbread designs on Gingery Christmas. There are 4 small ginger cookie appliqué designs and 4 larger ones that work well with these instructions.
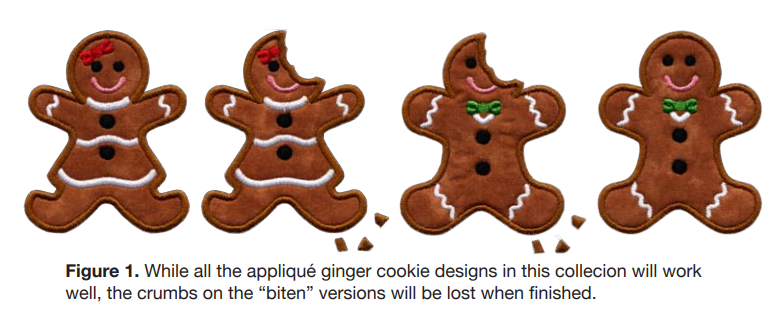
You’ll also want to select a design that does not have any stitching extending beyond the fabric appliqué area. If you’re using the “bitten cookie” versions, the crumbs will be lost during the finishing process.
If you are using other appliqué designs, you may want to resequence some stitching or wind matching bobbins for each color change in your design so that the back looks as good as the front.
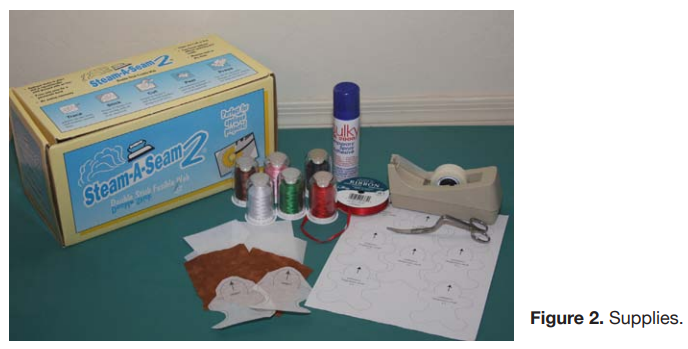
What You’ll Need
- Small scraps of fabric for front and back of appliqué
- Cutaway stabilizer (medium to heavy weight)
- Washaway stabilizer (fiber, not film)
- Light-weight tearaway stabilizer for printing templates
- Double-stick (pressure sensitive) fusible web for appliqué (Steam-A-Seam II or Pellon Easy Steam II)
- 6-8” piece of ribbon for hanger
- Cellophane tape
- Small gingerman design from Gingery Christmas by Lindee G Embroidery with templates
- Suitable embroidery threads
- Regular embroidery bobbin thread
- Bobbin of matching thread for the outer gingerbread color (last color in these designs)
- Temporary embroidery spray adhesive (“TESA”)
1. Prepare templates.
Print templates onto fusible tearaway and loosely cut around shapes to separate. (See technique in the Appliqué Basics instructions if aren’t familiar with this process.)
2. Prepare fabrics.Fuse a piece of cutaway to the back of each piece of appliqué fabric using fusible web. Press one template to front of one fabric and one to cutaway of other fabric to make a reversible ornament.
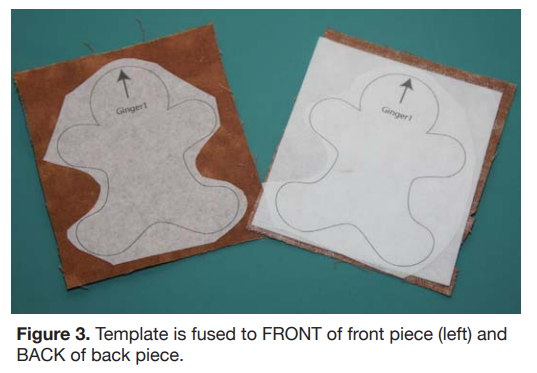
While the cutaway isn’t strictly necessary, it adds extra body and dimension to the design.
Cut out appliqués just to the outside edge of the pattern lines


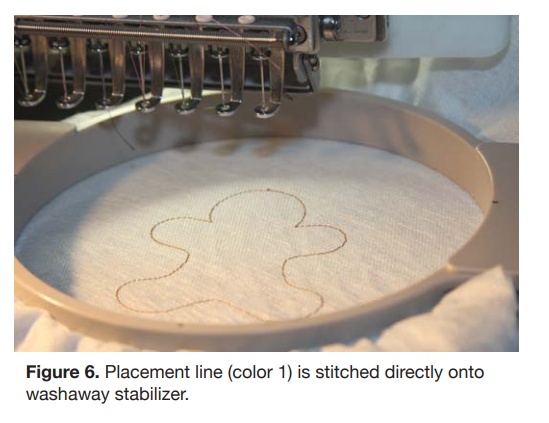
Hoop 2 pieces of washaway stabilizer. Sew first color of design (outline).
Fold a loop of ribbon in half, place cut edges within top outline about 1/2”. Tape in place out of range of needle.

Spray back of top piece with TESA. Remove template from piece and position in hoop within outline.

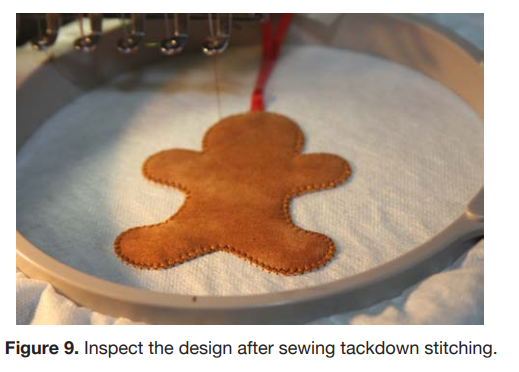
Inspect the design to see if any areas extend beyond the tack down and trim off.
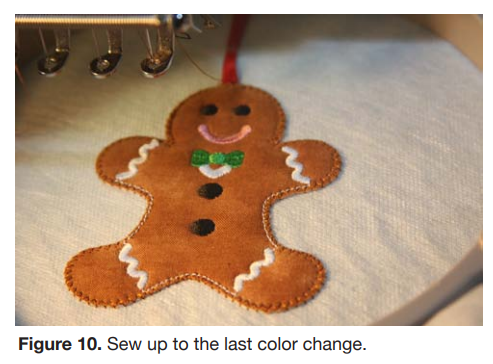
Don’t sew last color! The last color attaches the back of the ornament.
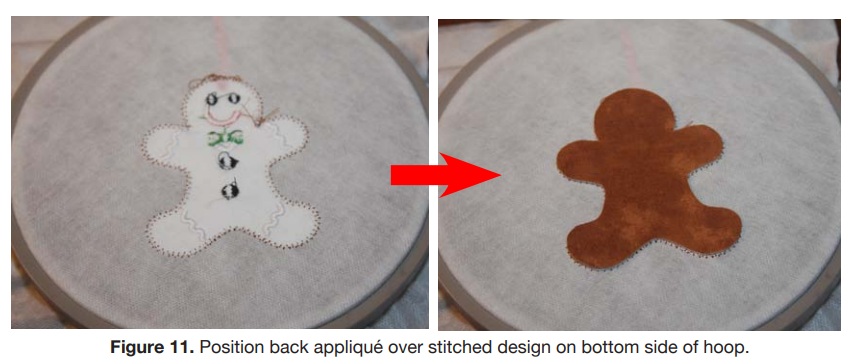
Remove the hoop from machine. Spray cutaway side of back appliqué with TESA, remove paper template, position appliqué in place, reset the hoop, replace the bobbin with the matching thread, and sew last color.
Trim off excess stabilizer close to the stitching. Remove remaining bits with damp paint brush or sponge. It is not necessary to soak out the remaining stabilizer
By the "Lindee G Embroidery" Team
")
")
")