


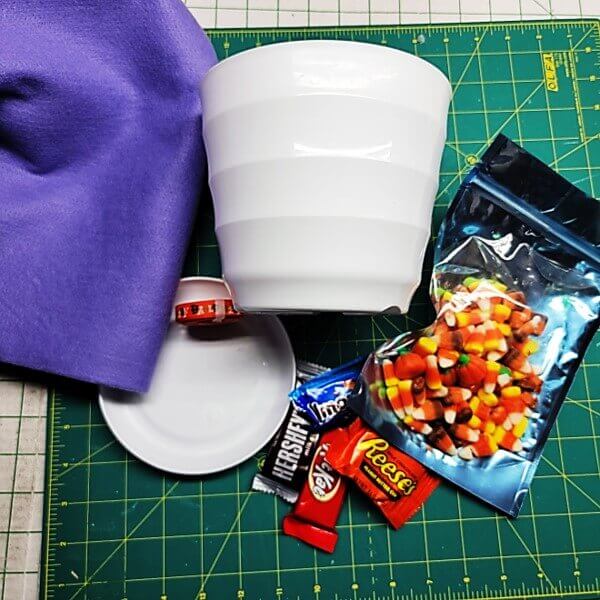
What you’ll need:
Print out of the design
6” new, clean plastic pot with saucer
Polyester felt—in color of your choice. The amount will be determined after measuring the pot and saucer.
Embroidery thread as stated in color sequence
Cutaway stabilizer
Colored twine (find in the scrapbook area of craft store)
Old awl
Pliers
Large, sharp needle with big eye
Sewing thread to match felt
18” 3/8” wide Halloween themed ribbon for handle
Halloween Candy
Featured Design:
https://www.grandslamdesigns.com/halloween-boo-3-embroidery-design?variant=1
Other designs which may be used:
https://www.grandslamdesigns.com/boo-2-embroidery-design
https://www.grandslamdesigns.com/happy-halloween-2-embroidery-design
https://www.grandslamdesigns.com/babys-1st-halloween-embroidery-design
Notes:
- Read through all the instructions before beginning and assemble all the materials.
- Use good quality polyester felt for this project—your choice of color.
- There is only one seam and two boxed corners in this project.
- The pot, with saucer, acts like a bucket for candy during trick or treating.
- Line the pot first with food-grade aluminum foil or plastic wrap before using the bucket.
- Use Glow-in-the-dark thread for a portion of the design, following the manufacturers directions.
Preparation:
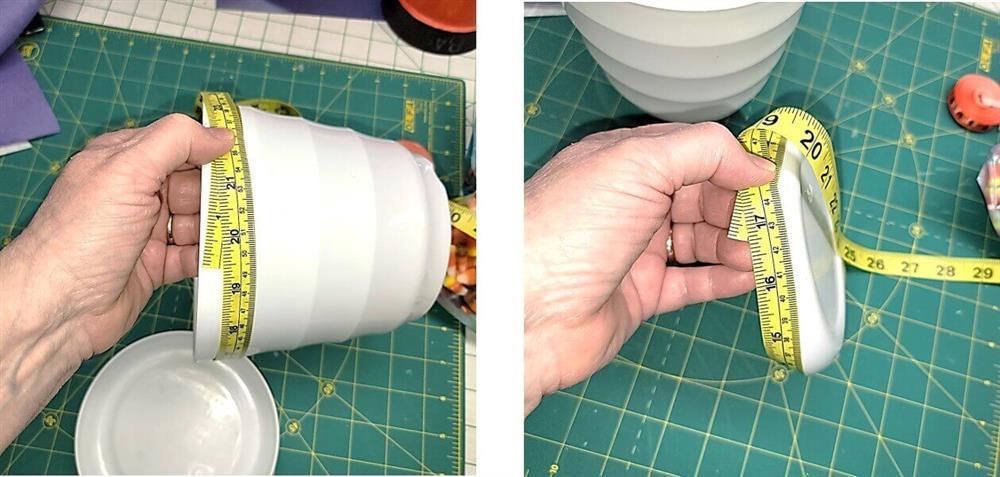
- To begin, measure around the pot at the top, and also around the saucer—the dimensions will probably be close.
- Using the larger of the two measurements, double the measurement and add 2”. This allows for ease and a seam allowance.
- Flip the pot over so the top is on a flat surface. Place the saucer on top of the bottom of the pot.
- Measure from the top of the pot over and around to half the width of the saucer. Add 4.5” to this measurement. This allows for a seam allowance and room at the top to gather.
- The first measurement will be how wide to cut the felt.
- The second measurement will be how high to cut the felt.
- For this project, the felt was cut 10” high by 10 1/2” wide —your measurements will be different!
Hooping and Stitching:
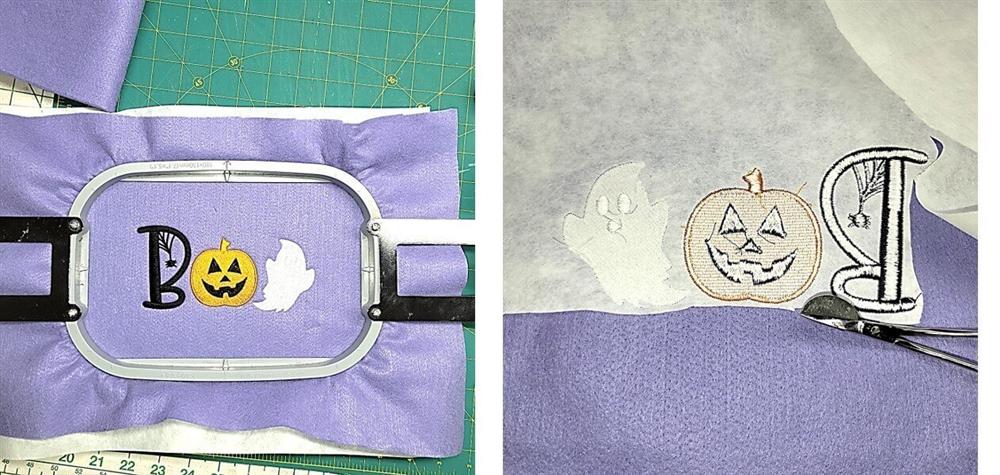
- Load the Boo design and threads on the machine. For this design, the ghost was stitched with glow-in-the-dark thread.
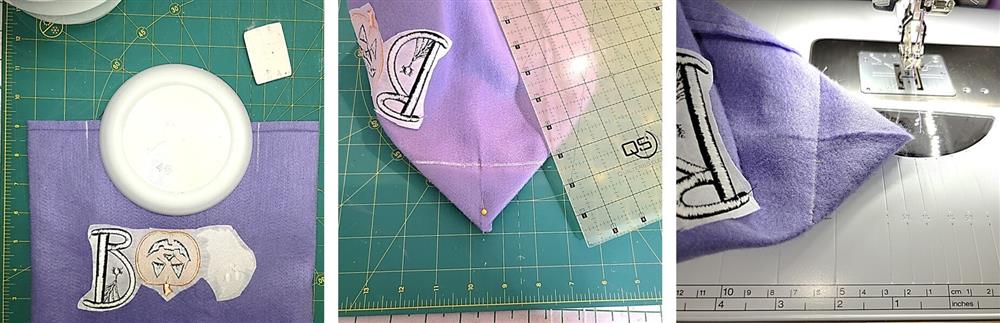
- Using the print out of the design as a template, determine where the design should be placed on the felt.
- Figure out where the bottom will fold under the pot, plus seam allowance. Then center the design at what will be the center front of the pot; remember, there is room at the top for gathering the top part of the fabric.
- For this project, the bottom of the embroidered designs was 4 ¼” up from the bottom of the felt, and aligned to the vertical center of the felt.
- Hoop the felt with a layer of cutaway stabilizer and stitch following the color sequence.
- Once the stitching is done, remove the felt from the hoop and trim away the excess stabilizer.
Sewing the Bag Together:
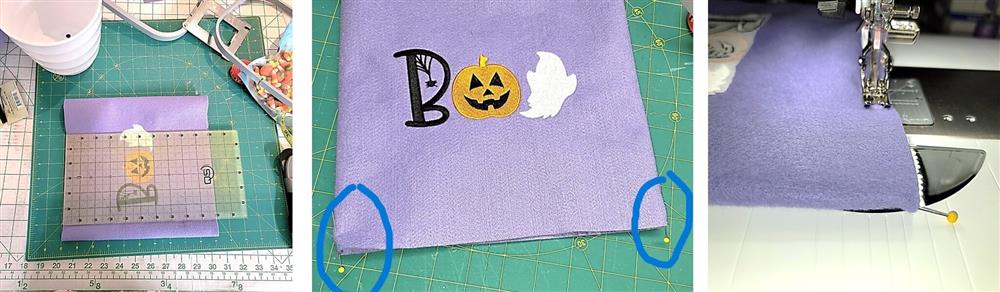
- To form the center back seam, bring the left and right sides, right sides together, and stitch with a ¼” seam.
- Turn the bag right side out. Find the center front and align with the center back seam; this will form folds at the two side edges. Place pins at the bottom of each fold.
- Turn the bag wrong side out. Sew a ¼” seam from pin to pin to form the bottom seam.
- Keeping the bag inside out, align the center of the saucer to the center of the seam just sewn. Mark about ½” on each side of the saucer.
- Box the corner by bringing the side pin in alignment with the bottom seam. Measure and mark up 2” from the corner point.
- Sew along the marked line.
- Repeat for the other corner.
- Turn the bag right side out and form the corners well.
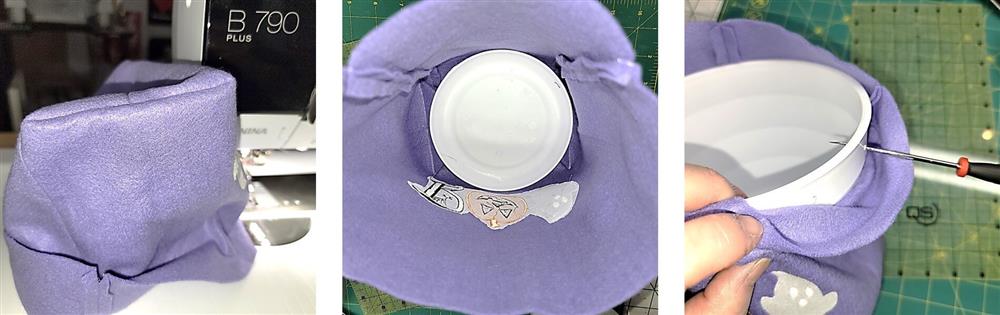
- Place the saucer in the bottom of the bag.
- Place the pot on top of the saucer in the bag.
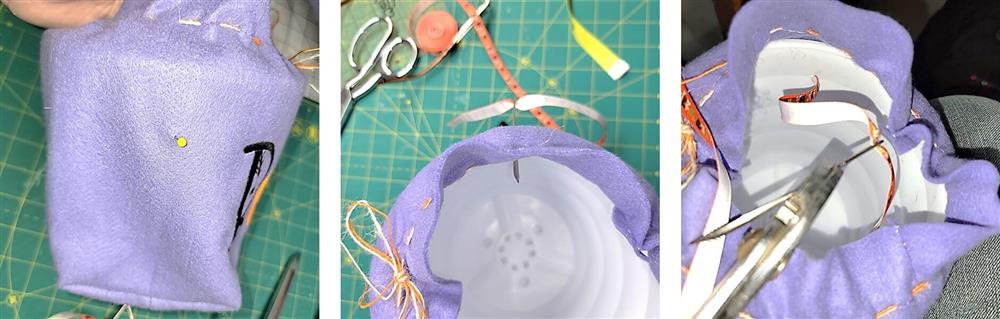
- Using an old awl, very carefully push the awl through the pot (about 1” below the top of the pot). Be very careful not to poke yourself.
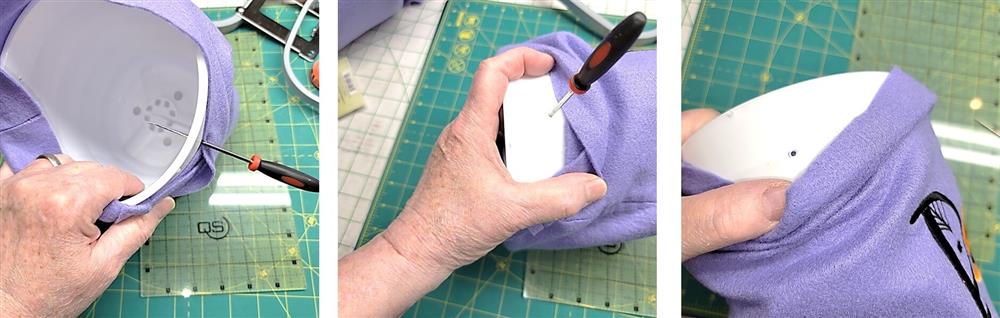
- The awl should puncture all the way through the pot.
- Repeat for the other side.
Final Steps:

- Next will be to run colored twine through the top of the felt.
- Measure from the cut edge of the felt to the top of the pot. For this project, that measurement was 2”.
- At the sewing machine, use a seam guide to measure 1 ½”.
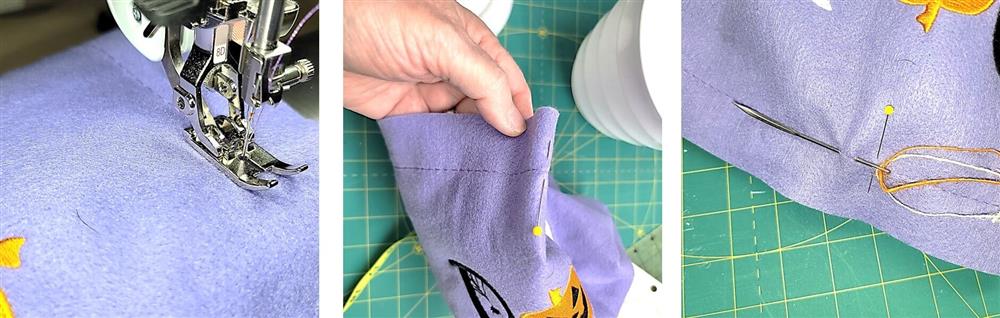
- Set the sewing machine at a 4mm basting stitch.
- Using a guide or the ruler, run a row of stitching around the entire top of the felt at the determined measurement (1.5” for this project).
- Thread the large eyed needle with two or three strands of colored twine.
- Using the basting line as a guide, run the needle in and out of the basting line holes.
- Begin at the center front.
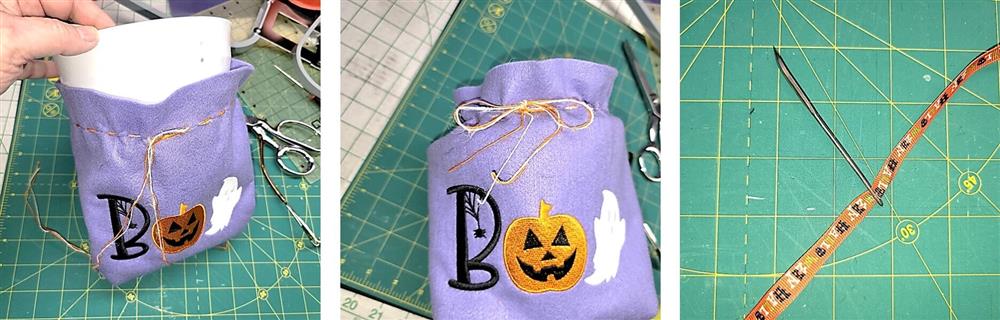
- Run the twine from the center front all the way around to the center front again.
- Gently pull the twine to slightly gather the top of the felt and tie a bow.
- Using the same large eyed needle, run the end of the ribbon through the eye of the needle.
- Align the needle to the hole on one side of the pot that was created with the awl, going through the felt.
- Pull the needle through, using pliers to help if needed.
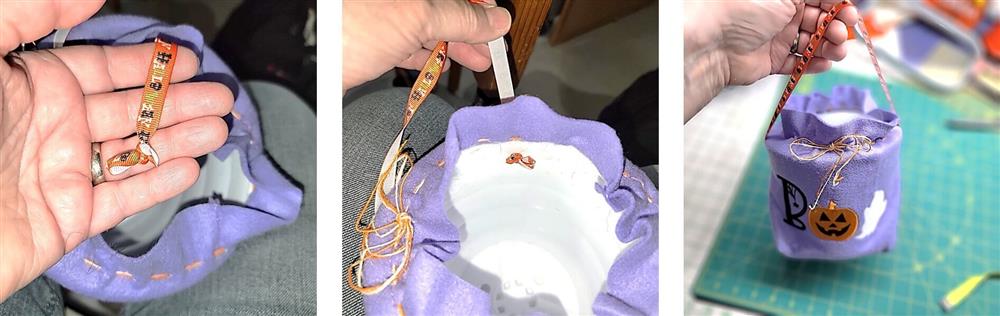
- Knot the end of the ribbon.
- Repeat for the other side—make sure the ribbon doesn’t get twisted.
- The “BOO BUCKET” is finished!
- If glow-in-the-dark thread was used, follow the package instruction to illuminate the thread.
Conclusion:
Congratulations! Whether for yourself or a gift, learning new ways to use designs increases your enjoyment of stitching. There is no doubt your project will be a “Grand Slam!”
By the “Grand Slam Designs” Team
By the "Lindee G Embroidery" Team


