


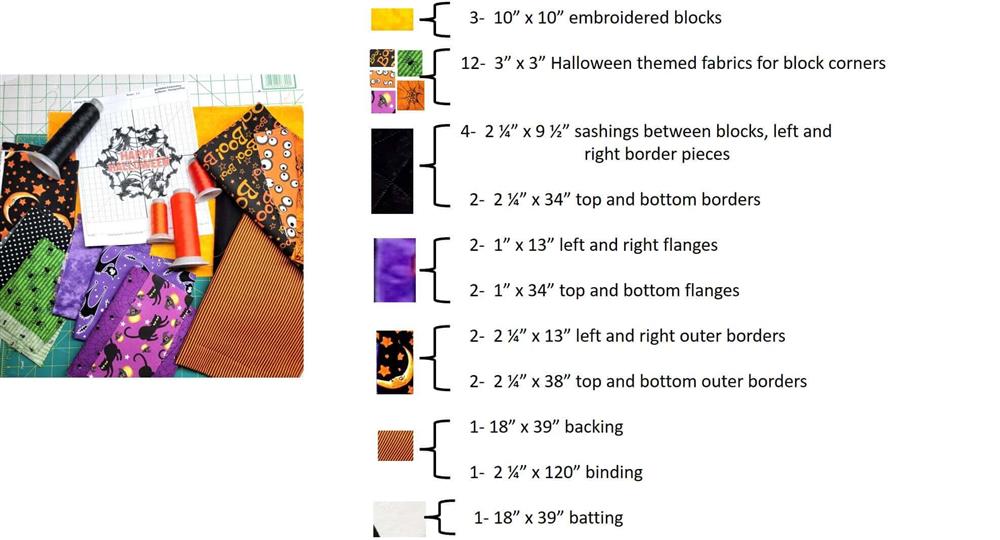
What you’ll need
Yellow-Orange Batik:
3- 10” x 10” embroidered blocks
Halloween Themed fabrics:
12- 3” x 3” Halloween themed fabrics for block corners
Black Kona Cotton:
4- 2 ¼” x 9 ½” sashings between blocks, left and right border pieces
2- 2 ¼” x 34” top and bottom borders
Purple Batik:
2- 1” x 13” left and right flanges
2- 1” x 34” top and bottom flanges
Moon and Stars themed fabric:
2- 2 ¼” x 13” left and right outer borders
2- 2 ¼” x 38” top and bottom outer borders
Orange/Black Stripe:
1- 18” x 39” backing
1- 2 ¼” x 120” binding
Cotton Batting:
1- 18” x 39”
3-Tearaway stabilizer to fit hoop
Black embroidery thread
3- colored embroidery thread to coordinate with fabrics for text in blocks
Print out of embroidery design
Sewing thread to coordinate with fabrics
Thread for quilting
Featured Design
https://www.grandslamdesigns.com/happy-halloween-99-embroidery-design
Other designs that could be used:
https://www.grandslamdesigns.com/fabulous-witch-shoes-embroidery-design
https://www.grandslamdesigns.com/flying-witch-embroidery-design
https://www.grandslamdesigns.com/witchful-thinking-halloween-3-embroidery-design
Notes
- Be sure to read through all the instructions before beginning.
- There is a schematic of which fabrics go where, with the sizes in the next picture.
- Gather all the supplies.
- Wash, starch, and press all fabrics.
- ¼” seams are used throughout.
- Measurements listed are cut measurements—for borders and flanges, the width is accurate and the length will be trimmed after sewing. For the embroidered blocks, they are cut down after embroidery.
- If measurements are changed to fit what you’d like, be sure to allow for extra fabric.
- When the corner squares are sewn onto the embroidered blocks, “Snowball” quilt blocks are formed.
Preparation

- Here is a layout of the cut fabrics, with a swatch of the fabric.
- The widths of the flange and border pieces is final width; however, the lengths are longer and will be cut down after stitching them on.
- The corner block sizes are final cut sizes.
- The block fabrics for embroidery are cut larger and then cut down after embroidery.
- The binding is cut the width, and extra length is given for turning corners and finishing.
- The backing and batting are cut 1” larger all the way around.

- With some fabrics, the wrong side may be used instead of what is considered the right side; it may give a color that is better for the project—the decision is yours.
- Print a copy of the design.
- Find the center of the cut fabric to center the embroidery design.

- Determine the fabrics that will be used around each of the three embroidered squares.
- Cut the fabric to be embroidered. For the project, the yellow-orange batik fabric was cut 10” square.
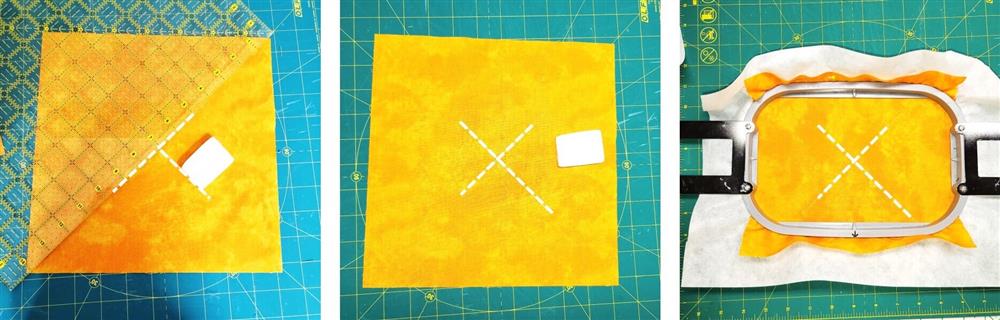
- Find the center of each square. To do this, lay a ruler from corner to corner and mark with chalk.
Machine prep and hooping
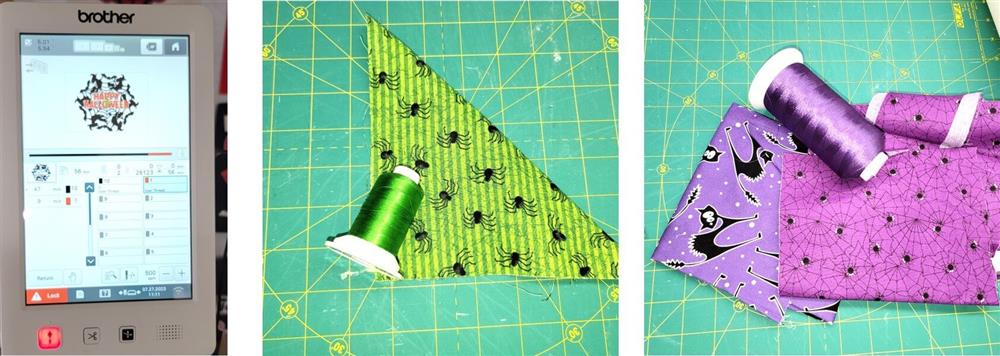
- Load the design on the machine.
- Black thread is used for the circle around the text.
- Choose an embroidery thread color to coordinate with the squares that were chosen to go around the center block.
Embroidery

- Center and hoop one piece of fabric with a piece of tearaway stabilizer.
- Stitch the design with the chosen colors.
- Remove the embroidered fabric from the hoop and remove the excess stabilizer.
- Repeat hooping and stitching two more times with the other chosen thread colors.

- Press the fabrics and square them up to 9” square, centering the embroidery.
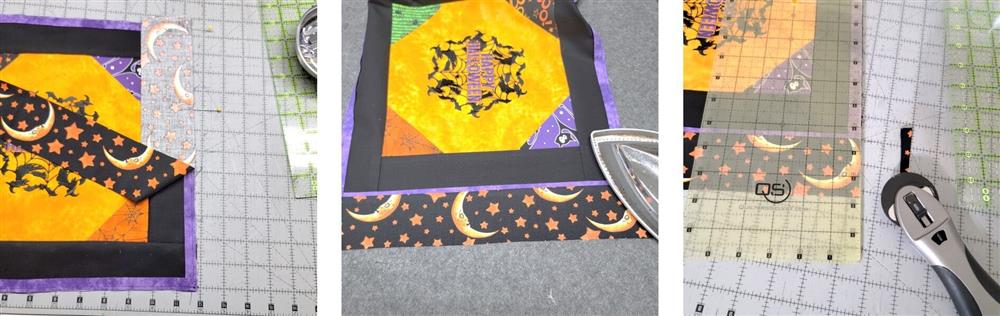
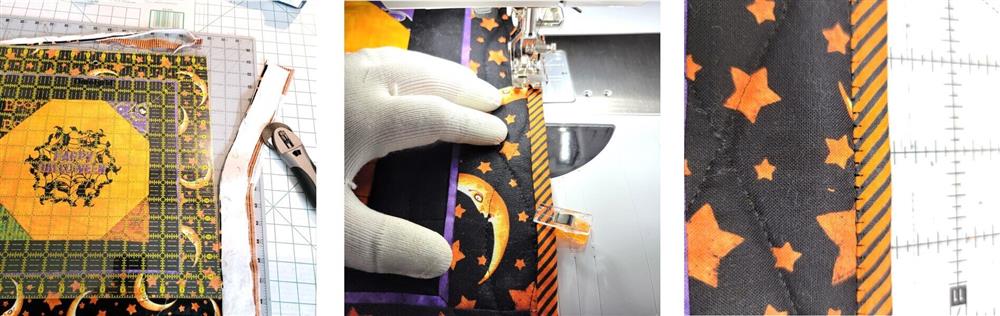
Corner squares
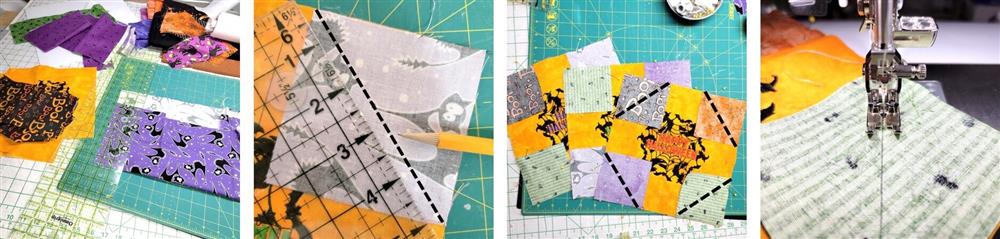
- Cut the 12- 3” x 3” corner squares from the fabrics.
- Lay out the squares as planned.
- Draw a line from corner to corner as shown by the dotted lines.
- At the sewing machine, stitch about one thread width inside the drawn line, backstitching at each corner.
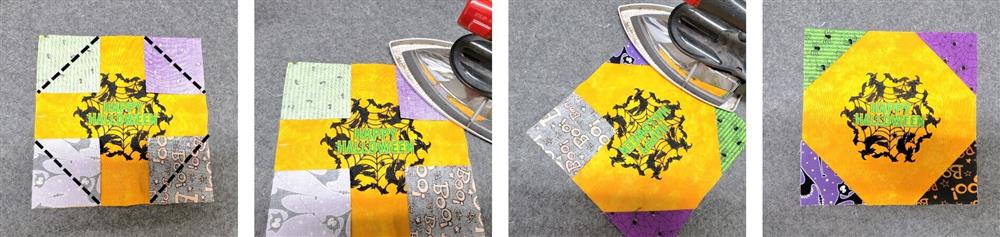
- The lines show how the squares are sewn onto each corner.
- After sewing on each corner, press to set the seams.
- Flip each corner up and press into position.

- Find the seam and fold back the background fabric.
- Trim the excess corner fabric to ¼”.
- Repeat for all corners on all blocks.
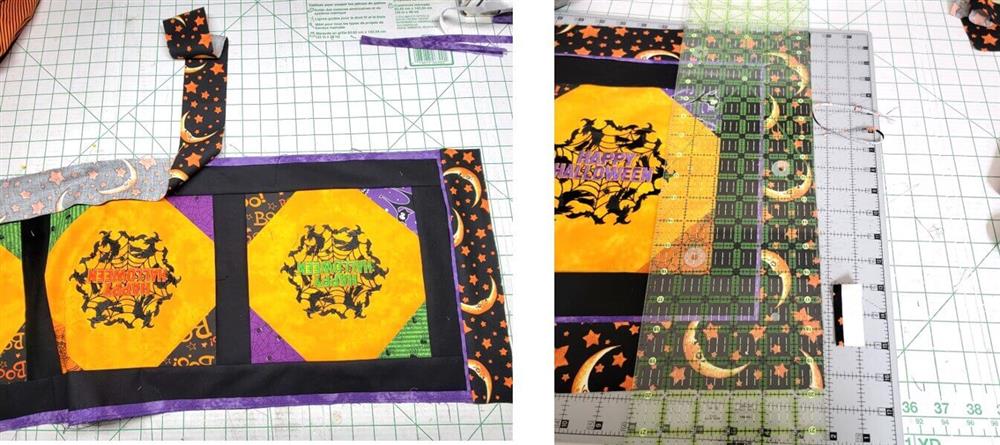
Sashing, flange, borders
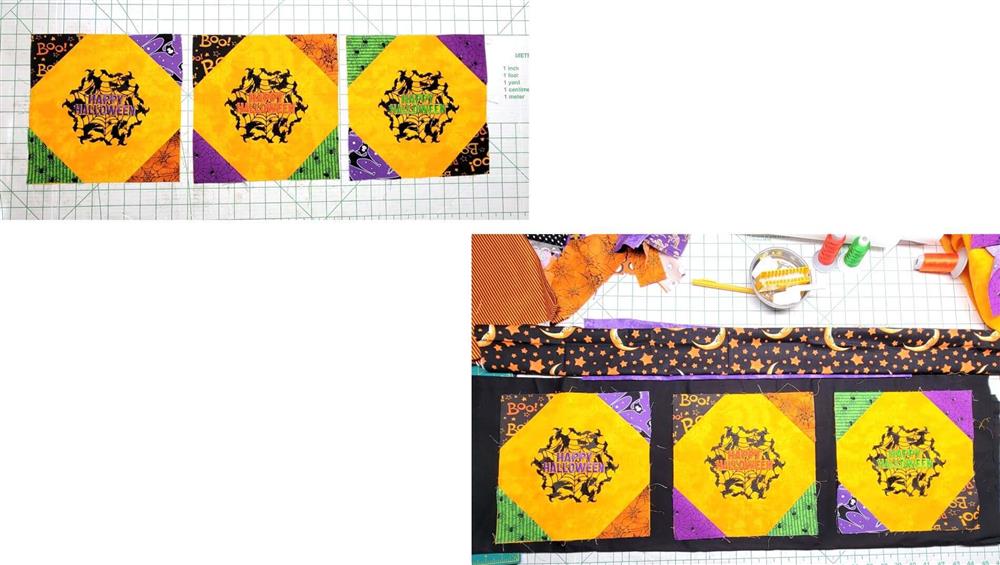
- Press all the corners back into place. If desired, place a little tack of glue in each corner to tack the corners to the background fabric.
- Audition fabrics from your stash for the sashings, borders, and flange pieces.
- For the project, black Kona cotton sashing and top and bottom borders were added.
- Purple batik fabric was chosen for the flange.
- A moon and star themed fabric was used for the outer border pieces.
- For this project, everything was pulled from scraps in the stash.
- Cut the 4 sashing strips.
- For the project, the strips were cut as stated in the materials list.
- Place right sides and together and sew the sashing pieces to the left and right sides of the left and right blocks.
- Sew the pieces on using a ¼” seam.
- Set the seams and then press the seams toward the sashing.
- Trim the sashing pieces even with the embroidered blocks.
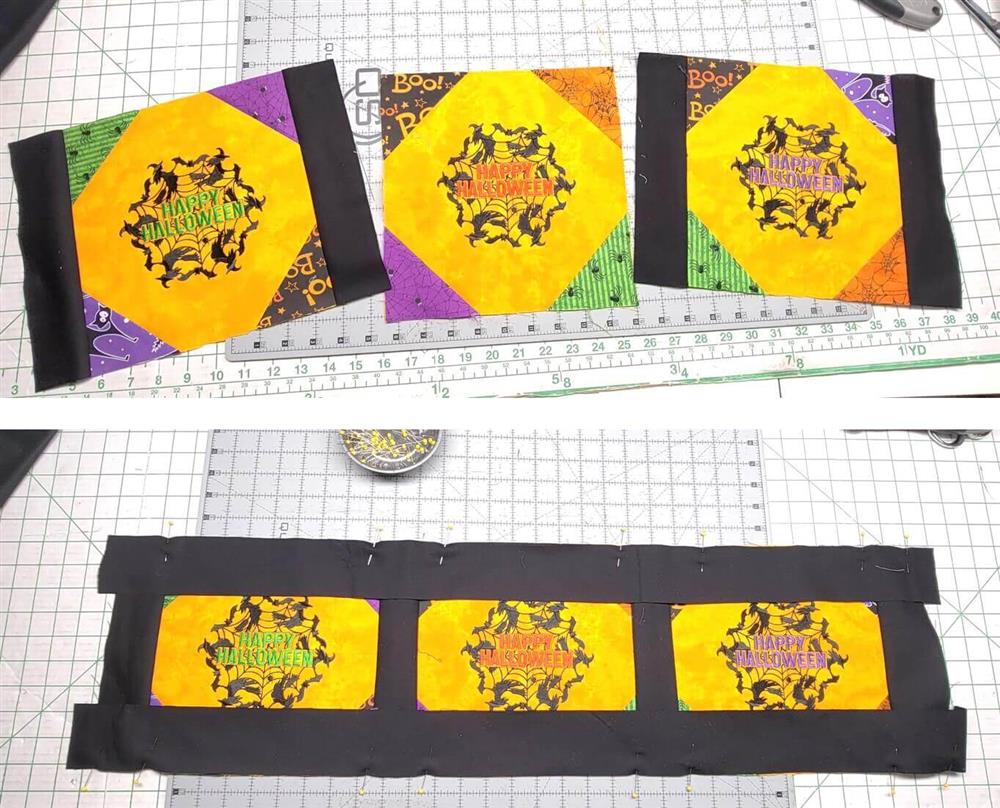
- Next, sew the middle block to the left and right blocks at the sashing pieces.
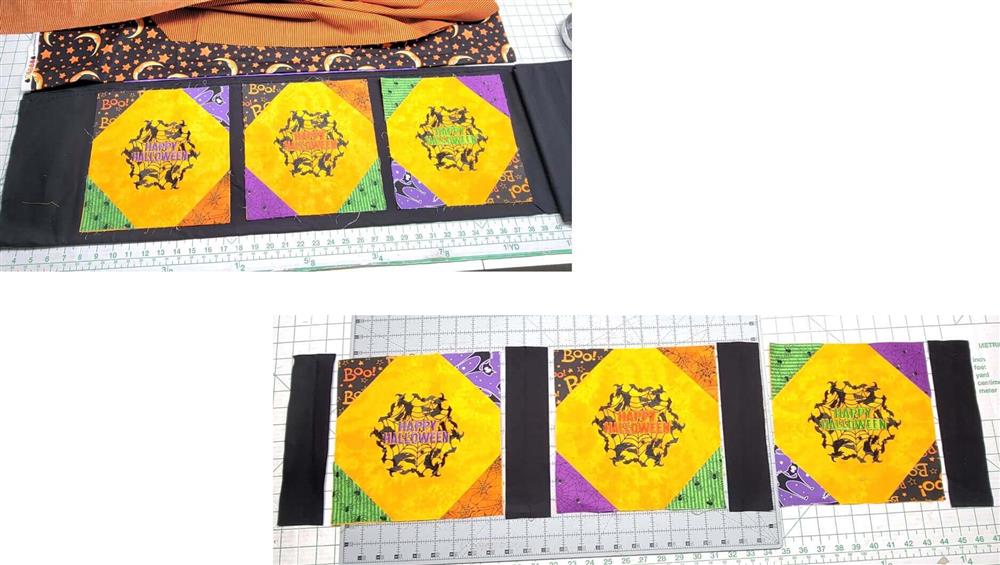
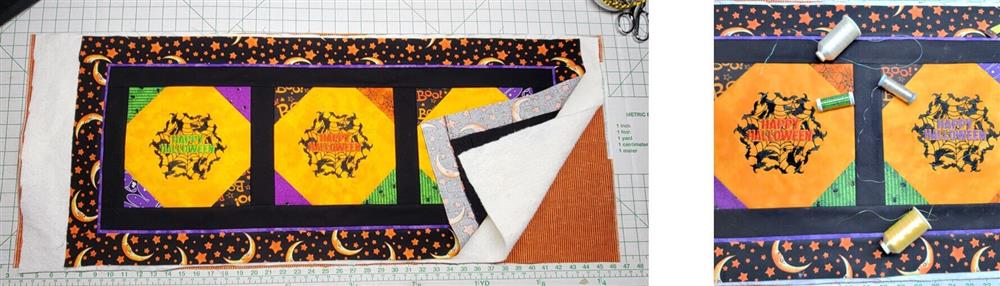
- Cut the top and border pieces.
- With right sides together, sew them to the top and bottom of the blocks section.
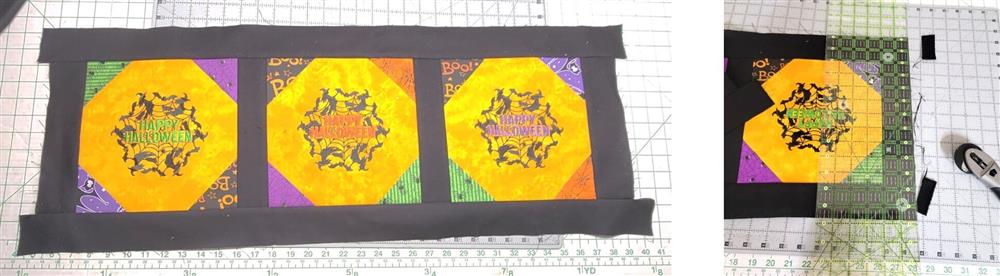
- Set the seams and press the seam toward the border.
- Square up and trim the borders even with the sashing strips on each end.

- Measure and cut the flange strips.
- For the project, the flange pieces were cut as stated in the materials list.
- Press the flange strip in half lengthwise.
- Measure and cut the flange pieces longer than the left and right sides of the sashing.
- Baste the flange pieces on the left and right sides, sewing about 1/8” seam.
- Trim the flange pieces even with the top and bottom borders.
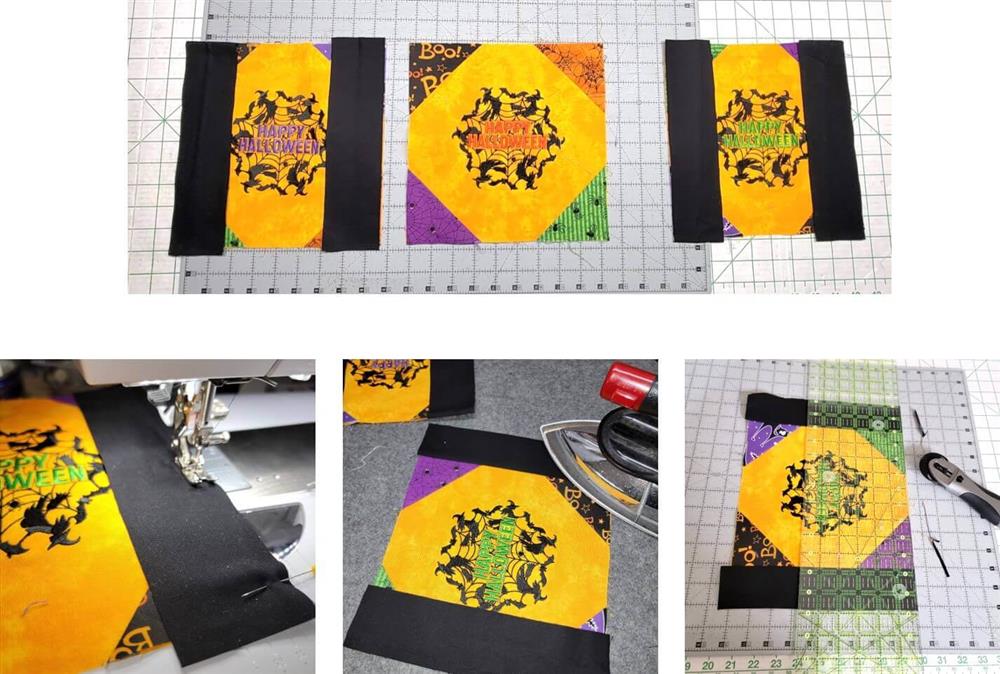
- Cut flange pieces the length of the top and bottom borders.
- Baste on the top and bottom flanges.
- Square up and trim the flange ends even.
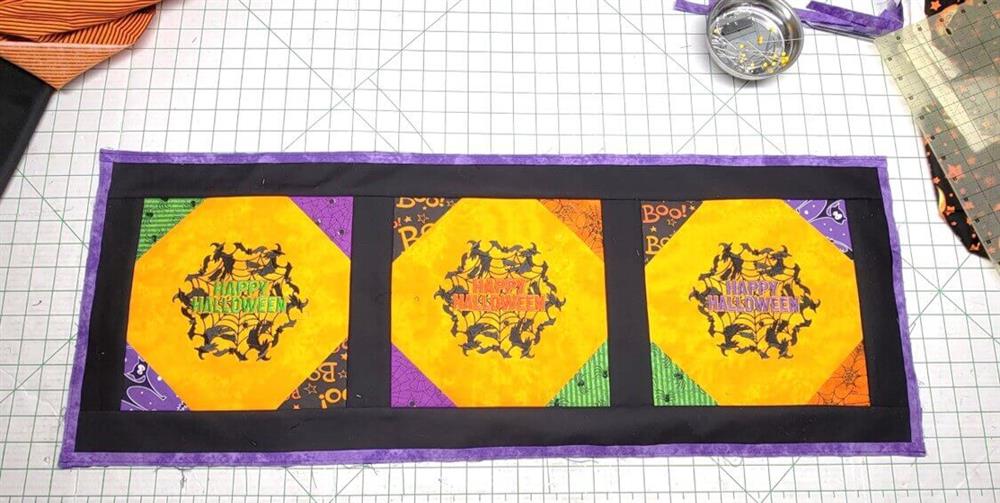
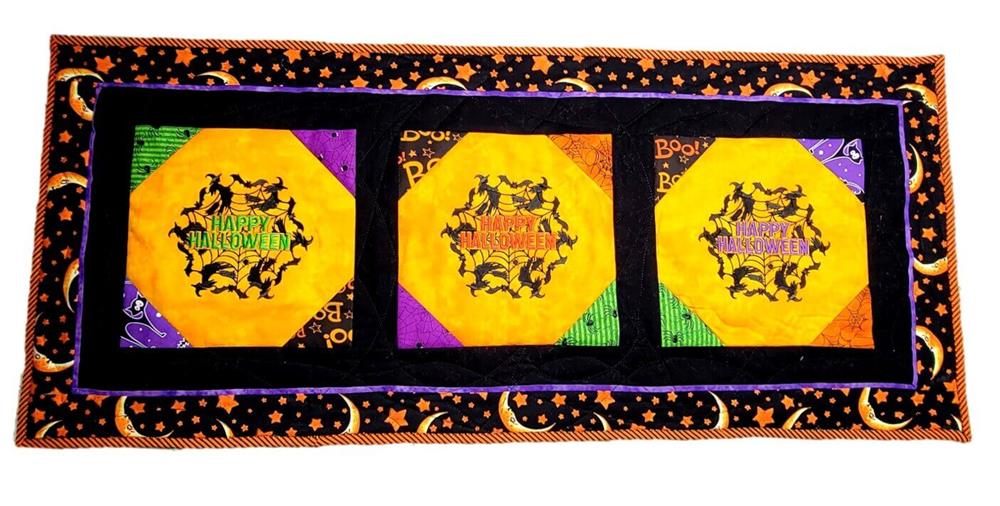
- The table runner should look like this now.
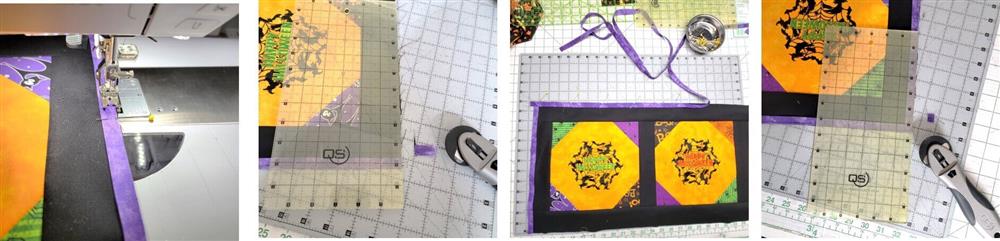
- Next will be to add the outer borders.
- Cut the left and right border strips.
- Sew them on and press the seam toward the border.
- Square up the borders at the top and bottom.
- Cut the top and bottom borders pieces.
- Sew on the borders, press the seam toward the border.
- Square up and trim the border pieces.
Final Steps
- Cut a piece of batting about 2” larger than the table runner top.
- Cut a piece of backing fabric 2” larger than the table runner top.
- Sandwich the table runner: backing fabric wrong side up, batting, table runner top right side up.
- Pin or spray baste the quilt sandwich.
- Choose a thread color for quilting.
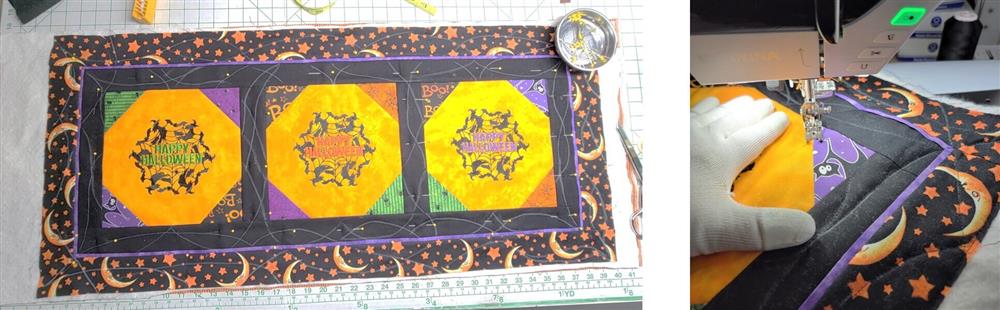
- Quilt the table runner as desired.
- For this project, all the seams were stitched in the ditch first, and then a random web-like stitching was done.
- Hint: use quilting gloves to help grip the fabric while quilting.
- After the quilting is finished, square up and trim the table runner.
- Cut bias strips of fabric for the binding and sew them together to form one long strip.
- Stitch the binding on using your favorite method.
- For this project, the binding was pressed in half lengthwise, sewn to the back, pressed to the front, and a blanket stitch used with black embroidery thread to stitch it down.

- The table runner is completed.
- The colors pop and it’s a great way to use up smaller fabrics from your stash.
Conclusion:
Congratulations! Whether for yourself or a gift, learning new ways to use embroidery designs increases your enjoyment of stitching. There is no doubt your project will be a “Grand Slam!”
By the “Grand Slam Designs” Team


