


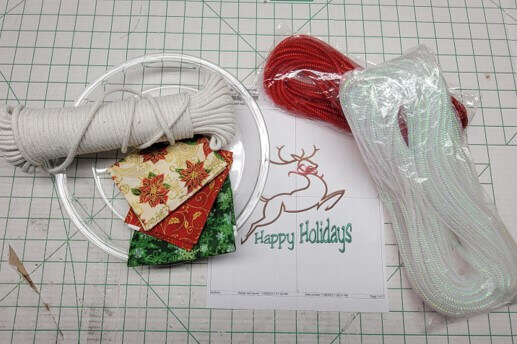
What you’ll need:
- Pie plate
- Poly fleece larger than hoop and bottom of pie plate
- Tearaway stabilizer
- Cotton clothesline rope
- Mesh tubing (various colors available)
- Bodkin for feeding rope through mesh tubing
- Applique or other sharp scissors for close trimming
- Fabric scraps in colors to match embroidered design
- Embroidery thread for stitching design and to coordinate with fabrics
- Pie of choice—baked and cooled
Featured Designs:
https://www.grandslamdesigns.com/reindeer-embroidery-design?variant=2
Or choose another design such as these:
https://www.grandslamdesigns.com/merry-christmas-tree-embroidery-design
https://www.grandslamdesigns.com/wreath-ornament-embroidery-design
Notes:
- The mesh tubing is available at the Dollar Store and Amazon.
- If you want more information on making rope bowls and pie pan shaped projects, there are many YouTube videos and also private Facebook groups to join.
- Once the first project is done using rope, you’ll have so much fun you’ll want to make more!
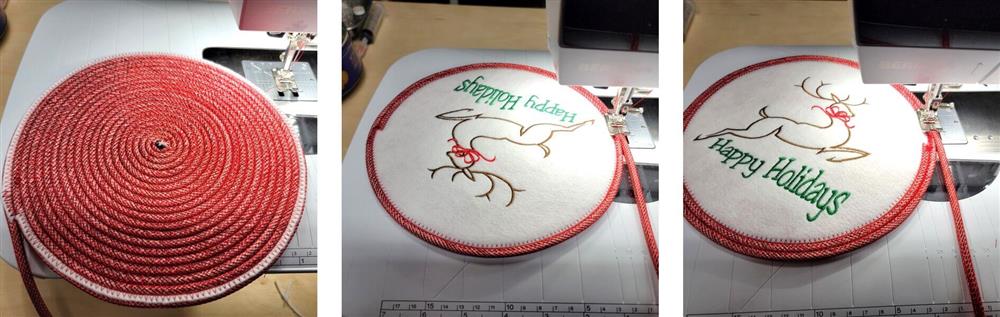
Machine prep, hooping, and stitching:
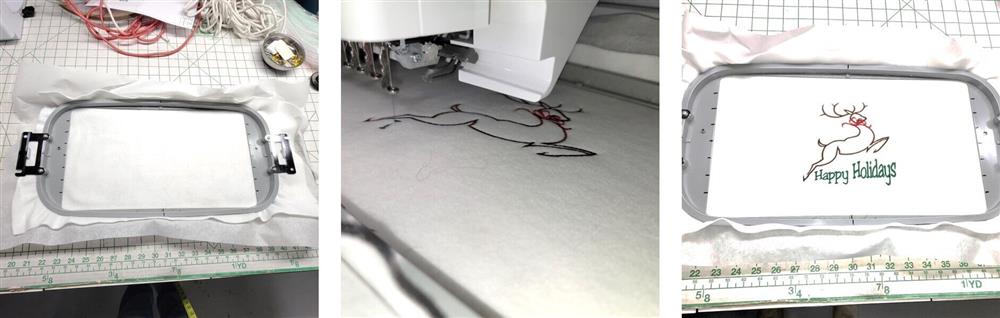
- Hoop the piece of poly fleece with a piece of tearaway stabilizer.
- Load the chosen design on the machine and stitch the design with the chosen thread colors.
- The design is beautiful, and simple to stitch.
- Remove the hoop from the machine, but do not unhoop the fabric yet.
Prep the fabric for placement on the bottom of the rope basket:
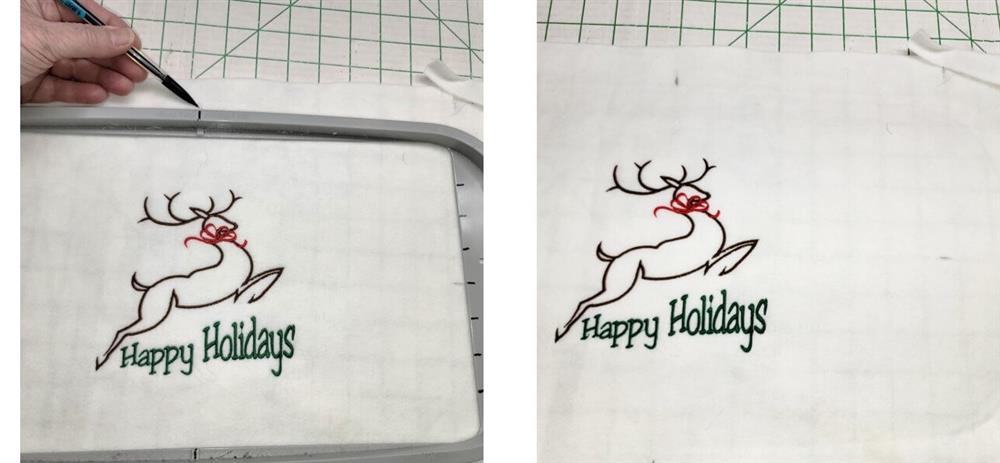
- Using the marks on the hoop, make tick marks on the fabric at the top, bottom, and sides of the hoop.
- Remove the fabric from the hoop.
- Tearaway the excess stabilizer.
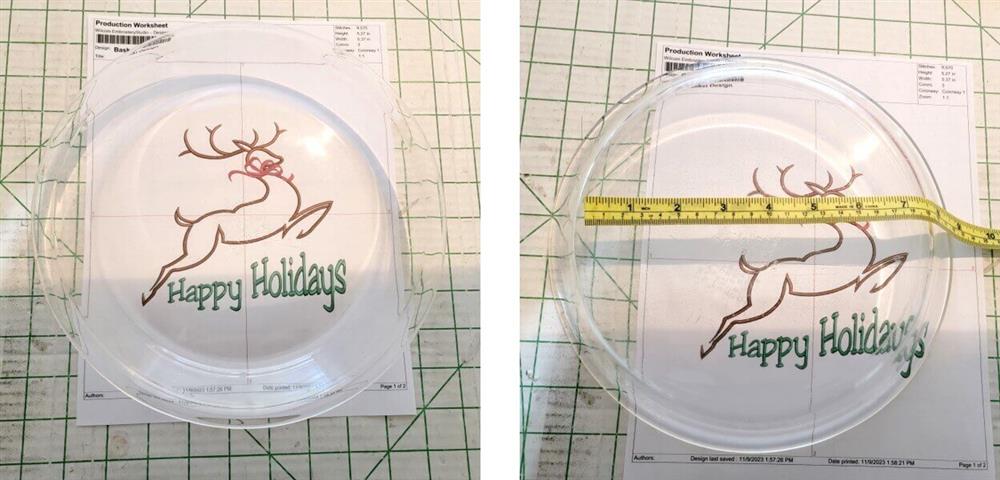
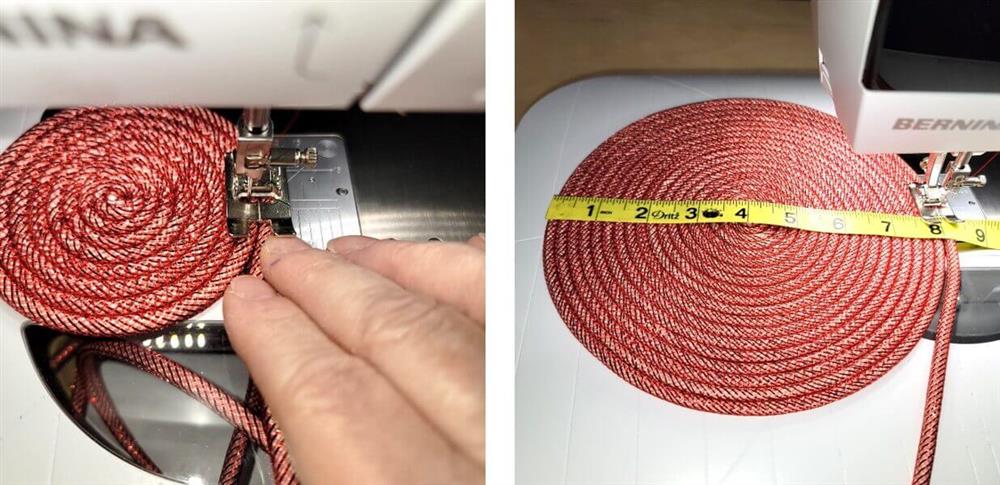
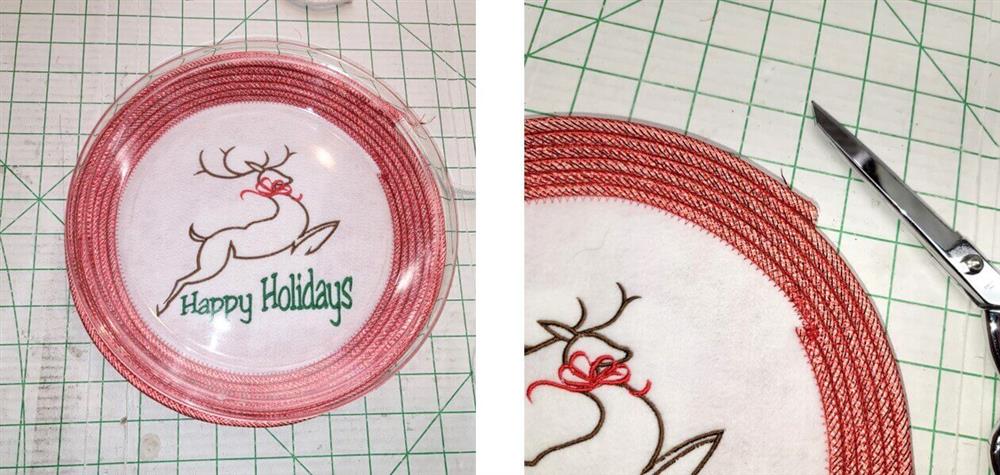
- Place the glass plate over the paper template to get an idea of how the stitching will be centered at the bottom of the plate.
- Flip the pie plate over and measure the bottom of the plate.
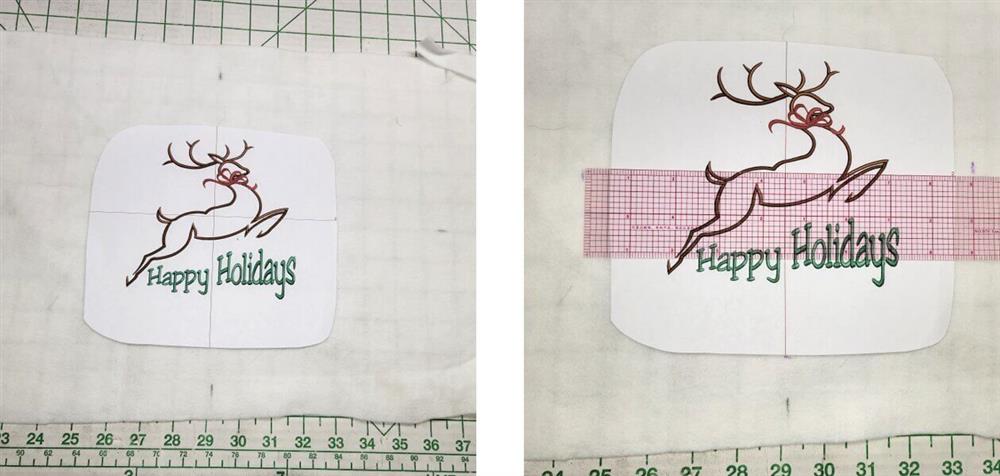
- Generally trim around the paper template.
- Use the crosshairs on the template to align with the marks on the fabric.
- Measure across the bottom of the plate (the project plate measured 8”).
- Place the 4.5” mark at the center of the paper design, and make tick marks at the outer edge of the ruler, and the 9” mark.

- Using a seam gauge or compass, use the tool to go around the fabric to make a circle.
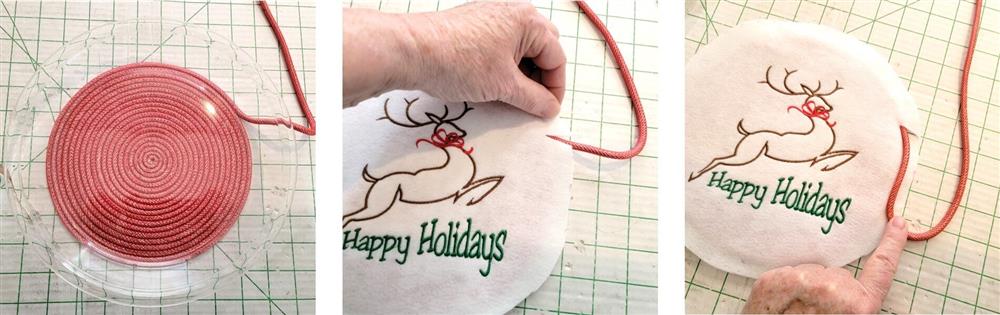
- Cut out the circle, which will be about an inch larger than the bottom of the plate.
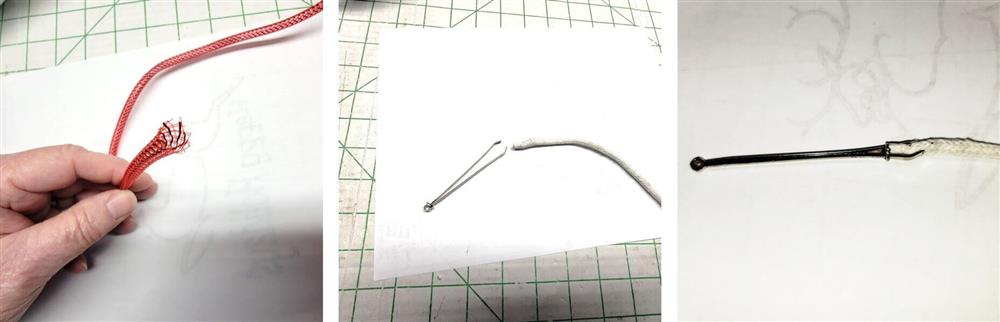
- Next will be to feed the clothesline through the tubing; this is very easy to do because the tubing expands and contracts.
- Unwrap and clean cut one end of the tubing.
- Place the teeth of the bodkin at one end of the rope and push down the plunger to snug the teeth around the rope.
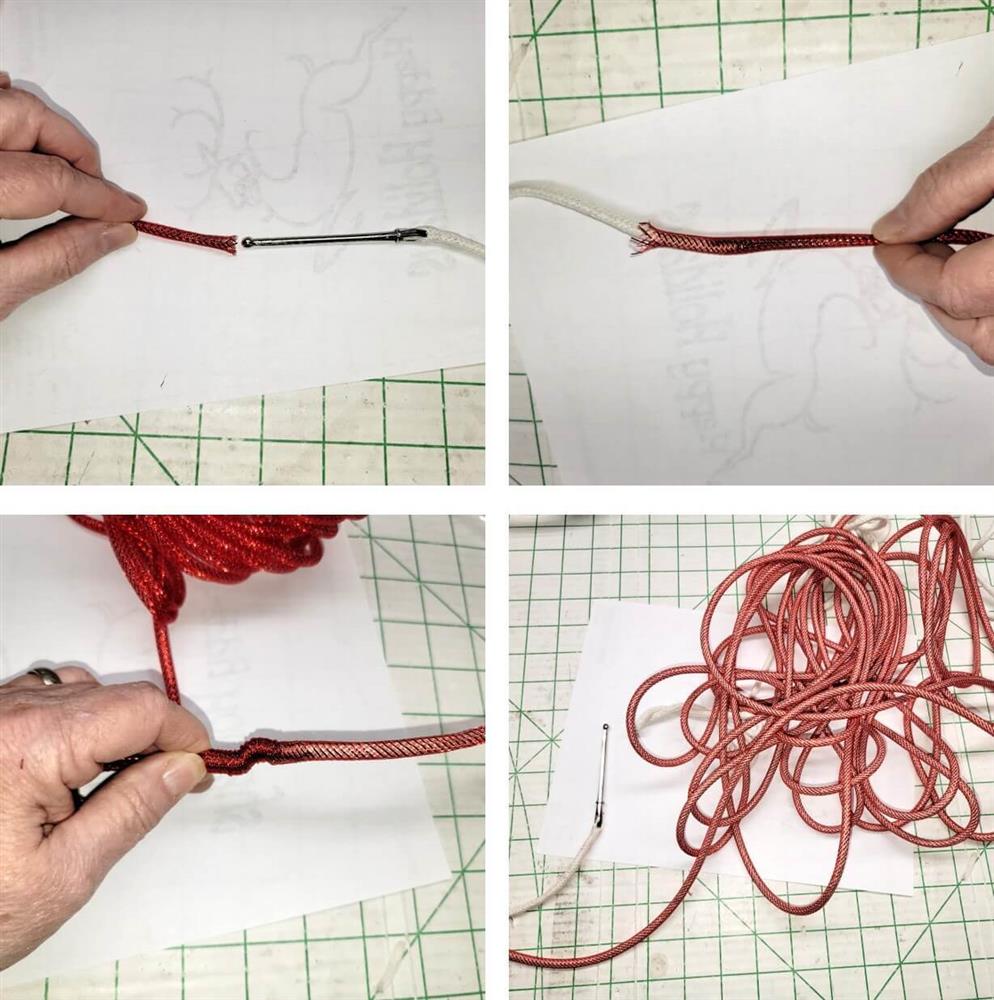
- Feed the ball end of the bodkin through the end of the mesh tube—it will slide in easily.
- While feeding the bodkin through the tube, scrunch the mesh along the bodkin and then use your hand to smooth the mesh along the rope. This is much like feeding elastic through a casing.
- Continue feeding the rope through the mesh to fill up the entire length of mesh.
- For this project, the mesh measured 12’ long; after the mesh was fed over the rope, the length measured 11.5’.

- Now it is time to begin building the rope basket.
- Clean cut the end of the mesh/rope.
- Make a small coil, snugging the rope tightly and pinning.
- Continue coiling the rope and pinning until there is about a 3” coil.

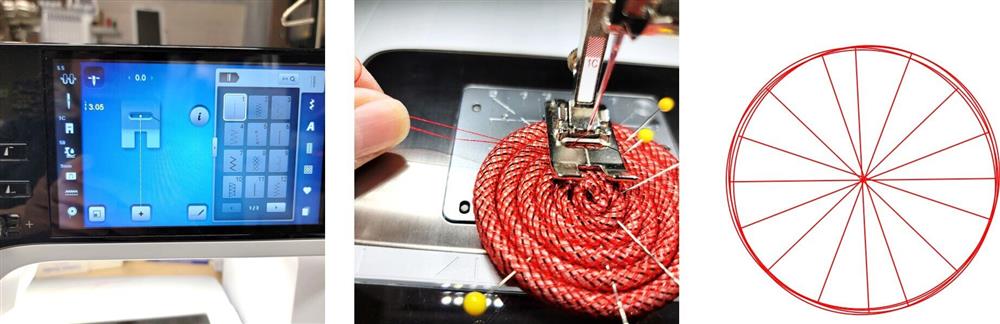
- Thread the machine in both the top and bobbin with thread to match the mesh color.
- Using a straight stitch, go back and forth in a spoke formation to secure the oil, removing the pins as you come to them.

- Now switch to a zig-zag stitch. For this project the length was set to 2.5mm and width to 5.5mm. This may be different for your machine.
- With the rope length to the right, continue stitching the coil.
- Use an open toe foot with a center mark; this helps in keeping the stitching centered between the rope edges.
- To keep the rope feeding smoothly and aligned, it may be helpful to stick your middle finger just under the right toe of the presser foot and your left hand moving the rope under the needle.
- Continue stitching the coil until you have the width of the bottom of the plate.
- Double check under the pie plate that the bottom coil is large enough.
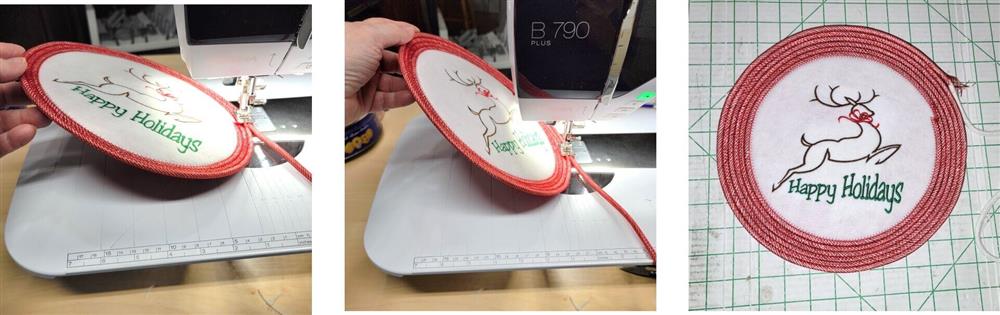
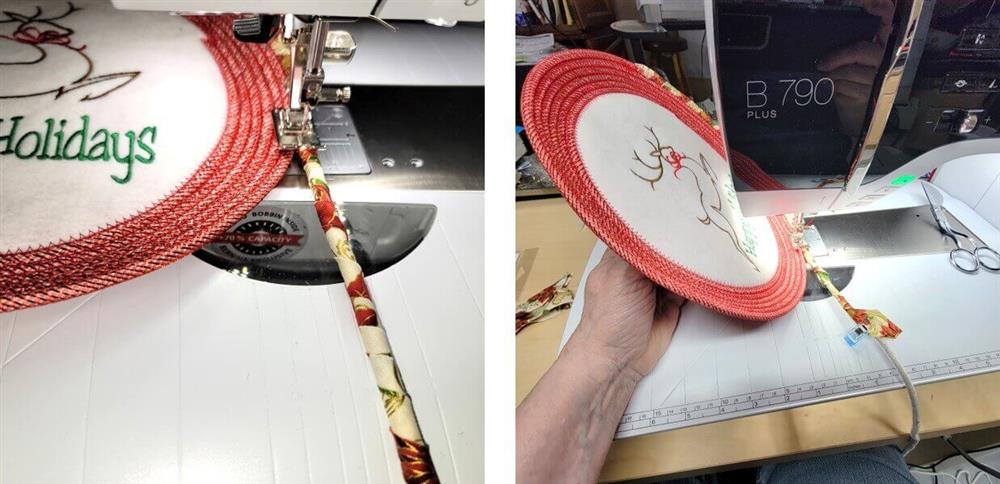
- Center the embroidered piece over the coiled bottom.
- Make a slit only large enough to pass the rope through the fabric edge to be able to continue stitching the basket.
- You may want to pin the fabric to the bottom to keep it centered.
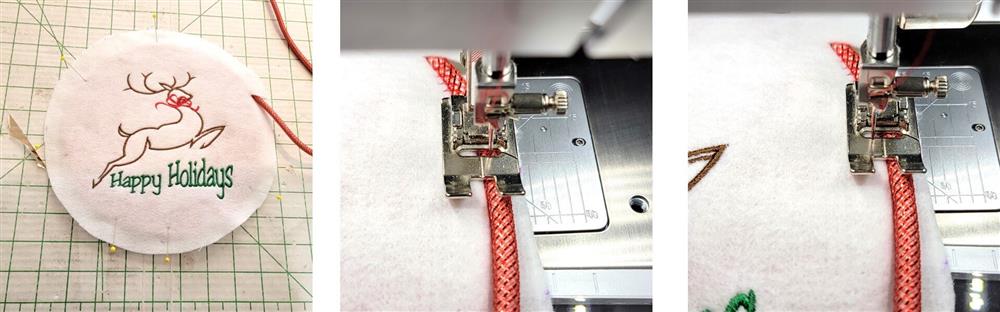
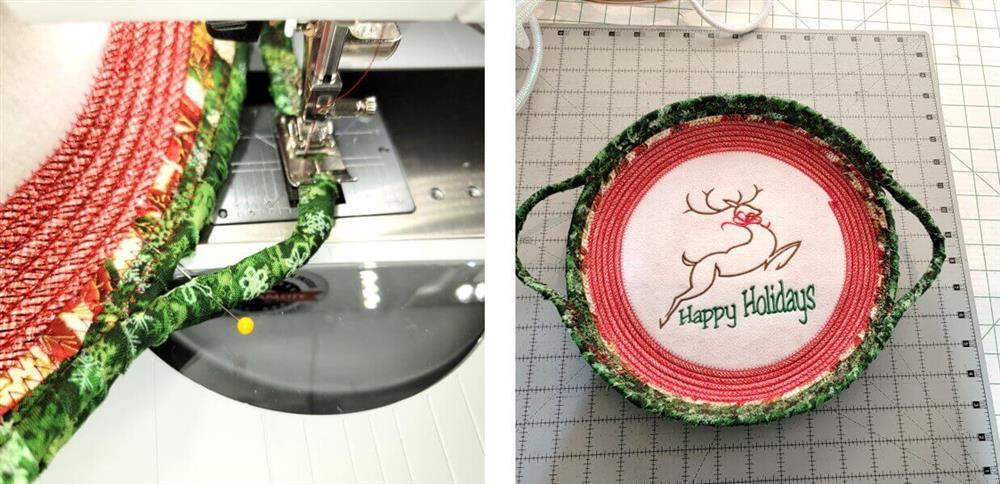
- Place the piece back under the needle and continue stitching around the coil as before.
- The needle should zig into the mesh/rope and zag back into the fabric, catching the rope underneath.

- Stitch one round until you are back at the beginning; backstitch.
- Trim the thread
- Using applique scissors, from the back very carefully trim the excess fabric away from outside the stitching.
- Be careful not to cut into any of the stitches.
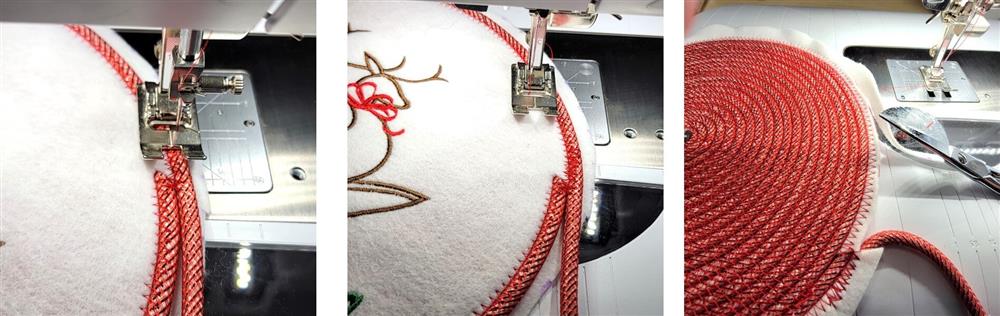
- This is how the bottom of the basket should look.
- Return to the machine and continue stitching as before.
- Do one more round to the bottom of the basket.
- To start building a slanted side, raise the outer edge of the basket at about a 45 degree angle and stitch more rounds.
- The more the outer edge is raised, the deeper the sides will be.
- This was 11.5’ of mesh/rope stitched.
- Check to see how many more rows need to be stitched to reach the edge of the pie plate.
- Clean cut the end of the mesh/rope.
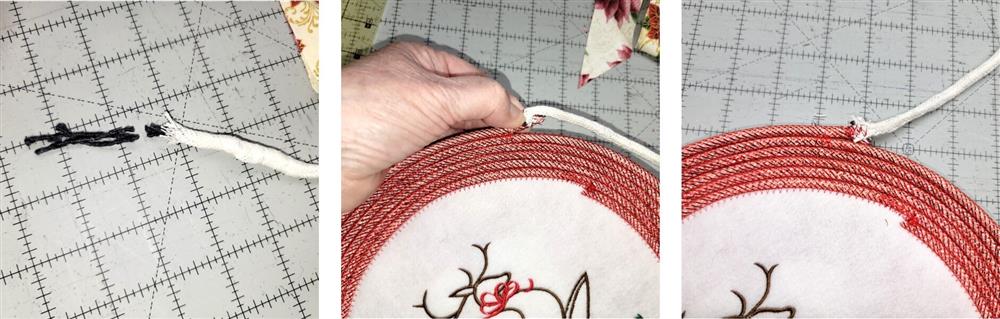
- To attach more rope to cover with fabric, pull out about an inch or so of the rope filling and pinc it around the end of the mesh/rope end; stitch the ends together.
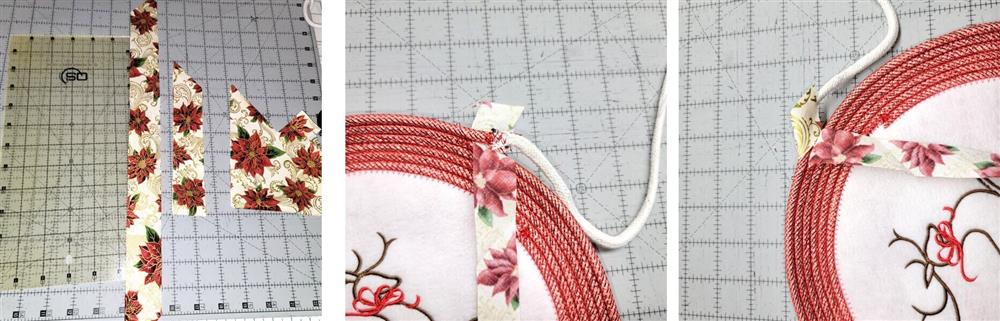
- Cut bias strips of fabric 1-1/4” wide.
- Begin wrapping the fabric strips around the rope, beginning at the cut end.
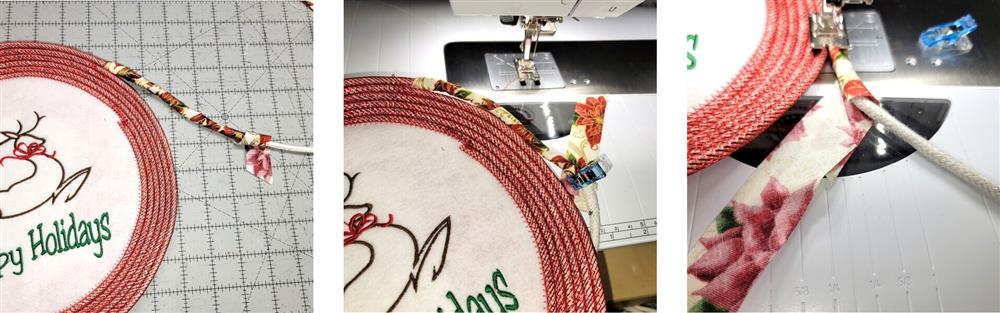
- Wrap the strips and secure with a clip or pin.
- Continue stitching the basket as before, adding more sections of fabric, wrapping around the rope.
- Continue wrapping fabric and stitching while making the sides straighter by holding the edge of the basket closer to the head of the machine.
- This is truly trial and error to get the angle. The instructions given are general and what worked for this project. All pie plates are different, so do what works for the pie plate you are using.
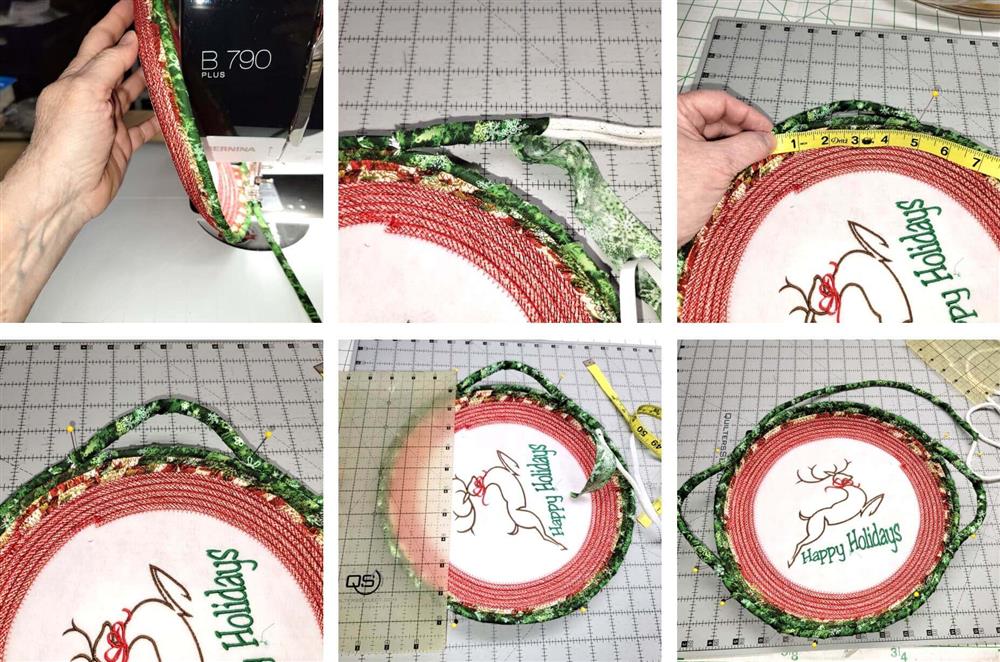
- To add additional color, cut strips of another fabric in a color from the embroidery design.
- When the basket reaches a height that is at the top of the pie plate, handles may be added.
- To do that, cut 2-6” pieces of rope, one for each handle.
- At the side of the basket, stop stitching, and add the small piece of rope, wrapping both section with one strip of fabric.
- Shape the handle and measure about 5” from the start of the handle; pin the end of the handle edge to the top edge of the basket.
- Continue wrapping the rope around to the other side of the basket and repeat the steps, pinning the second handle in place.
- Use a ruler to make sure the handles are aligned.
- Back at the machine, begin stitching where the last stitching edged, catching both ropes of the handle in the zig zag stitching.
- Continue stitching around the top edge of the basket to the second handle and repeat stitching the second handle.
- End the stitching back at the beginning of the first handle.
- Trim the end of the rope and tuck the edge under and secure with stitching to make a clean finish.
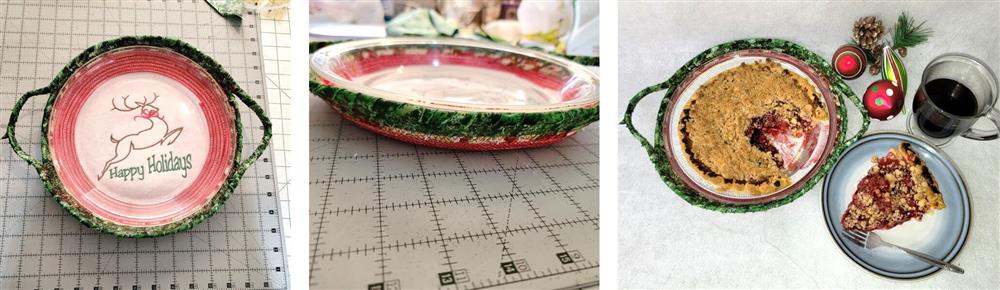
- The pie carrier basket for your holiday pie is complete.
- The basket should taper at the sideds, come to the top of the pie plate, and fit just slightly loose in the basket.
- Bake the pie and be sure to let it cool before place the pie in the basket.
- Grab a beverage and enjoy a piece of pie, sit back and admire your latest creation!
Conclusion:
Congratulations! Whether for yourself or a gift, learning new ways to use designs increases your enjoyment of stitching. There is no doubt your project will be a “Grand Slam!”
By the “Grand Slam Designs” Team


