


What you’ll need
- 360mm x 200mm hoop (14” x 7 7/8”) hoop was used for this project
- Unit insignia, medals, rank pins, etc.
- Cutaway stabilizer
- Embroidery thread as stated in color sequence
- White embroidery thread for quilting
- White cotton fabric for front and back
- 80/20 Batting
- Binding fabric in your choice of color
- 505 Temporary Spray Adhesive (TESA)
- Painter’s tape
- Applique scissors
- Optional: embroidery software
Featured Design
https://www.grandslamdesigns.com/vietnam-security-agency-embroidery-design
https://www.grandslamdesigns.com/national-defense-service-ribbon-embroidery-design?variant=1
https://www.grandslamdesigns.com/vietnam-service-ribbon-embroidery-design?variant=1
Notes
- Because all insignia and any additional text and medals, pins, and ribbons are added, general instructions will be given on how this project was created. The steps will generally be the same; what will differ is the size of hoop being used and the amount and size of embroidery designs/text being added. Just use these instructions as a general guide and choose the unit patches/ribbons and whatever embroidery designs you need. Just adjust the size and placement to personalize your project.
- Software was used to create the project; however, most machines will be able to create the steps, too. The choice is yours. If using the machine, just follow the steps for creating the outlines, adding the designs and aligning them, and adding the text and stippling.
- For this project a large hoop was used so everything can be done in one hooping. If you don’t have a large hoop, just set up the design and rehoop and align as necessary.
Preparation
- Gather all the pins, medals and any other decorations you’d like to add to your wallhanging.
- Gather the thread colors.
- Generally, figure out how everything will be laid out and then measure the area. Figure out the amount of fabric you will need.
- For this project, the dimension was 13” x 10”.
- Cut and press the white Kona cotton for the front and back, leaving about 1-2” all the way around
- Select fabric for the binding.

- In software (or at the machine) follow these steps, using your unit embroidery and ribbons.
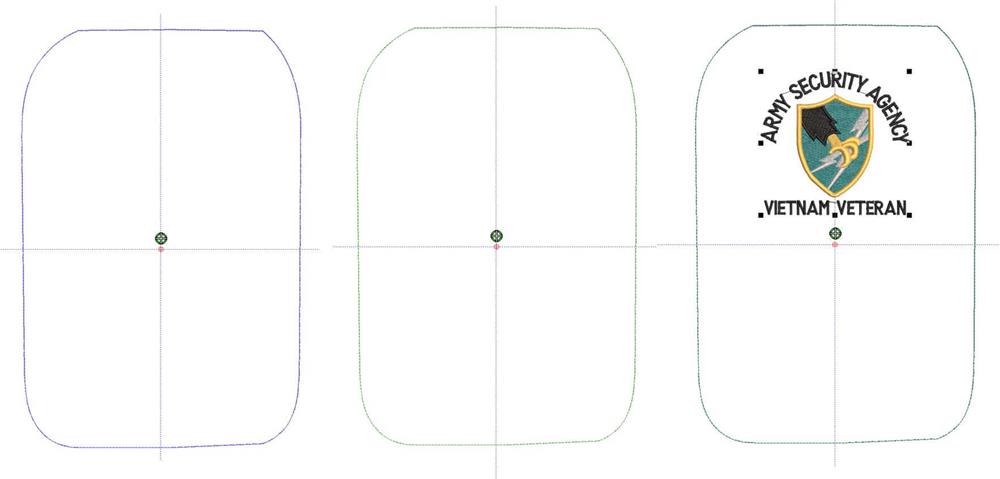
- Color 1: create a placement line 10” x 7” for the fabric placement.
- Color 2: duplicate this outline which will be the tackdown for the fabric
- Colors 3 on: import and center the unit patch design, centering toward the top as was laid out.
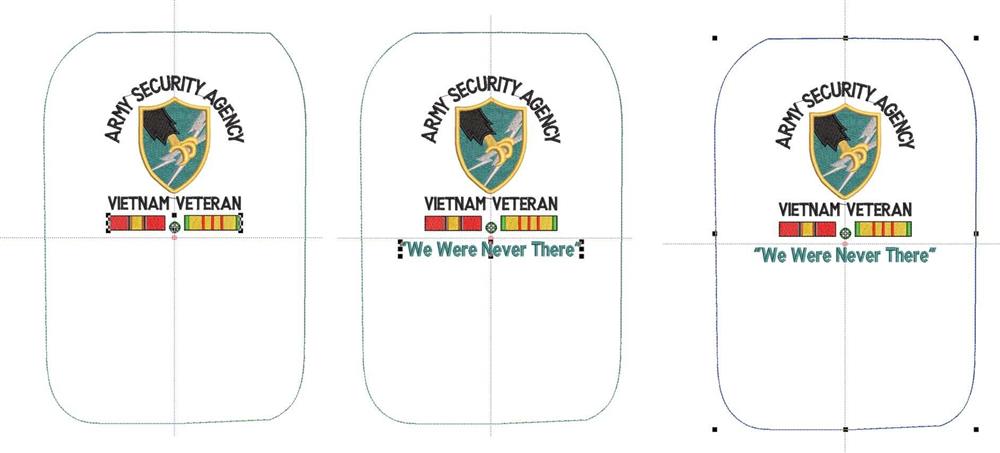
- Add ribbon embroidery designs and center and align them as planned.
- Using the lettering/text function, add a unit motto, centering under the ribbons.
- Duplicate the tackdown outline—this will be used to tack down the batting and backing fabric prior to stippling.

- Last Color: add stippling around the design as shown.
- Save the design in the native file format.
- Export the machine file.
Stitching

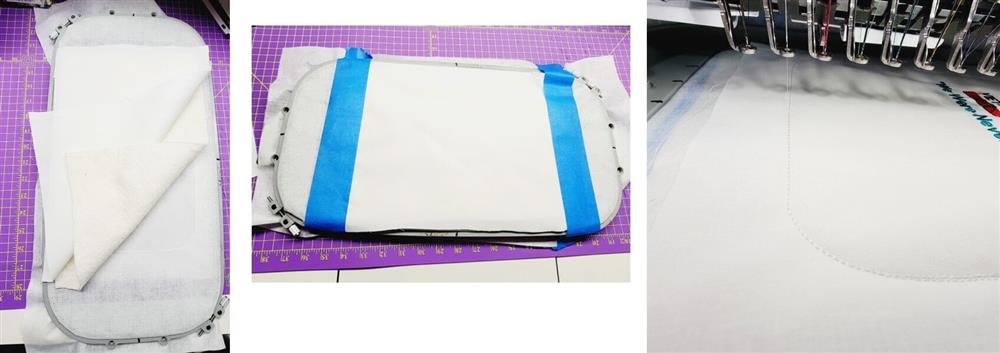
- Hoop a piece of cutaway stabilizer.
- Load the design on the machine, rotating if necessary.
- Load the embroidery thread on the machine and program stops for fabric placement.
- Stitch Color 1, the placement line.
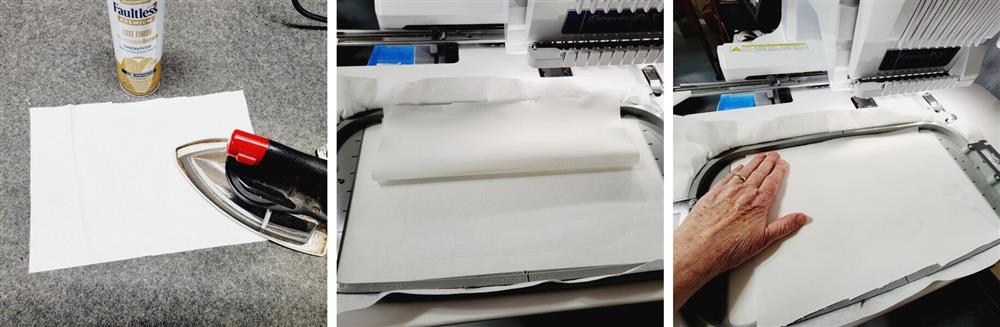
- Starch and press the front and back fabric pieces.
- Lightly spray the back of the top fabric with TESA.
- Center the fabric over the placement line.
- Lightly press the fabric in place with your hand.

- Stitch Color 2, the tackdown line for the top fabric.
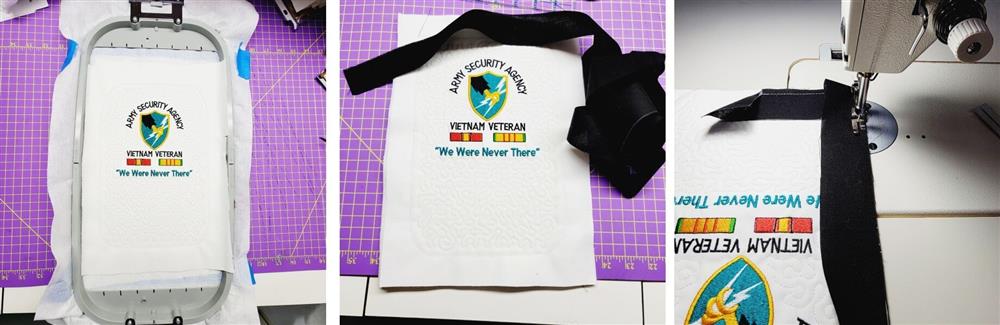
- Continue stitching the designs through the unit motto, following the color sequence.
- The machine needs to stop.
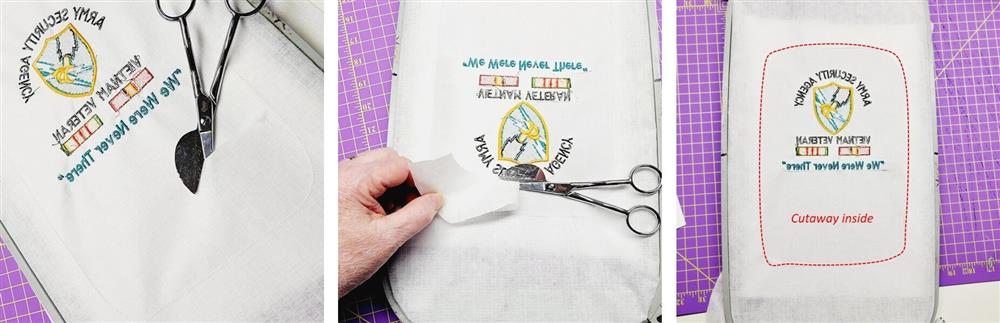
- Remove the hoop from the machine, but do not remove the fabric.
- Flip the hoop over.
- Using the applique scissors, very carefully slide the stabilizer and then trim around the embroidery.
- Trim away all the stabilizer possible inside the outline stitch (indicated by dotted line).
- When trimming away the stabilizer use a light hand so that the fabric and remaining stabilizer will not be disturbed and loosened in the hoop.
- Lay and center the batting over the outline.
- Lay and center the back fabric over the batting, with the fabric right side up.
- Secure the pieces with a light spray of TESA and then secure with painter’s tape.
- Place the hoop back on the machine, checking to be sure everything is still in place.
- Stitch the placement line to tack all the layers together.
- Stitch the last color, the stippling.
- Remove the fabric from the hoop and trim ¼” outside of the outline.
- Cut and prepare the binding.
- On the front, sew the binding to the edge.
Final Steps
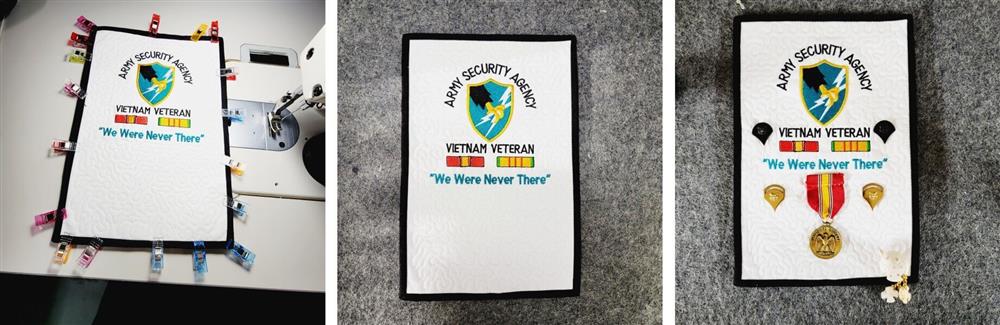
- Flip the binding to the back and hold in place with pins or clips.
- Stitch the binding to the back, mitering the corners.
- Add the additional pins, etc. as planned.

Conclusion:
Congratulations! Whether for yourself or a gift, learning new ways to use embroidery designs increases your enjoyment of stitching. There is no doubt your project will be a “Grand Slam!”
By the "Grand Slam Designs" Team


