


Skill Level
Moderately easy if you follow the steps and cut and place your fabrics as required. Appliqué basics are not covered here. Please see either: • Video: How to do Machine Embroidered Appliqué • PDF book: Appliqué Basic
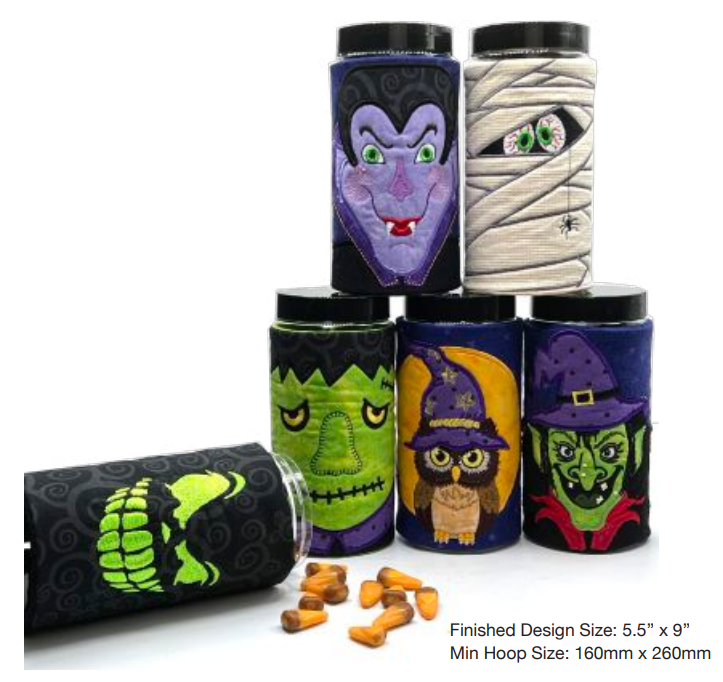
Designs Used In This Project
- Glow Scarey Face (https://www.grandslamdesigns.com/scary-face-glow-halloween-embroidery-project)
- Scarey Face (https://www.grandslamdesigns.com/scary-face-halloween-embroidery-project)
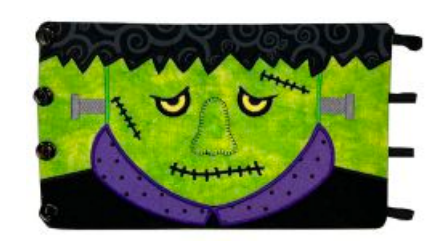
- Frankenstein (https://www.grandslamdesigns.com/frankenstein-halloween-embroidery-project)
- Mummy (https://www.grandslamdesigns.com/mummy-halloween-embroidery-project)
- Owl Hat (https://www.grandslamdesigns.com/owl-hat-halloween-embroidery-project)
- Dracula (https://www.grandslamdesigns.com/dracula-halloween-embroidery-project)
- Witch (https://www.grandslamdesigns.com/witch-halloween-embroidery-project)
- Complete set (https://www.grandslamdesigns.com/ith-halloween-container-wraps-bundle-embroidery-project)
What’s Included
- PDF worksheets with color sequences and full-size appliqué patterns
- SVG pattern pieces for digital cutters
- PDF annotated pattern guide sheet for designs with appliqués
- PDF illustrated instructions (this document)
What You’ll Need Per Design:
Fabrics:
Front fabric: 6.5” x 10.5” in the color you want for the face- Backing fabric: 6.5” x 10.5” in a coordinating color
- Fleece or thin batting: 6.5” x 10.5”
- Fabrics for appliqués: refer to patterns for sizes, and colors of your choice
- Gauze or cheesecloth for mummy (optional)
Other Supplies:
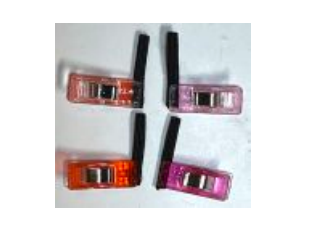
- Elastic: 1/8” wide or narrow round, four 2” strips
- Buttons: 4 small (1/2” or 13mm or smaller) (mine are plain back but a holiday theme could be fun)
- Stabilizer: I used no-show cutway
- Fusible Interfacing: Floated fabrics are not securely held; some designs (those with more stitching), may benefit from applying a fusible interfacing to the back of the front fabric. (Recommended for Witch design.)
- Painter’s tape or similar
- Fabric glue to secure elastic raw ends
- Clips to hold elastic while drying
- Embroidery threads to coordinate with your fabrics
- Fusible web for appliqué; I used Steam-a-Seam 2
- Optional: Temporary embroidery spray adhesive (TESA)
- Containers: these designs are sized for 16oz straight-sided containers that are approximately 6” tall with a diameter of 2.77”. I used these
Scissors used:
- For trimming batting
- Thread snips
- Heavy scissors for final trim
Before You Start!
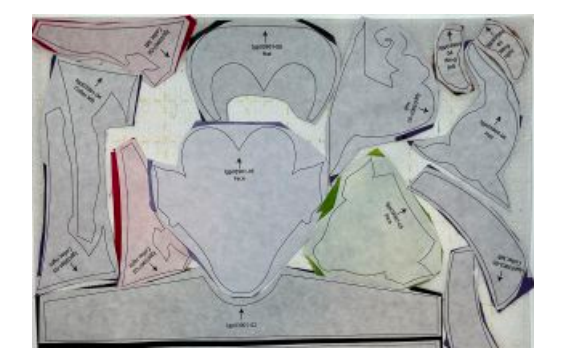
Appliqué patterns are included for all other pieces for the designs that have appliqués. These pieces need to be cut and placed accurately and will benefit from using a fusible appliqué web. Files are included for digital cutters (SVG only) and hand cutting (PDF). These patterns are the exact size you need; be sure to print or cut at the actual size
About Appliqués:
Here's a quick overview if you’ve never stitched machine embroidered appliqué. Each appliqué consists of 3 parts, which are delineated by a different color.
- Placement Line (hot pink): an outline so you know where to place the precisely cut and prepared appliqué pattern
- Tack Stitch (purple): a zigzag stitch to attach the appliqué to the base fabric
- Cover Stitch (design color): satin stitch, which may be sewn immediately after the tack stitch or later.
Colors are needed to force the machine to stop; use the same color as the cover satin.
If you’re hand-cutting, print the templates onto a fusible tearaway, which has been lightly fused to a piece of printer paper. (Press along the top and bottom edge about 1/2”.) Cut out loosely, and fuse to the front of your desired fabric. Apply fusible web to the back and cut out precisely along the outline. Here you can see a batch of patterns arranged on a piece of Steam-A-Seam 2. Press lightly and then cut out
When you are ready to place the appliqué, remove the front printed pattern paper and the protective carrier sheet on the back. Align within the outlines (you may want to remove the hoop to really see what you’re doing), and stitch
Preparation:
- Print the worksheet for the design. This includes your color sequences and a brief “cheat sheet” for the stitching process. Even if you choose to print the appliqués on a digital cutter, the PDF pages are a good reference for wraps that have appliqués to help you keep track of the pieces.
- Decide on your fabrics and cut and organize your supplies. Fabrics should be smoothly pressed. I prepared my appliqués with fusible web. If the design includes heavy stitching, prepare the front fabric with a layer of fusible interfacing applied to the back.
- Cut 4 elastic button loops to 2”. Glue the raw edges together and secure with a clip to dry. Gluing is not strictly necessary; it just makes them easier to handle in the hoop.
Stitching:
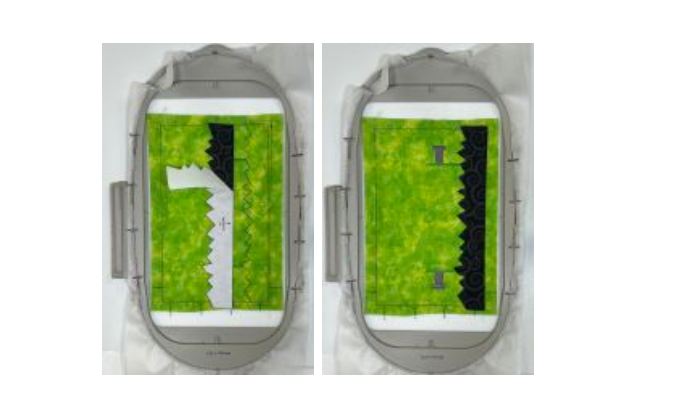
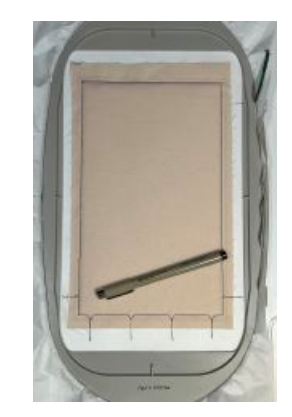
- Hoop the stabilizer making sure it will not slip. A medium-weight stabilizer can be more secure than the thinner “no-show” types. If your stabilizer is not slip-proof, you can experience more puckering and misalignments. Tape and t-pins are good methods for securing the stabilizer.

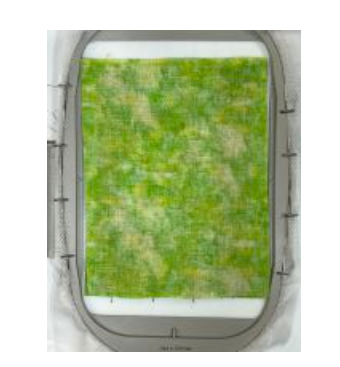
- Sew color 1. Place the fleece over this reference and sew color 2 to attach it.
- Trim off the excess batting close to the stitching line. This will minimize the bulk in the seam allowances.

- Smooth the front fabric over this area, extending it slightly over the side and bottom placement guides and extending more at the top. This fabric provides a smooth surface for the other appliqués that will be attached over it.
- Sew color 3 to attach the front fabric. This tack-down includes some extra placement notations for aligning the elastic loops. These stitches may be covered later so it’s a good idea to extend these lines onto the stabilizer.
- Now simply follow the worksheet reference to stitch up to the last two colors. All appliqués will have a placement line to outline where to place the associate precut appliqué.
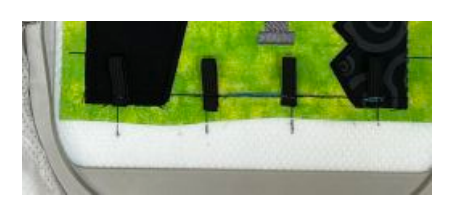
- Placing the elastic button loops: The next-to-last color secures the elastic hoops. The reference lines you extended onto the stabilizer are the placement guides

The 4 lines across the bottom mark the vertical center for each button loop. Align the cut ends of each loop at the bottom and the closed end along the guide. Temporarily secure in place with tape to prevent the presser foot from catching on anything sticking up in the hoop.
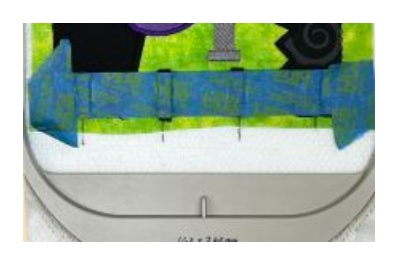
- Sew this color to attach the loops. Remove tape
Smooth the back fabric, face down, over the front of the hoop aligning it with the front fabric
Finishing:
- Remove the project from the hoop.
- Trim seam allowances on the long sides and the bottom edge (end where the loops are) to 1/4”. Trim the top edge first to 3/4” then down to 1/4” only next to the stitching line.
- Clip corners to minimize bulk.
- Turn right side out, tuck in the seam allowance at the opening, and press well.
- Close the opening (machine edge stitch, hand stitch, or fuse).
- Stitch buttons along the edge matching the alignment of the button loops.
- Secure elastic loops over the buttons and then slide them onto the container.


By the "Lindee G Embroidery" Team


