


What you’ll need
- Embroidery editing software (or resize at the machine if needed)
- Fabric to stitch designs on
- Poly mesh stabilizer
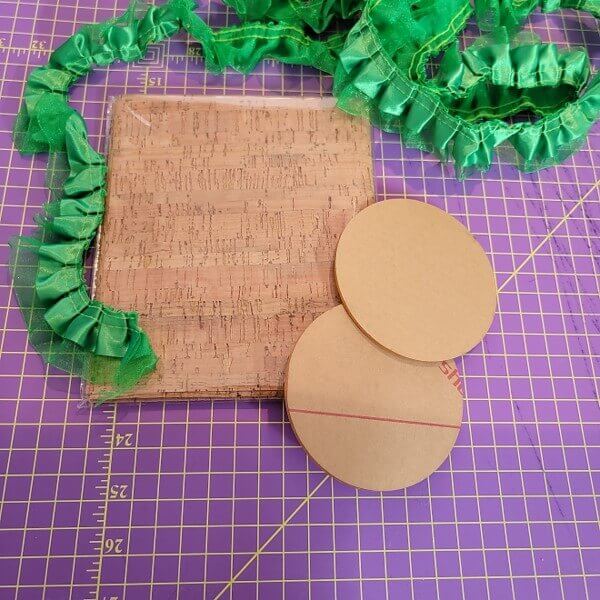
- Cork for backing
- 4” Acrylic rounds
- Roll Green pleated ribbon
- Embroidery thread as stated in embroidery sequence
- Hot glue gun and glue sticks
- Pin backs
Featured Designs
https://www.grandslamdesigns.com/patrick-was-a-saint-embroidery-design
https://www.grandslamdesigns.com/clover-2-embroidery-design
Preparation

- Please read through all instructions before beginning, and gather all the materials needed.
- Load the designs and check the size.
- For this project the designs were reduced 10% in size.
Machine prep, hooping and stitching
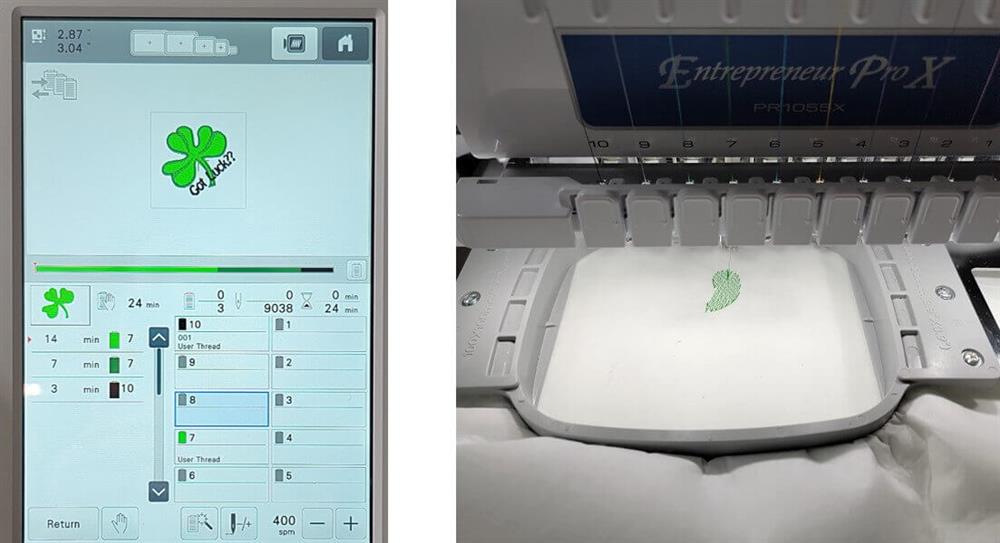
- Load the designs on the machine and load the embroidery thread colors.
- Hoop the fabric and stabilizer.
- Stitch the designs following the color sequence.
- While the designs stitch, remove the protective paper from both sides of the acrylic rounds.
- If the embroidery software is calibrated, you can make sure that the designs will fit in the round.
- Stitch as many designs as needed for as many buttons as you are making.
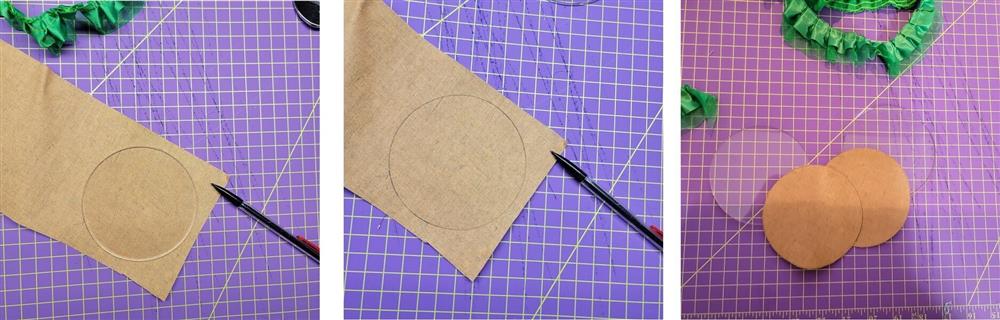
- Also while the designs are stitching, trace around the acrylic round on the back of the cork.
- Cut out as many cork pieces as needed—one for each button.
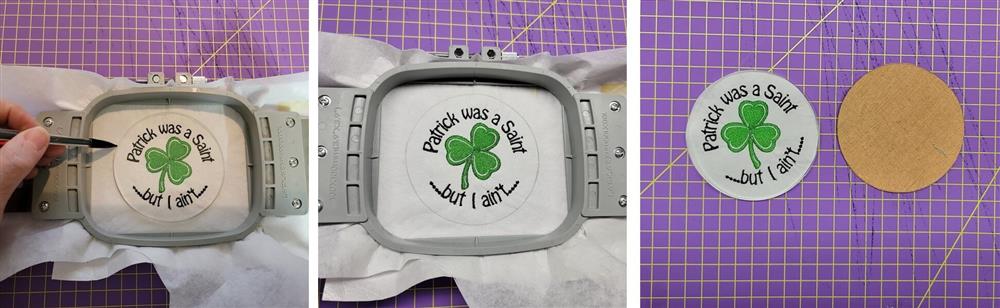
- Before removing the fabric from the hoop, position one of the rounds over the design and trace around the acrylic with a pencil.
- Cut out the fabric and stabilizer.
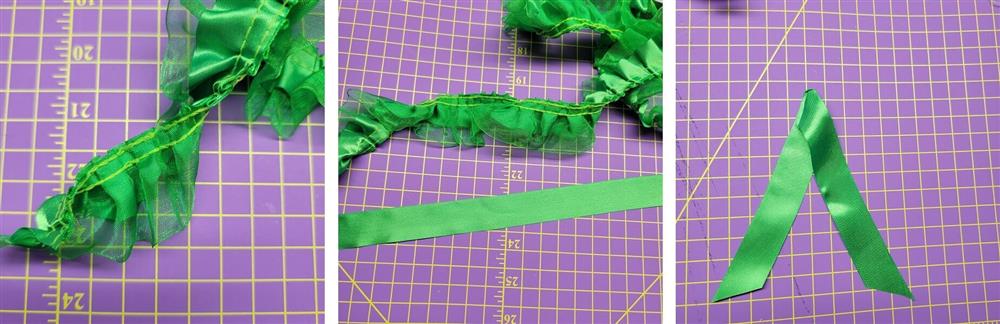
- For each button, on the threads of about 8-10” section of the ribbon; press the pieces.
Final Steps

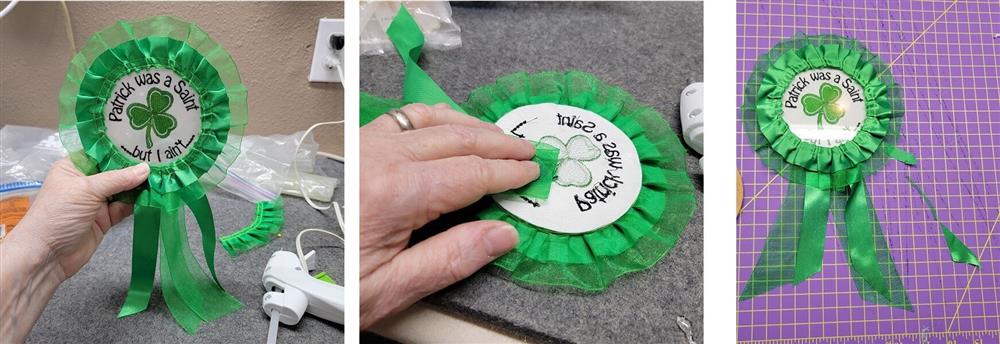
- Working carefully but quickly, place a bead of hot glue around the outer edge of the embroidered fabric and then position the acrylic round right on top, matching the cut edges; press down to adhere.
- Next will be to attach the ribbon to the front.

- It is easiest to work from the back so the lower thread on the back side of the ribbon can be used as a guide to glue the ribbon to the acrylic front.
- Working in small sections, run a bead of hot glue along the edge of the acrylic, flip the piece over, and align the lower thread of the ribbon to the edge of the acrylic.
- Continue around the acrylic until you are back at the beginning.

- Trim off the ribbon, roll the end under about ¼”, and glue in place.
- Press to secure the glue.
- Form the tails of the ribbon and/or organza.
- Determine where the ribbon will hang down from the back.
- Holding the ribbons in position, flip the piece over, glue the ribbons in place.
- Let the glue completely set up.
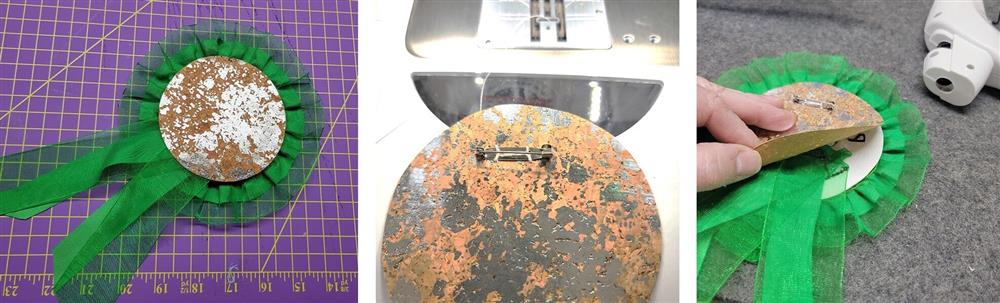
- With one piece of cork, sew the pin backing to the right side of the cork as shown.
- Position the cork on the back of the piece—make sure the pin will be at the top of the button.

- Glue and press the cork back onto the button.
- Set aside for the glue to completely set up.
- Pin the button to the garment and enjoy St. Patrick’s Day!
Conclusion:
Congratulations! Whether for yourself or a gift, learning new ways to use embroidery designs increases your enjoyment of stitching. There is no doubt your project will be a “Grand Slam!”
By the "Grand Slam Designs" Team

