


INTRO
Summer time is picnic time! Keep condiment bottles organized with this decorative recycling project.
What you’ll need
Bottle carrier (like soda bottle carrier)
White poly fleece for embroidered design
Cutaway stabilizer
Embroidery thread to coordinate with fabrics
Fabric glue (spray and/or liquid)
Ribbon for trimming top and bottom edges
Condiment bottles
Old scissors for trimming
Fabric clips
Featured Design
https://www.grandslamdesigns.com/picnic-let-s-go-on-a-picnic-embroidery-design?variant=1
Other designs that may be used:
https://www.grandslamdesigns.com/lets-have-a-picnic-embroidery-design
https://www.grandslamdesigns.com/picnic-time-7-embroidery-design
Notes
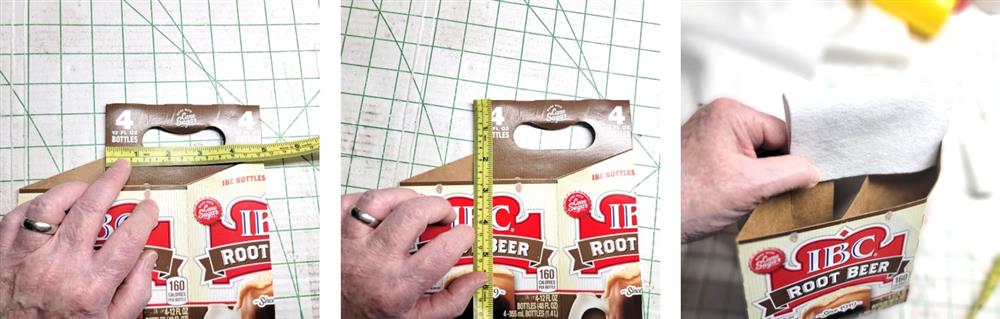
- General directions are given. This project uses a cardboard caddy that held soda bottles; the dimensions of the caddy will determine the amount of fabric needed.
- There are also commercial and digital caddy sewing patterns that may be used; consult the supply list and instructions for fabric amounts and caddy assembly.
- Be sure the design used will fit the front of the caddy.
- This is a good scrap-buster project.
- Coordinate the ribbon trim and embroidery threads for a coordinated look.
Preparation

- Gather all the supplies and materials needed for the project. Print out the design at actual size.
- If using a cardboard container, measure the dimensions of the carton and determine the amounts of fabric needed.
- Choose ribbon and embroidery thread to coordinate.
Machine prep and hooping

- Be sure the caddy will hold the squeeze bottles being used.
- Check to see if the fleece is see-thru. If so, the entire piece to be wrapped around the caddy needs to be underlined with the cutaway stabilizer or other underlining.

- Measure the dimensions of the caddy all the way around, up the sides, the front panel and the depth.

- Cut the fleece and stabilizer larger than needed. For this caddy, the fleece and stabilizer were cut 10” high and 22” long. Find the center where the embroidery will go. Place pins or a sticker to mark the center point.

- Hoop the stabilizer and fleece, centering the design.
Stitching
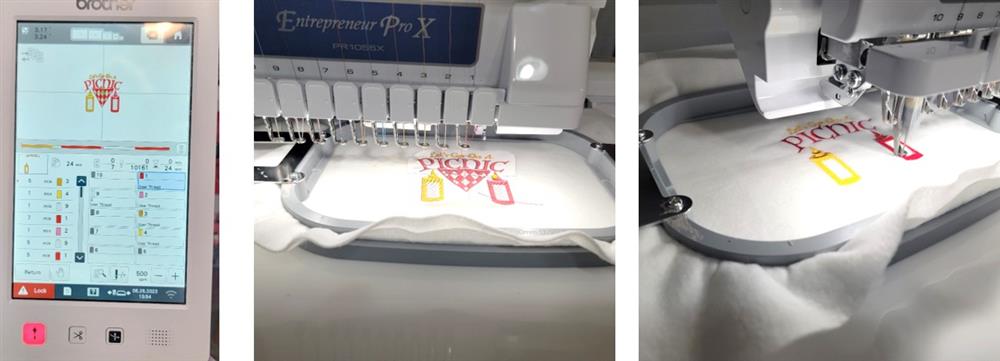
- Load the design on the machine, load the embroidery threads, and assign the thread color stitching order.
- Center the needle over the center of the design.
- Remove the paper design template.
- Stitch the design following the color sequence.
Cover the Handle
- While the design stitches, cover the handle. Measure and cut a piece of fleece the dimensions needed. For this project, the fleece was cut 6” wide by 6” long. The fabric was wrapped over the handle and then further trimmed to size.
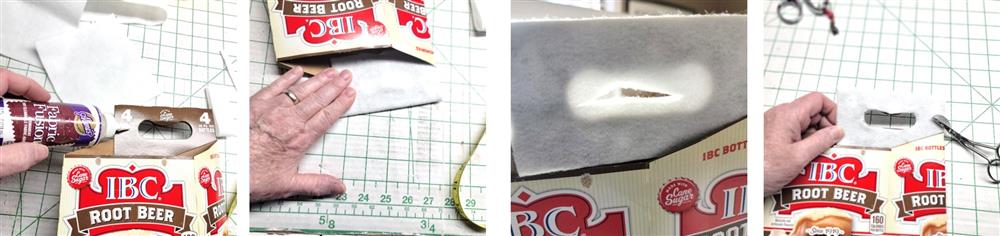
- Smear fabric glue over the handle area and wrap the fleece over the handle; set aside to dry.
- Using old scissors, cut out the open area of the handle.
Wrapping the Caddy
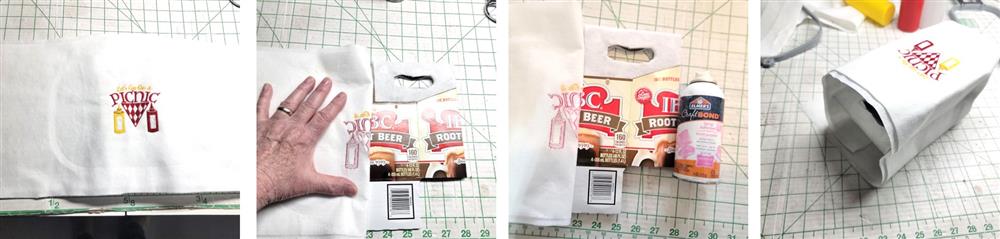
- Remove the embroidery from the hoop, but do not trim away the stabilizer.
- Determine where to center the embroidery at the center front of the caddy. The ends should overlap about ¼” at the center back of the caddy.
- Use spray glue to wrap the embroidered fleece around the box; set aside to dry.
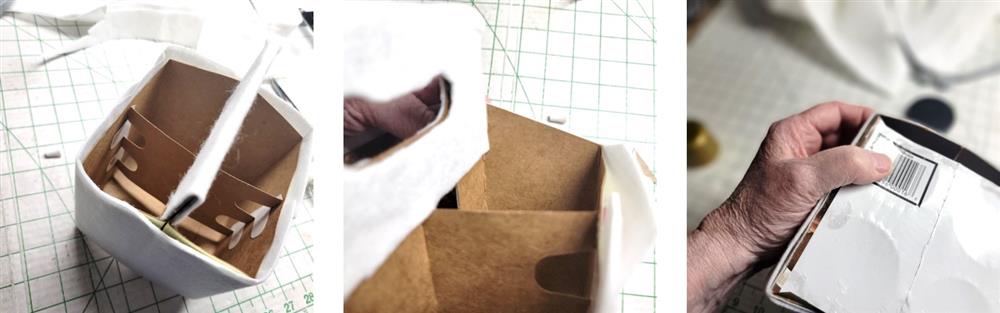
- With old scissors, trim away the top and bottom excess fleece. Trim first about ½” beyond the edges, and then trim even with the top and bottom aedges of the caddy.
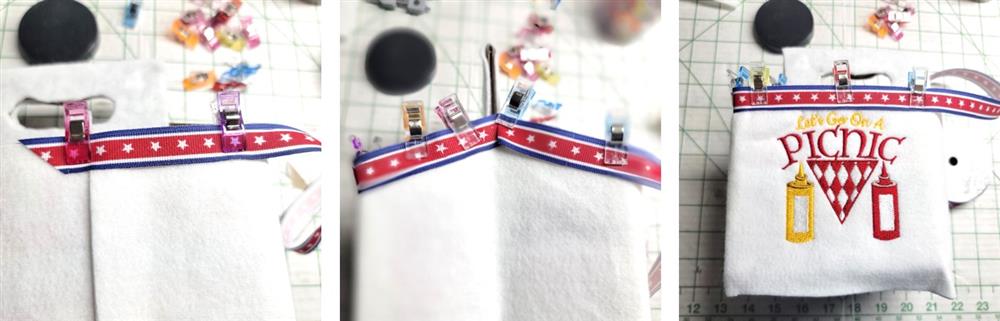
- Measure the ribbon trim around the top of the box, overlapping about ½” at the center back. Using the fabric glue, run a bead of glue around the top and then place the ribbon trim top even with the top of the caddy and mitering in the corners if needed. Using the clips to hold the ribbon in place; allow the glue to dry.
- At the bottom of the caddy, run a bead of fabric glue, place the bottom of the ribbon even with the bottom of the caddy and secure in place with clips. Overlap the ribbon ends at the center back; allow the glue to dry.

- Once the glue has thoroughly dried, remove the clips. Option: spray with a protective spray (such as Scotch brand Fabric Protector) to help keep the project clean. Fill the bottles with condiments and place them in the caddy.
Conclusion
Congratulations! Whether for yourself or a gift, learning new ways to use designs increases your enjoyment of stitching. There is no doubt your project will be a “Grand Slam!”
By the “Grand Slam Designs” Team


