


What you’ll need for each Mug Mat
1- cotton fabric to fit hoop to be embroidered
2- fleece batting to fit hoop
1- backing fabric about 3” larger than hoop all the way around
Embroidery thread as stated in color sequence and to coordinate with fabrics
Featured Design
https://www.grandslamdesigns.com/mama-needs-coffee-3-embroidery-design
https://www.grandslamdesigns.com/pumpkin-spice-and-everything-nice-embroidery-design
Notes
- These projects are very easy to do!
- The fleece provides softness for the quilting.
- The quilting can be added at the machine or in embroidery software.
Preparation

- Read through the directions before beginning.
- Gather all the supplies needed—this is a great scrap buster project.
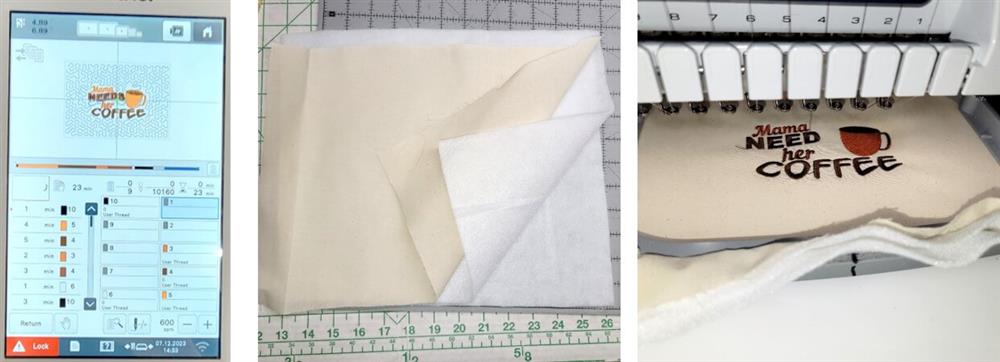
- Load the first design on the machine.
- Add stippling around the design (this could also be done in embroidery software prior to exporting the design for stitching)
- Select the thread colors; set the machine to pause before the last color (stippling) stitches.
- Place two layers of fleece batting over the bottom hoop, add the top fabric, and hoop all the layers together.
- Stitch the design following the color sequence.

- Before the last color stitches, remove the hoop from the machine, flip it over, and place the backing fabric right side up over the back of the hoop.
- Place the hoop back on the machine, making sure the fabric remains flat.
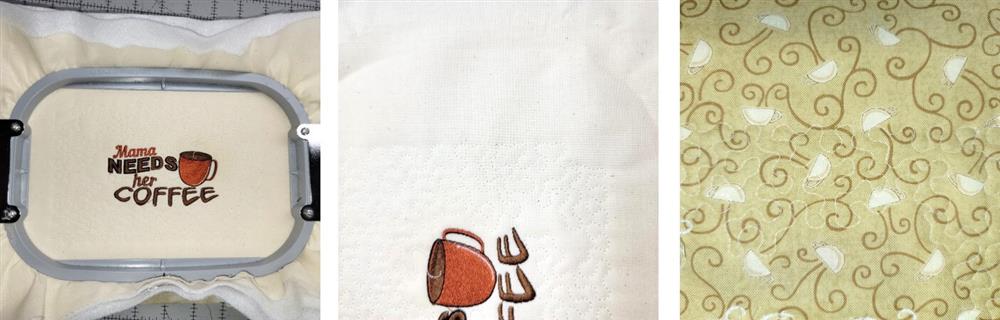
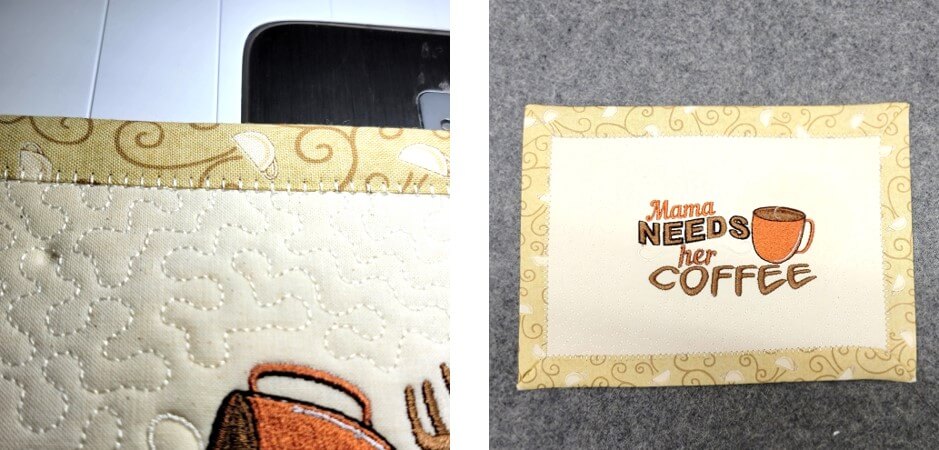
- When the design finishes stitching, remove it from the hoop. You’ll see the beautiful stippling on the front and back of the project, through all the layers.
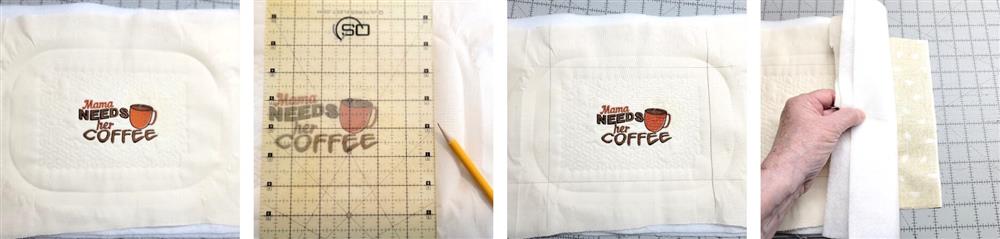
- Using the outside edges of the stippling as a guide, use a ruler to mark ½” beyond the stippling on all sides.
- Next will be to trim through the top fabric and two layers of fleece.
- Fold the backing fabric back so it won’t get caught when trimming.
- Trim the top fabric and two layers of fleece along the drawn lines.
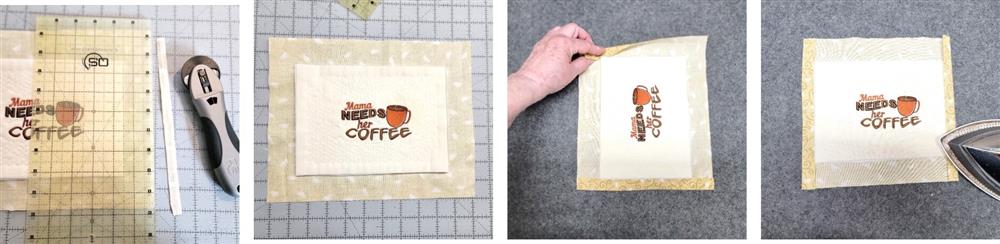
- Now trim away 1 ¼” – 1 ½” away from the cut edge of the fleece/fabric, around all edges.
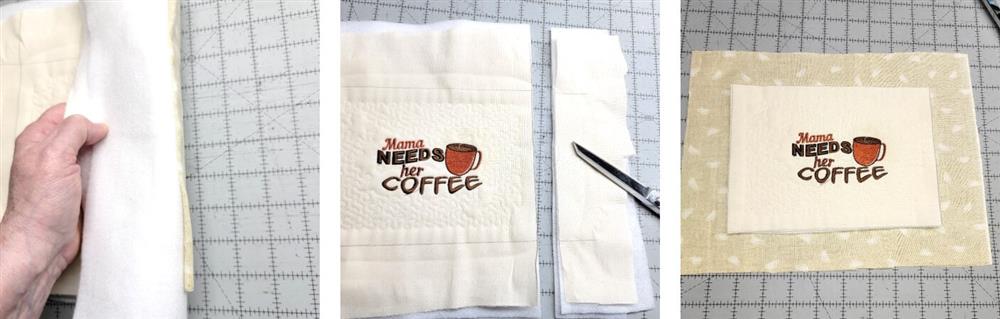
- To create the border, fold the sides in, meeting the cut edges.
- Fold again so the folded edge of the border meets the outer edge of the stippling.
- Press well.
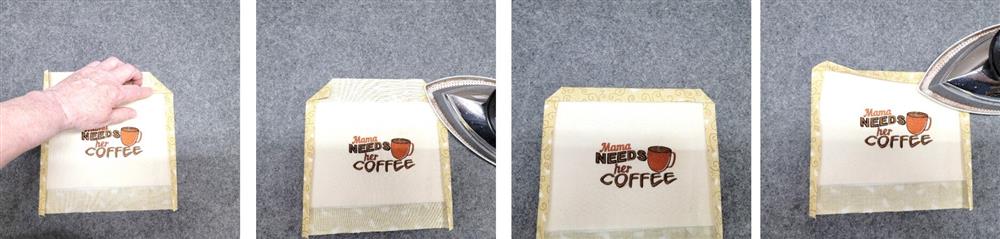
- For the top and bottom edges, turn in and miter the corners.
- Fold the edge once, and then a second time like before.
- Press well making sure the corners are mitered.
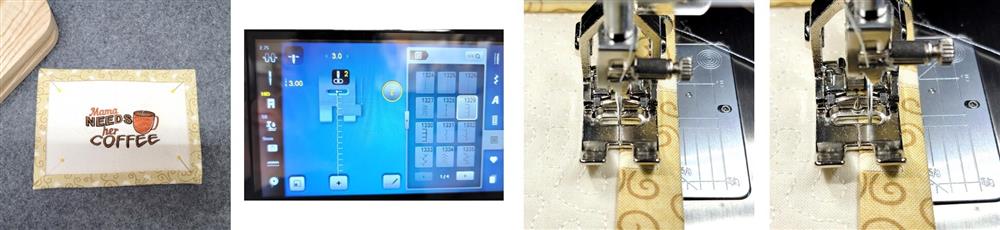
- Blanket stitches create a beautiful edge for a simple border.
- Repeat the steps for creating the second mug rug.
- Do coordinate fabrics and threads for a cohesive look.
- If you do craft markets or church bazaars, these are fast and easy to do and always good sellers!
- If you have a multi-needle machine, prepare everything for all the mug mats you are going to do. While one stitches, finish the previous one to make efficient use of your stitching time.
Conclusion:
Congratulations! Whether for yourself or a gift, learning new ways to use designs increases your enjoyment of stitching. There is no doubt your project will be a “Grand Slam!”
By the “Grand Slam Designs” Team

