


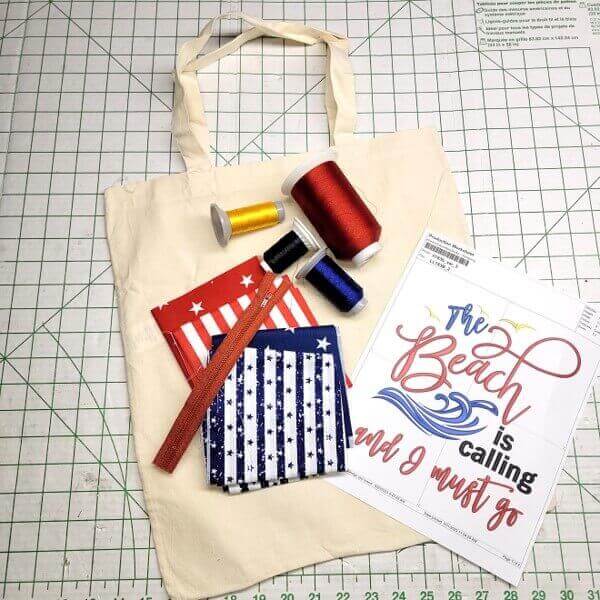
What you’ll need:
Purchased tote bag
Cutaway stabilizer to fit hoop
Embroidery thread as stated in design sequence
Permanent fabric writing marker
Fabric for pocket (optional)
Zipper for pocket (optional)
Featured Design:
https://www.grandslamdesigns.com/the-beach-is-calling-embroidery-design?variant=3
Other designs that would work well for this project:
- https://www.grandslamdesigns.com/beach-bum-2-embroidery-design
- https://www.grandslamdesigns.com/beach-bum-embroidery-design
- https://www.grandslamdesigns.com/sand-beach-toys-embroidery-design
Notes:
- Inexpensive tote bags may be purchased at a local craft store or online.
- Use polyester thread for this project. Polyester thread will withstand the weather and be resistant to sun exposure.
- Change the colors in the design as desired to match the pocket fabric.
- The pocket on the back is optional; coordinate the pocket fabric and embroidery thread colors.
- Use polyester thread with some of the decorative stitches on the machine to further add some decoration to the tote.
- Make the pocket size as you wish. Include a zipper or just make a simple stitched-on pocket.
- For some totes it may be easier to embroidery and add the pocket if the side seams are undone, and restitched when the decorating is completed.
- Be sure the writing marker is for fabric and it will remain permanent (read the manufacturers' instructions, some need to be heat set to be permanent).
- This would be a good beginner project for children learning to sew and embroider
Preparation:
- Gather all the supplies and materials.
- Read through all of the instructions before beginning.
- Print out a copy of the design at actual size.
Machine prep and hooping:
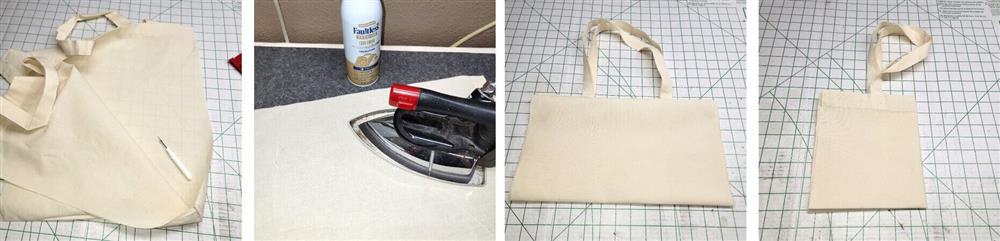
- Press the pocket fabric and tote bag, using spray starch if necessary.
- Find the center front of the tote by quarter folding.
- Undo the side seams if needed for easily stitching the embroidery and attaching the pocket.
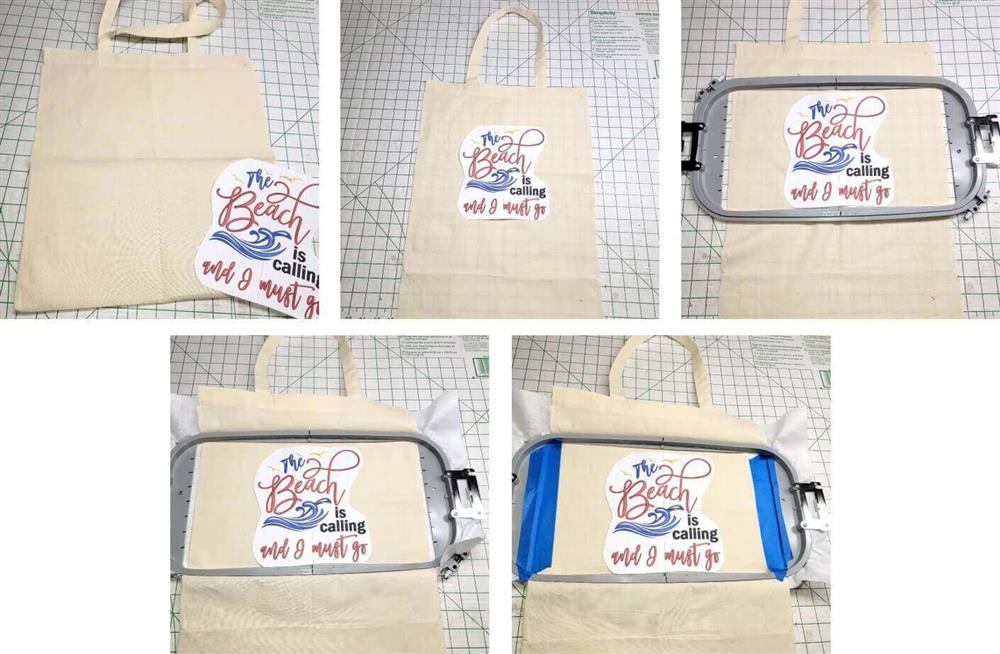
- Center the design print-out on the tote front.
- Hoop the fabric with a piece of cutaway stabilizer.
- Hint: if the edges of the bag are not completely in the hoop, use a little painters tape to secure the fabric in place.
Stitching:

- Load the design on the machine.
- Align the needle to the center of the design and then remove the paper design.
- Select the thread colors.
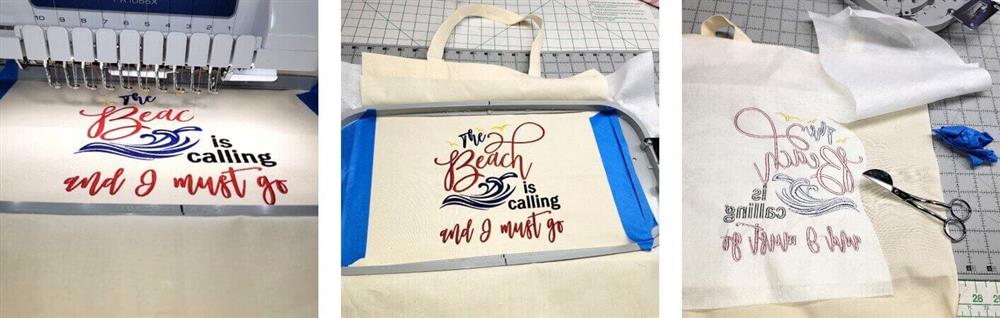
- Stitch the design following the color sequence.
- After the design has stitched, remove the piece from the hoop and trim away the excess stabilizer leaving approximately 1/4" all the way around the design. Hint: use applique scissors for precision cutting.
Pocket:
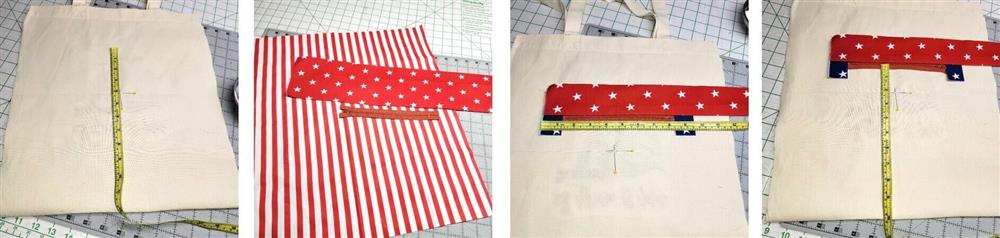
- Determine the size of the pocket and whether it will be a simple stitched-on pocket or a pocket with a simple zipper application.
- Cut the pocket piece(s). For this pocket it was figured out as it went along. The zipper was 7" long (zipper color was changed to white after the fabric selection was completed). The pieces cut were based on the 7" zipper length.
- The top piece was cut longer than needed, by about 4" in width and then folded in half lengthwise and pressed.
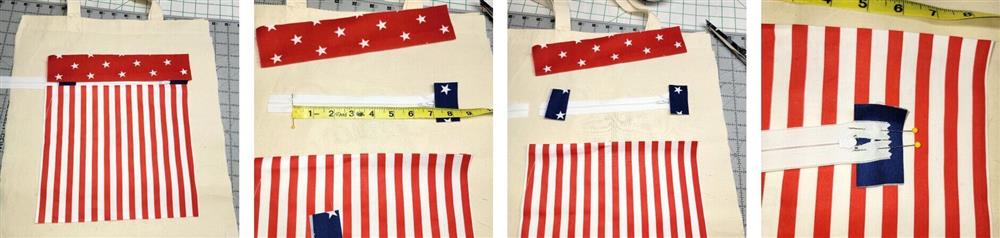
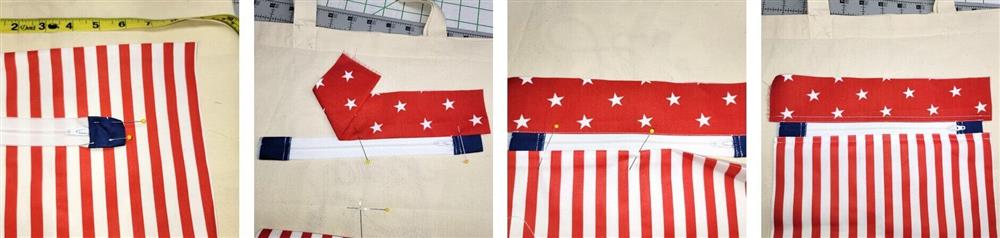
- The new zipper was cut to length and pieces of blue fabric wrapped around the ends and pinned in place.
- From the front, sew the blue end pieces in place.
- Position the fold of the top piece to the top of the zipper and stitch in place next to the fold and then again 1/4" away.
- Fold down a hem on the top of the pocket and pin the folded edge to the bottom edge of the zipper; pin and stitch in place and then again 1/4" away.
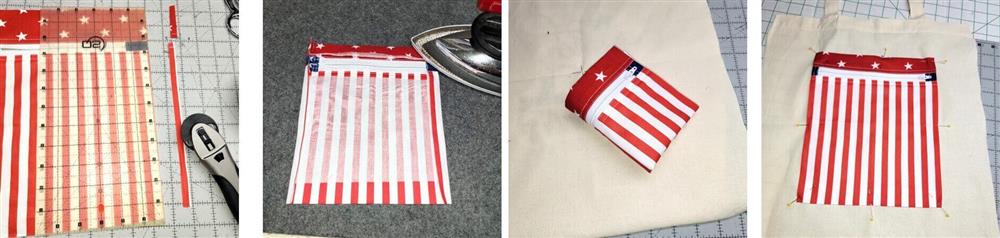
- Trim the left and right edges of the pocket and press under seam allowances on all edges.
- Quarter fold the pocket to find the centers of each edge.
- Center the pocket on the tote back, aligning with the folds on the tote.
- Pin the pocket on the tote.

- Stitch the pocket in place around all the edges.
Final Steps:
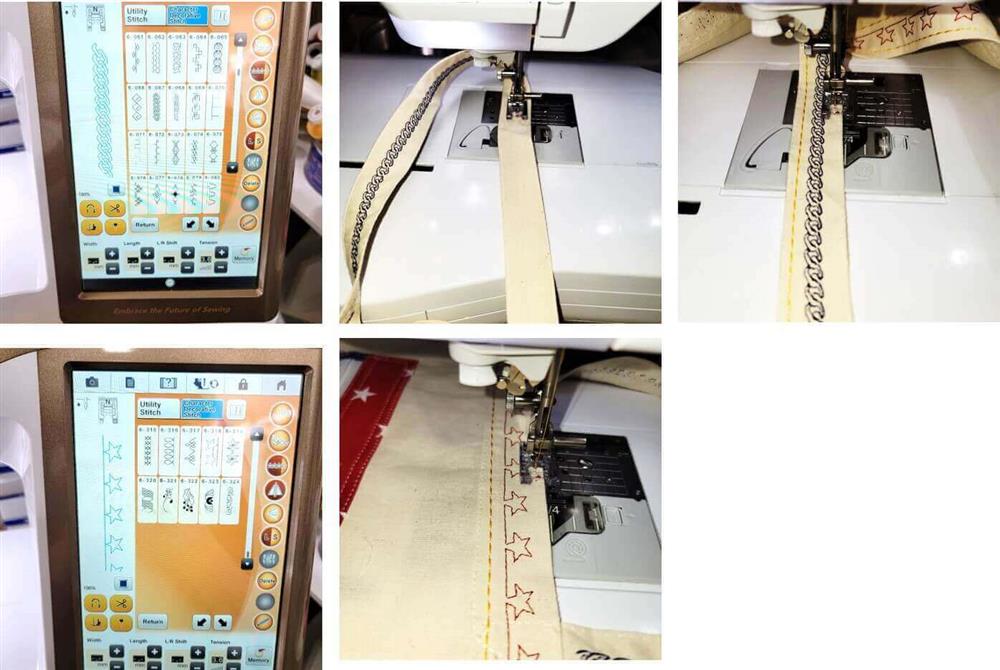
- With the same embroidery threads used in the embroidery design, add some decorative stitching to the tote straps and top (optional). There are many decorative stitches in our machines we do not use enough and this is a good chance to play with them.
- Depending upon the type of stitch used, if "tunneling" occurs (usually happens with satin type stitches), simply add a piece of tearaway stabilizer behind the area being stitched and remove the excess after the stitching is completed.

- Re-sew the side seams if they were undone; use a French seam or sew the seam and serge the edges to clean finish.
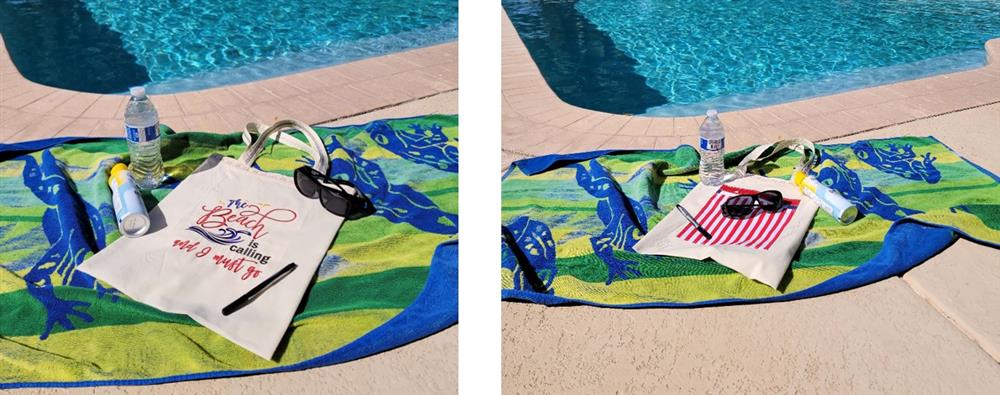
- Use the tote when going to the beach, pool, or waterpark. Let the children write the date, location of the trip, and a sentence or even a few words to remind them of a happy summer days.
Conclusion:
Congratulations! Whether for yourself or a gift, learning new ways to use designs increases your enjoyment of stitching. There is no doubt your project will be a “Grand Slam!”
By the "Grand Slam Designs" Team
By the "1Z Embroidery" Team


