


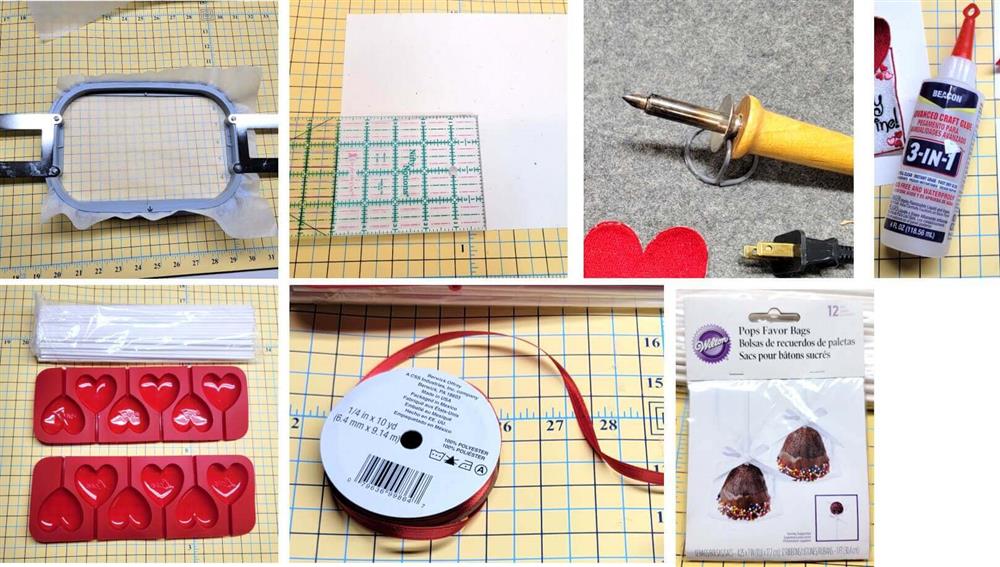
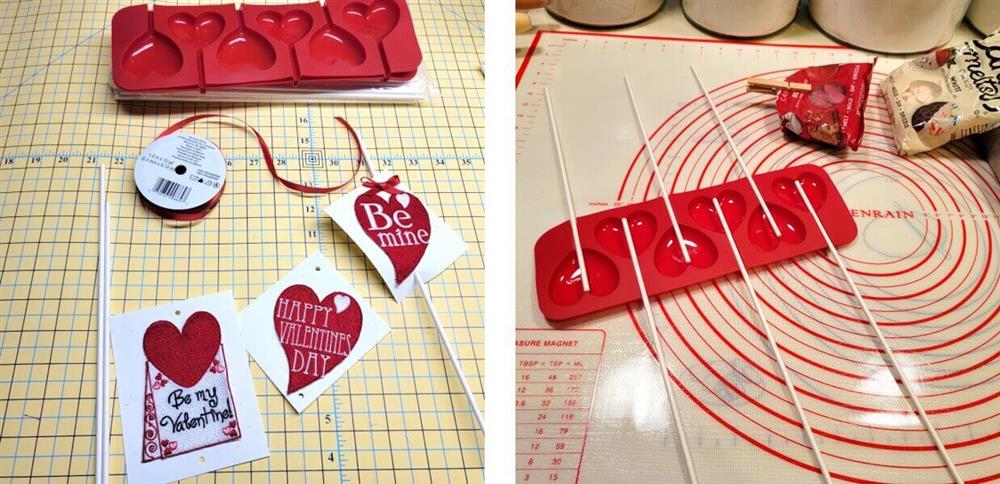
What you’ll need
- 1-2 pieces of poly mesh stabilizer to fit hoop
- Embroidery thread as stated in the color sequence
- 1-2 pieces of card stock
- Wood burning tool
- Glue to hold embroidery design to card stock
- Silicone sucker molds
- 12” sucker sticks
- Melting candies
- ¼” Red satin ribbon
- Small hole punch
- Candy bags
- Vase, flowers, card, etc. for gift presentation
Featured Design
https://www.grandslamdesigns.com/be-mine-22-embroidery-design?variant=1
https://www.grandslamdesigns.com/happy-valentines-day-28-embroidery-design?variant=1
https://www.grandslamdesigns.com/be-my-valentine-31-embroidery-design?variant=1
Notes
- If you’d like to do shorter suckers, then choose smaller sucker sticks and smaller designs.
- Be sure to use food-grade silicone supplies for baking.
- Read the instructions for preparing and melting the candies.
- Read and follow all instructions for the heat burning tool.
- Read and follow all instructions for using your choice of glue.
- The project was able to be stitched on one layer of poly mesh stabilizer, but if more stability is need, hoop two layers of the stabilizer in the hoop.
Preparation
- Read through all the instructions before beginning the project.
- Purchase, download, and save the designs from the GrandSlamDesigns.com website.
Machine prep and hooping
- Load the design on the machine.
- If the hoop is large enough, you may be able to add a second design to stitch right after the first.
- If a second design is added, do not color sort.
- Load the embroidery thread.
- Hoop one or two layers of poly mesh stabilizer in the hoop, and place the hoop on the machine.
Stitching

- Slow the machine speed down.
- Stitch the design(s) following the color sequence.

- Continue stitching the second design if there is one; otherwise, hoop another piece or two of stabilizer and stitch the other designs.
- When the designs have finished stitching, remove them from the hoop and just cut them out of the stabilizer.
- Hoop and stitch the third design.
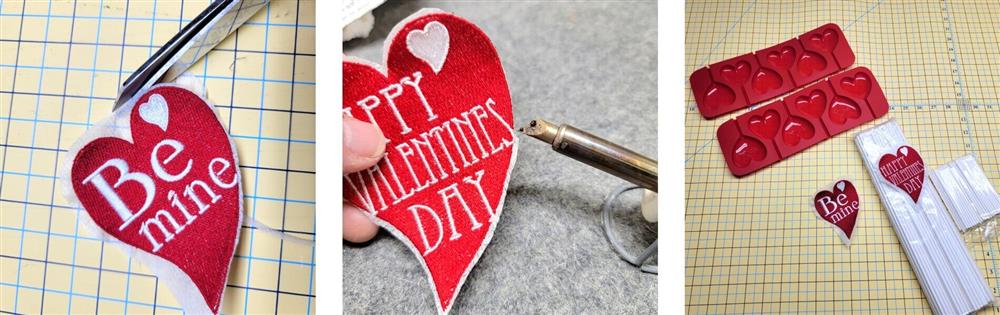
- Plug in the wood burning tool to heat it up.
- Further trim the stabilizer to within about 1/8” of the outer stitching—be very careful not to cut into the stitching line.
- Following the manufacturers’ directions, very carefully just hold the design along the outer portion of the stabilizer and it will instantly melt back to the outer edge of the design. Do not touch the thread with the wood burning tool as it will melt the thread.
- Repeat for the remaining designs.
- When all the edges have been burned away, unplug the woodburning iron and allow it to cool thoroughly before storing.
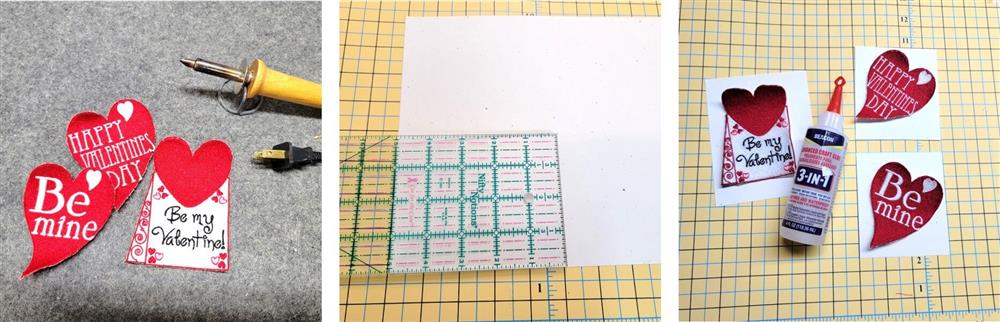
- Measure the size of the designs.
- Measure and mark pieces of card stock about ½” larger than the size of the design.
- Cut out the cardstock pieces along the marked line.
- Read the directions on what ever type of glue you are using.
- Test how to affix the card to the sucker stick.
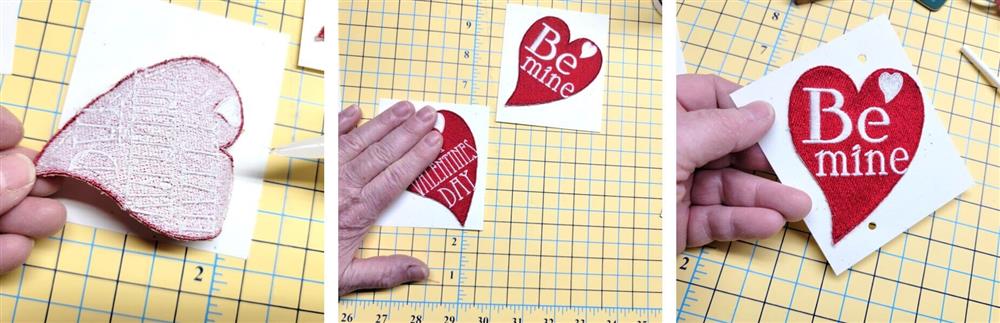
- For the project, the ribbon will be folded in half and inserted to the top hole in the card, the stick inserted through the front bottom hole and then up through the loop of the ribbon at the top.
- The ribbon will be snugged against the sucker stick and a bow tied at the top.
- There are many other ways to do this, or just add the tag, and use the ribbon to tie the candy bag at the end.
Final Steps
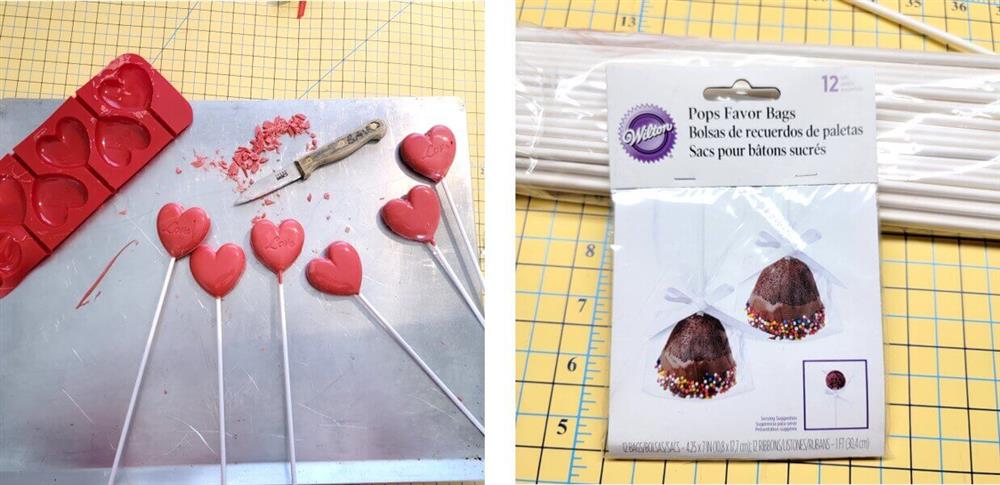
- Gather the supplies to make the candy suckers.
- Read the instructions on the Candy Melts.
- Place the sucker sticks in the silicone mold.

- Once the candy is melted, fill the mold.
- Make sure the top of the sticks remain seated and don’t pop up.
- Set the molds aside for the candy to set-up.
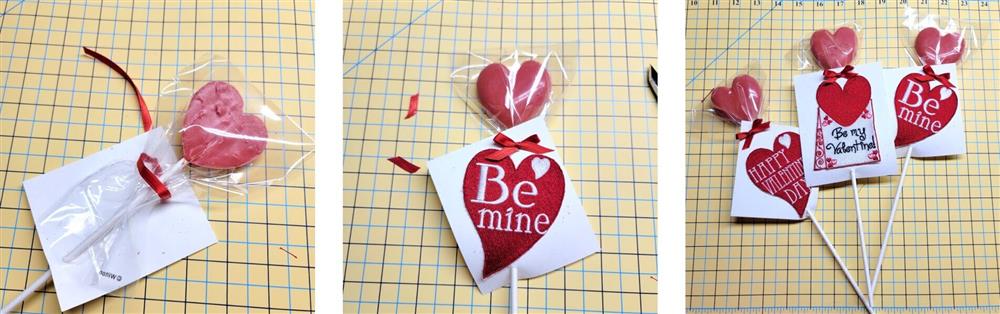
- When the candy has set up, pop them out of the mold and trim any outer edges if needed.
- Place a candy bag over each sucker.

- One way to decorate the sucker is to tie a ribbon around the bag to secure it and then slip the end of the stick through the top hole through the front, and then from the back through the bottom hole; slide the tag up along the stick to the desired position.
- Another way is to place the bag over the sucker, insert the bottom of the stick through the back side and from the front insert the ribbon through the hole, around the stick, and back through the front like was done in step 7. Tie the ribbon into a bow and trim the tails.
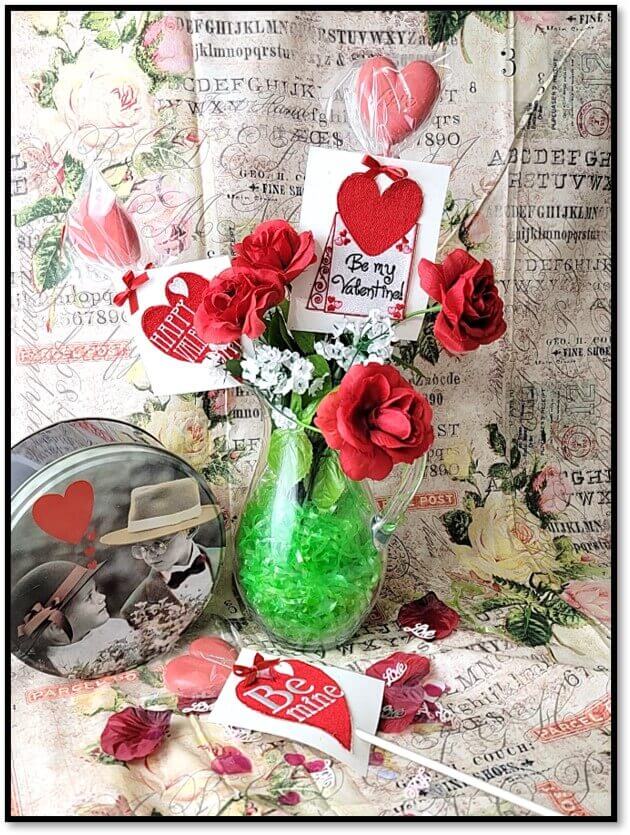
- Arrange the suckers and flower into a vase (an old pitcher was used for the project) to make a pretty presentation for a gift.
Conclusion:
Congratulations! Learning new ways to use embroidery designs increases your enjoyment of stitching. Use the idea from this project for wedding table displays, anniversaries, or any other celebration of love—varying the colors of the flowers and suckers to match the celebration theme. There is no doubt your project will be a “Grand Slam!”
By the "Grand Slam Designs" Team


