


Father's Day will be here next month. Is there someone in your life who loves to fish, sail, camp, and enjoy life on the water? We’ve got an easy project for you to create using one of the fabulous (yet quick to stitch) designs that is perfect for your nature lover. The Tackle Box Mat will be welcomed to keep lures, swivels, sinkers, hooks, bobbers, tools, and the like organized and at hand while preparing for a weekend on the water.
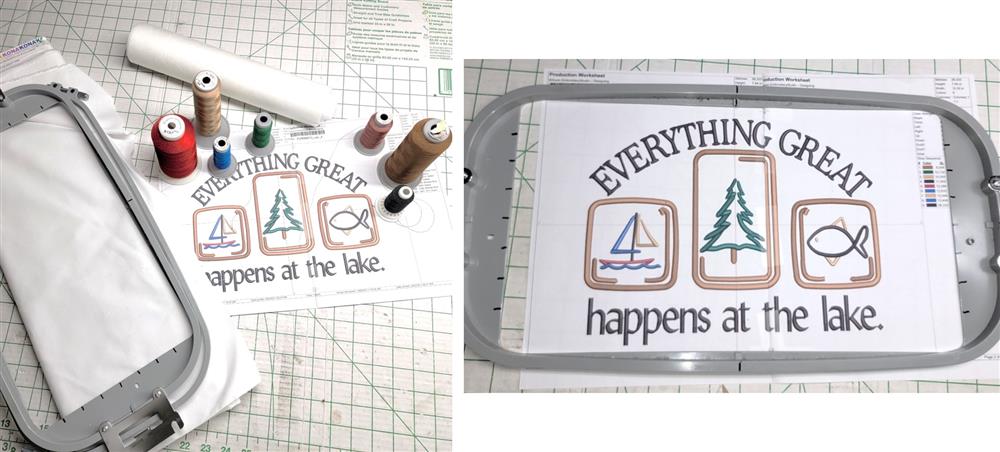
What you’ll need:
The approximate finished size of the project is: 16.5” H x 18.5” wide
1- White Kona Cotton fabric about 1” larger all the way around than hoop
1- poly mesh stabilizer to fit hoop
1- Cotton or polyester batting 17” x 19”
1- Cotton backing 17” x 19”
2- 2 ½” strips red star fabric for left and right borders
2- 2 ½” strips blue star fabric for top and bottom borders
2- 2 ½” square red star fabric for corners
2- 2 ½” square blue star fabric for corners
Embroidery thread as stated in the color sequence (and to coordinate with the fabrics)
Sewing thread
Fabric protector spray
Featured Design:
https://www.grandslamdesigns.com/everything-great-embroidery-design?variant=2
Notes:
- The largest size of the design (10.30” x 7.83”/261.62 x 198.88 mm) was used for the project; there is another size also available (7.72 x 5.87/196.09 x 149.10 mm) if you wish to use that. Please adjust the materials and dimensions used in the project if the smaller design size is used.
- It is best to cut the fabrics a little wider and longer than stated, and then trim them down during assembly. All seams are ¼”.
- A mat like this may have many design themes; consider holidays, sports, or kitchen. Just choose a design that fits the theme and follow the directions, altering any fabric sizes as needed.
Preparation
- Gather the materials and sewing supplies needed. Prewash the fabrics if needed. Be sure the entire piece of Kona cotton is large enough to hoop completely—this is important for a quality stitchout; the fabric will be cut down to the finished size after the embroidery is completed. Be sure to select a hoop large enough to accommodate the design.

- Make sure the lengthwise grain of the fabric runs in the direction of the design, top to bottom. If there is a selvage edge, trim it off and press the fabric well with spray starch.
Machine prep and hooping
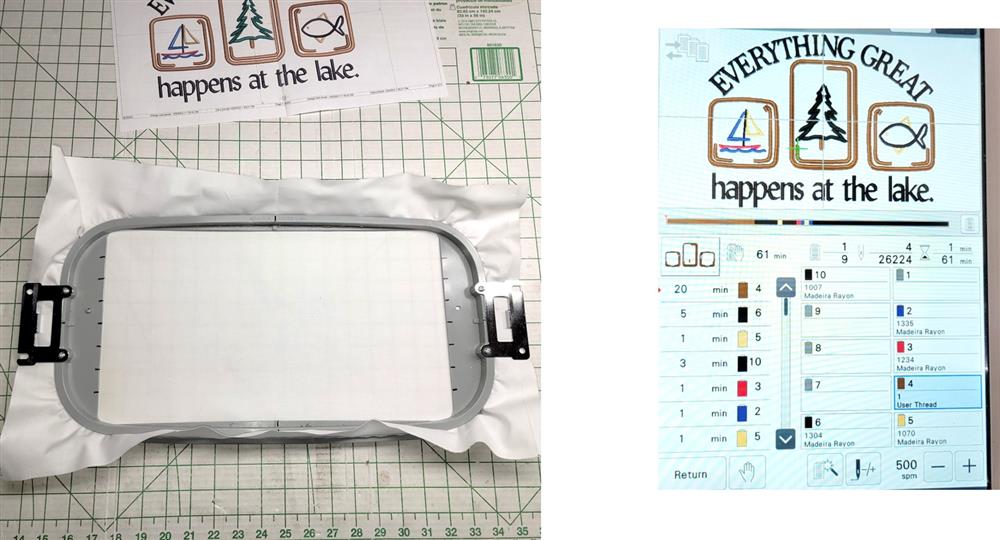
- Load the design on the machine.
- Hoop the white Kona cotton with one layer of poly mesh stabilizer. Place the hoop on the machine.
Stitching
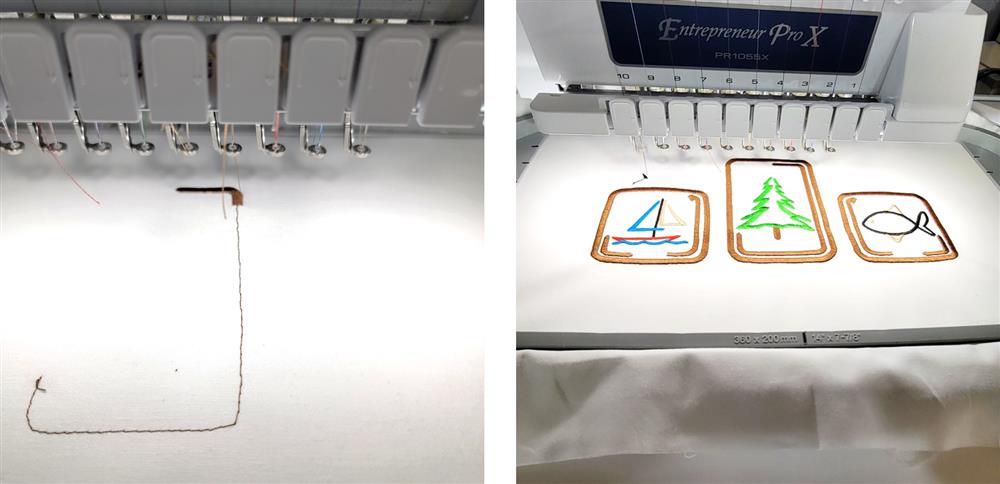
- Stitch the design following the color sequence. This design was stitched on a multi-needle machine at 500 spm using a size 80/12 sharp needle.

- When the design has finished stitching, remove the fabric from the hoop, press, and then trim away the excess stabilizer leaving about ¼” all the way around the design; press the fabric. Tip: use applique scissors to help protect the fabric while trimming the stabilizer.
Borders

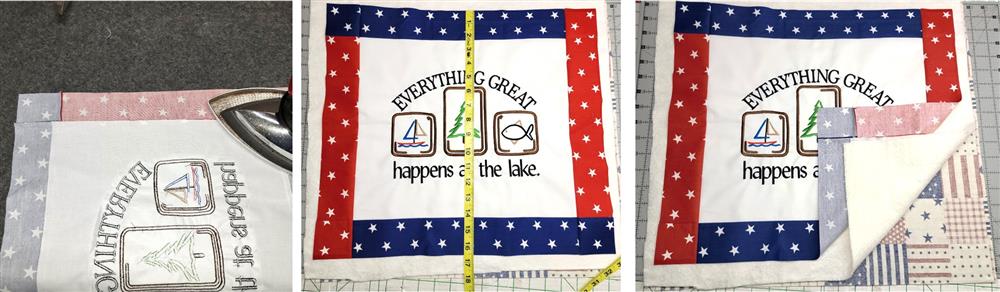
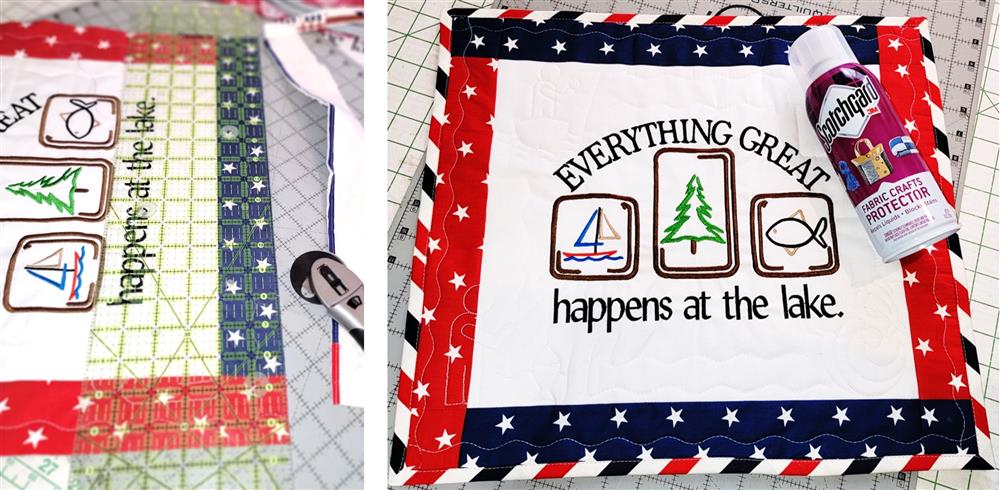
- Trim and square up the embroidered fabric to 12 ½” high by 14 ½” wide; it is most helpful to use a gridded ruler.
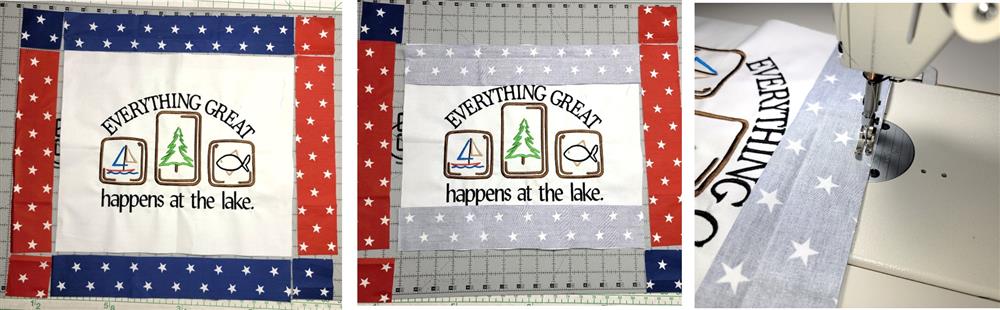
- Lay the squares and border pieces out as shown.

- Begin with the top and bottom borders, placing them right side down and stitch. Press the seam flat to set the stitches and then press the seam toward the border.

- Sew the squares to the top and bottom of the left and right borders, stitch, press to set the seams, and then press the seams toward the corner.
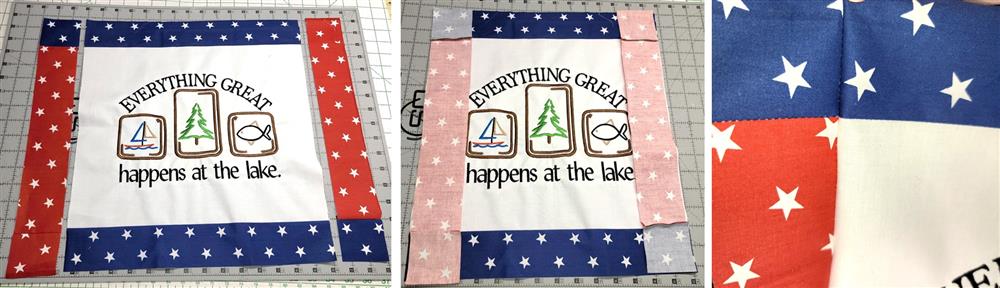
- Now place the left and right borders right side down on the embroidered fabric, making sure to match the seams at the corners; stitch.
- Press to set the stitches and then press the seams toward the borders.
- Measure the length and width of the mat top. Using these measurements, cut the batting and backing about 1” wider all the way around.
- Press the backing fabric with starch. Lay it right side down on the table. Center the batting and then the embroidered Kona cotton right side up to create a quilt sandwich. Pin, baste, or spray baste all the layers and quilt as desired to hold all the layers together.
Final Steps
- Baste all the layers together along the outer edges.
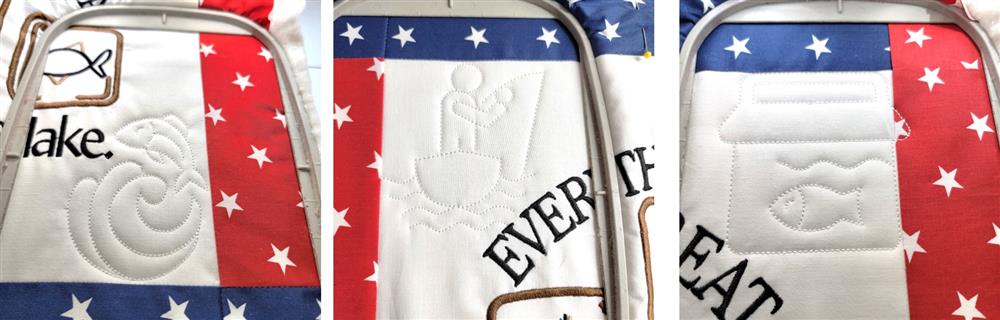
- Quilt as desired. This is a good time to use some of those outline designs in your stash.
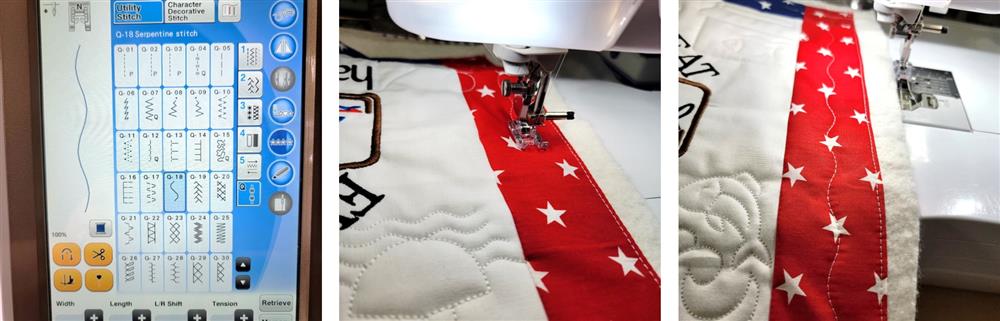
- Another way to quilt the layers together is to use some of the decorative stitches on the machine. This serpentine stitch worked well between the outline designs and stitched through the center of the borders.
Binding
- Square up the mat.
- Measure and cut 2 ¼”” binding strips, sewing them together to form one long piece.
- Fold and press the binding in half lengthwise.
- Sew the binding to the back using a ¼” seam and mitering the corners.
- Use your favorite method to end the binding.
- Fold the binding to the front.
- Stitch the binding down on the front.
- To help protect the mat, use a fabric protector following the manufacturers directions for application.
Conclusion
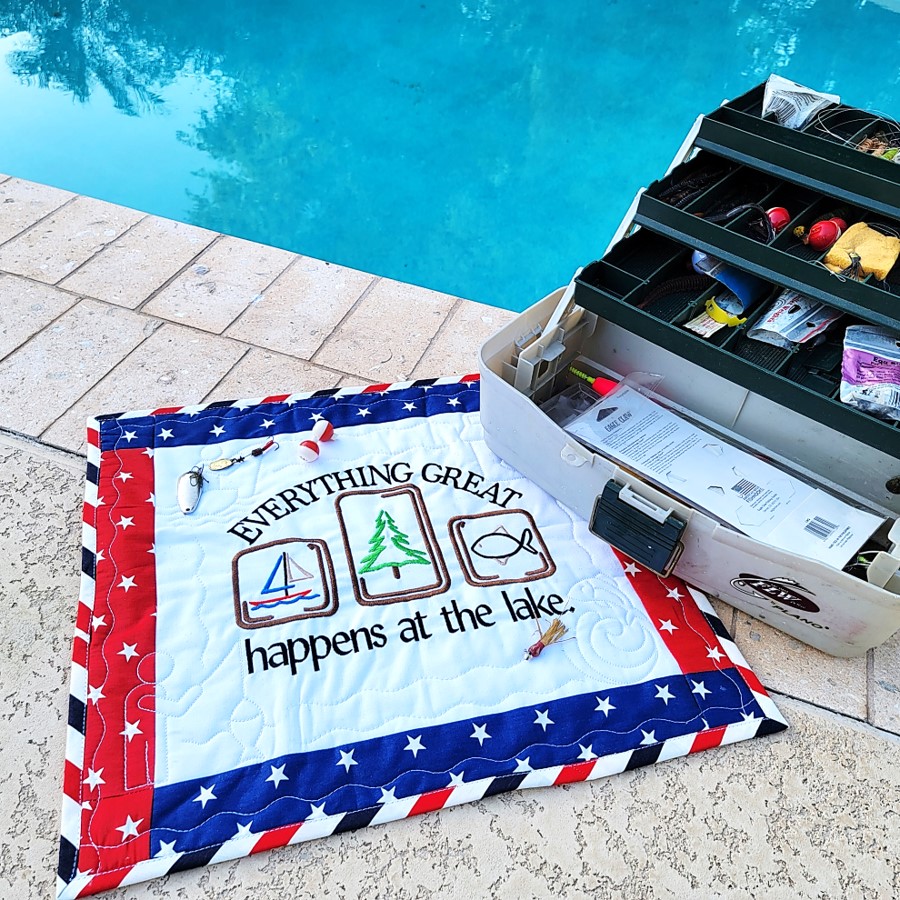
Congratulations! Whether for yourself or a gift, learning new ways to use designs increases your enjoyment of stitching. There is no doubt your project will be a “Grand Slam!”
By the "Grand Slam Designs" Team
